Learn how to make the most incredible and flaky pie crust! Once you make this pie crust from scratch you’ll never want to use those pre-made crusts again. Save this recipe for every holiday!
This is the first of a series of recipes here on the site that I’m calling “Back to Basics“. In this series you’ll find recipes that are common building blocks for beginner cooks, as well as homemade versions of pantry/store-bought staples, such as hot sauce, condensed soups, stabilized whipped cream, etc. With easy to follow instructions, detailed notes, and step by step photos, you’ll be on your way to being a master in your kitchen in no time!
PIE CRUST RECIPE
Making a perfect pie is one of those things that even seasoned bakers can have trouble with. And a lot of the problems and frustrations are from making the pie crust.
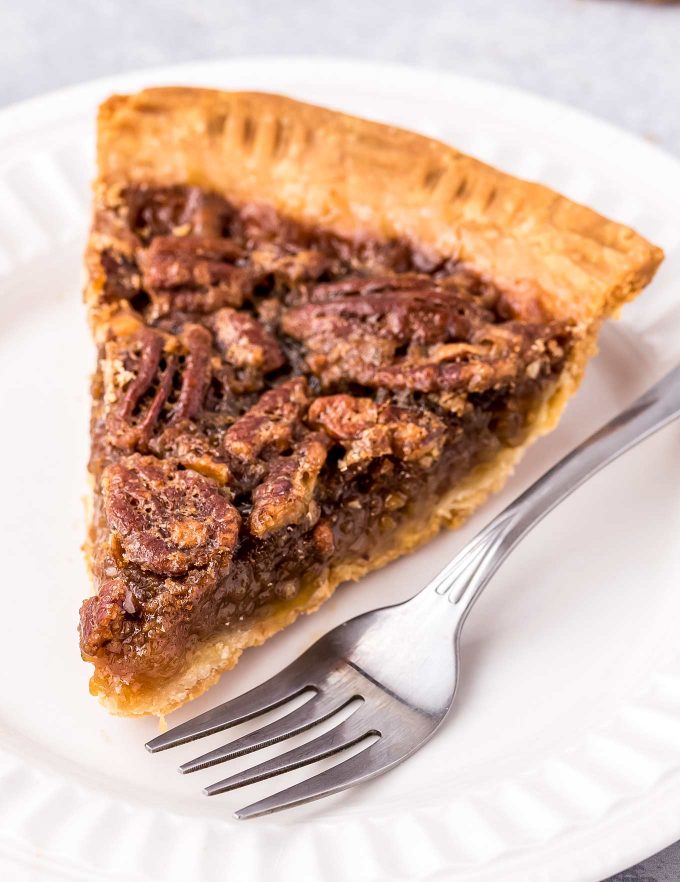
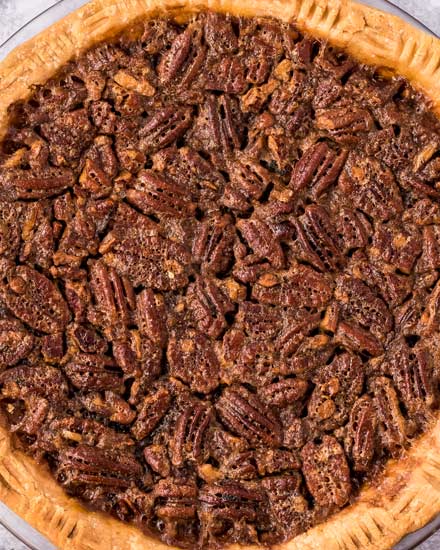
Speaking of pies, did I ever tell you guys about the time I made pecan pie “soup”? I have to tell you… and it’s embarrassing, but hopefully will help you guys understand that EVERYONE has had a baking fail or two in their time.
About 8 or 9 years ago, I decided I wanted to bring the pecan pie to our family Thanksgiving. Now keep in mind that my Mom makes an AMAZING pecan pie, so I already had some big shoes to fill, and I had never even attempted pie before. Go big or go home right? Instead of trying to make a crust from scratch, I figured I would buy a frozen one and no one would even know. Except I didn’t know that I’d have to thaw it before baking….
I made the filling according to my Mom’s recipe and was so excited as I slid it carefully into the oven. When the timer went off, I went to check it… so excited to see the final result.
It. Was. Liquid. NO part of it was cooked. Frantically, I called my Mom and she assured me the baking time was right, and to try 10 more minutes. No go… still soup. When I confessed to her that I’d used a frozen pie crust (unthawed), we figured out that was the culprit.
I baked and baked and baked it, and eventually got the edges to resemble a baked pecan pie, but the center was still essentially… pecan pie soup. I will NEVER live that Thanksgiving down, but I also won’t make that mistake again lol.
So since then I’ve been on a mission to master the art of the pie crust… determined to be able to make a great pie. A lot of failed attempts later, I’ve finally got it… and I’m sharing both the recipe, and all the tips and tricks that I learned along the way.

HOW TO MAKE HOMEMADE PIE CRUST
We’ll go through the step by step process below, complete with plenty of info and pictures 🙂
Try not to let pie crusts scare you. I’m convinced they can smell fear lol. Okay not really, but I do think having a positive mindset can help quite a bit. In all honesty, making the perfect pie crust just takes practice. And practice takes time.
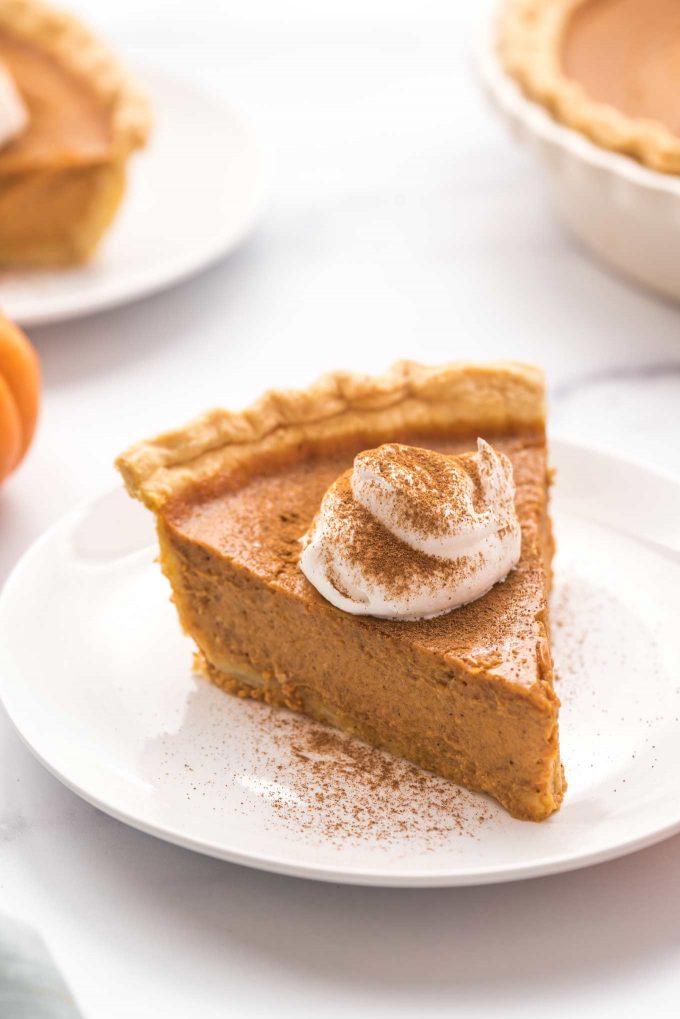
So don’t be upset if the first few attempts aren’t exactly perfect or great. Lord knows mine aren’t perfect either, and that’s okay. Homemade shouldn’t look perfect 🙂 Oh and don’t worry, you can get this amazing pecan pie recipe HERE.
ADDITIONAL COOKING TIPS
Okay, this is gonna get pretty wordy. I promise I’m not trying to make pie crusts super complicated or scare you off… I just want to be as thorough as possible for you 🙂
CHOOSING THE RIGHT FAT
At it’s core, pie dough is a simple 4 ingredient formula.
Flour + salt + water + fat = pie dough
The type of fat used is usually a big debate among bakers! Lard, butter and shortening are the main types. Lard is harder to come by nowadays, so I never use it.
So why use one over the other?
SHORTENING
Back in the 50’s, shortening came about as a shelf-stable alternative to butter, and quickly rose in popularity among bakers.
- Shortening has a higher melting point than butter, which means it won’t melt into the dough as much when mixing and rolling it out.
- Pie crusts made with all shortening will also hold their shape better.
- Shortening lacks buttery flavor and can give a sort of greasy mouthfeel.
BUTTER
- Has the best flavor.
- Produces a flakier crust due to the water content, which steams as it bakes, puffing up the dough.
- Has a lower melting point than shortening, so it can be trickier to handle and if it gets too warm.
- Tends to puff up more when baking, so it doesn’t hold it’s shape quite as well.
As you can see, there are pros and cons to both! For me, and for this recipe, I prefer a mixture of both shortening and butter. Shortening for the ease and shape, and butter for the flavor and puffy flakiness.
However, when I’m craving some nostalgic flavors, I whip up a pie made with all shortening, like my Great Grandma used to make (and Mom still makes).
CHOOSING THE RIGHT FLOUR
I’ve heard, but not tested this myself, that pastry flour makes an unbelievable pie crust. This makes sense because pastry flour has a lower protein content, which means less gluten is formed, which makes a tender crust.
However, most people don’t have pastry flour just laying around in the pantry, so I prefer to use all purpose flour.
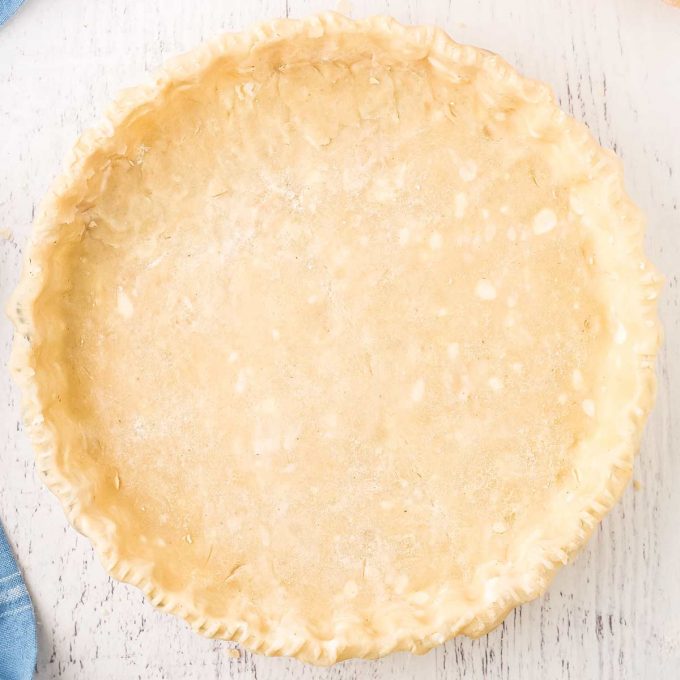
MAKE SURE THE FAT IS COLD
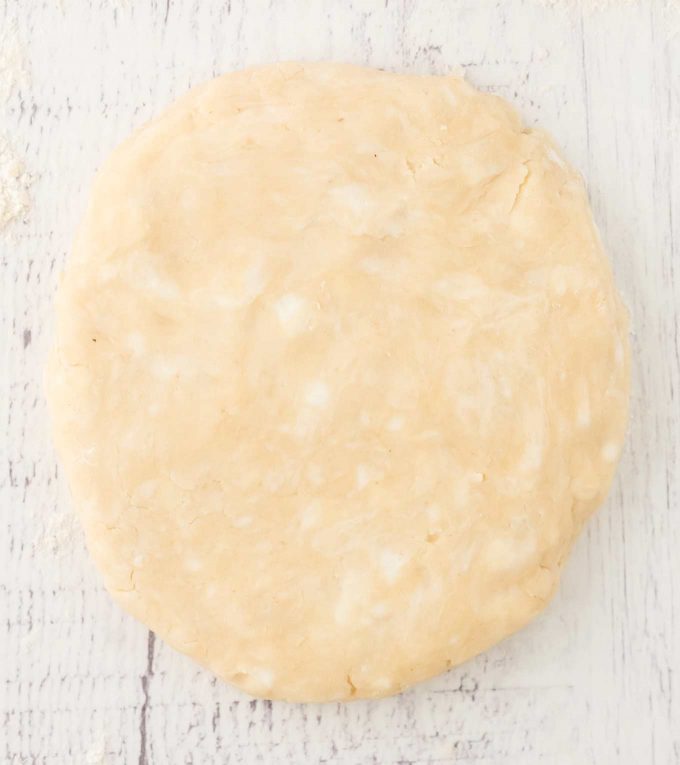
When making a homemade pie crust, you want things to be COLD. Cold fat (whether it’s butter, lard, or shortening), is crucial. See those white specks in the dough pictured above? That’s a very good thing!
Those pieces of fat melt in the hot oven, creating steam which creates layers in the dough, making the crust super flaky.
If the fats are warm when they go into the oven, you’ll end up with hard, crunchy and crumbly crust instead of a light, flaky one.
In fact, once I’ve made my crust and it’s in the pie pan, I refrigerate the pan while I make the filling, so it’s as cold as can be when it goes into the oven.
HOW TO MIX THE DOUGH
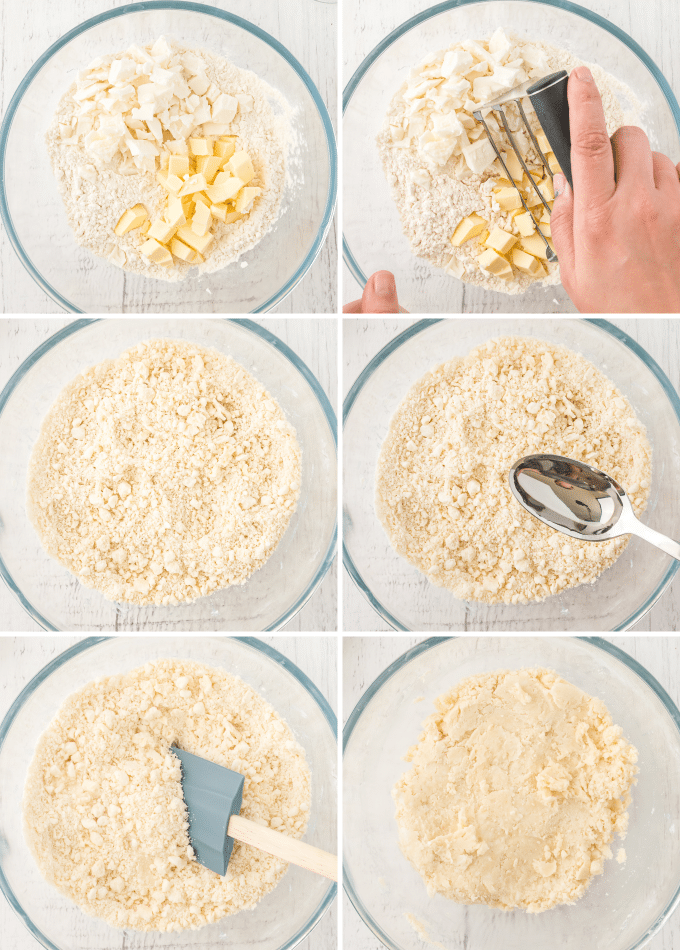
Remember to start off with cold fats. Mix the flour and salt together, then add the cubed, cold butter and shortening.
Use a pastry cutter to cut the fat into the flour, using a downward motion. Twist the cutter, then repeat the motions, over and over, working quickly, until the flour looks coarse, with pea-sized lumps.
Add the ice water, just 1 Tbsp at a time, stirring after each addition, until dough comes together and clumps form. The photo above is after the clumps have been stirred. You should be able to grab a clump, give it a squeeze and have it hold it’s shape and not immediately crumble everywhere.

Turn the dough out of the bowl onto a lightly floured surface and use either your rolling pin or hands to form it into a roughly 1″ thick disc.
Wrap it tightly with plastic wrap and refrigerate for at least 2 hours, or up to 4-5 days.
WHY YOU HAVE TO CHILL THE DOUGH
I get it, it’s likely the holidays and the last thing you need is to wait around for pie dough to chill. But I promise, it’s for some very good reasons!
- Mixing the dough can develop gluten in the dough, which is great for breads, but not so much for a flaky crust. Chilling the dough lets the gluten strands relax, so the crust will be more tender and flaky, as well as not shrink as much after baking.
- Chilling pie dough allows the moisture to redistribute, which results in a better, more workable dough.
- The pieces of fat in the dough need to be cold when they go in the oven, so they create steam as they bake, creating space between the flour layers which makes a beautifully flaky crust!
The good news is, pie dough freezes well, so you can make dough ahead of time.
HOW TO ROLL OUT THE DOUGH
Once the dough is chilled, it will likely be too cold and hard to roll out easily. Let it sit at room temperature for 5-10 minutes.
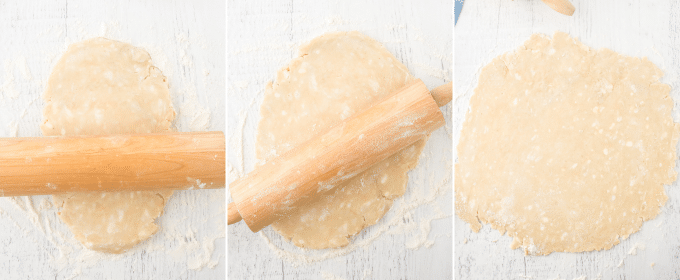
Make sure you’ve floured your work surface (I just use my island) so the dough doesn’t stick. Sprinkle the top of the dough and the rolling pin with flour as well.
Then start in the center of the disc of dough, and gently roll from the center outwards, in all directions. Pick up the dough and turn it a quarter turn (90°) as you go.
Picking up the dough and turning it ensures the dough won’t end up stuck to the surface, and helps keep it in a more even circle.
You’ll want to roll the dough out to be larger than the pie pan by about 2-3″ on each side. So for a 9″ pie pan, you’d want to roll it out to be about a 12″ circle. This way you have enough to cover the bottom, cover the sides and gives you enough for a decorative edge and/or excess dough to patch any cracks and rips in the dough.
HOW TO TRANSFER THE ROLLED OUT DOUGH
So once you have this beautiful rolled out pie crust, how do you get it IN the pie pan? Well there are two main ways. I prefer method #2, but both work well.
ROLLING METHOD
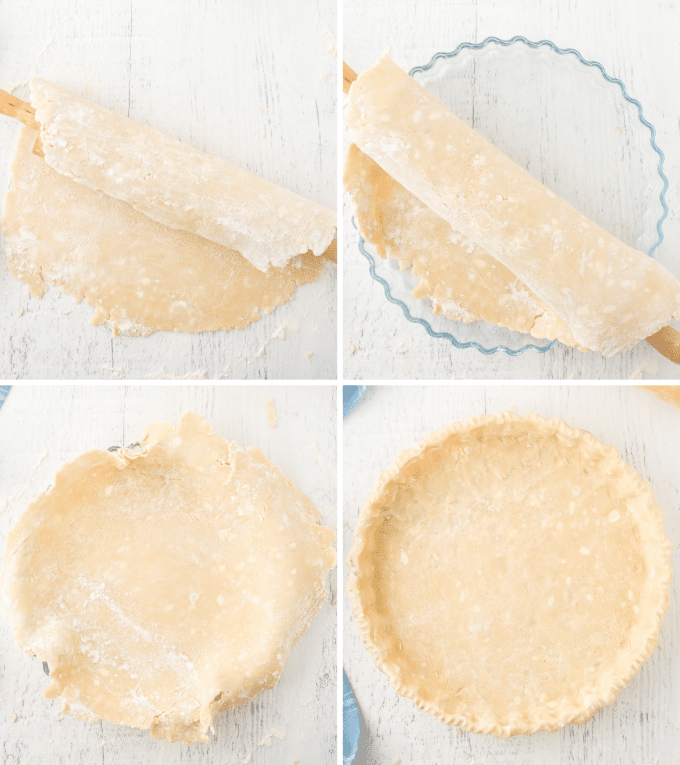
- Once your dough is rolled out to the thickness that you want, roll one edge up onto the rolling pin, and continue loosely rolling until the crust is wrapped around the rolling pin.
- Place your rolling pin over the pie pan and gently unroll so the dough wraps itself over the pie pan.
- Then just shape the dough as desired in the pan.
FOLDING METHOD
- Once your dough is rolled out to the thickness that you want, gently fold it in half, then in half again to make a triangle shape.
- Gently lift up the dough and place it in the pan, with the folded point towards the center.
- Now just unfold the dough, carefully, and shape it as desired in the pan.
- I like this method, as it’s easier to get the dough centered.
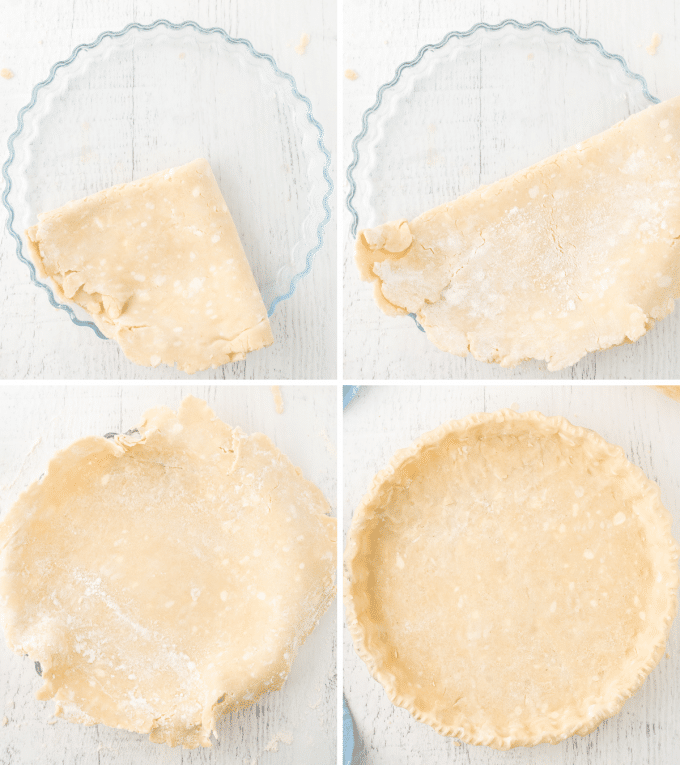
FIXING BREAKS AND CRACKS IN THE DOUGH
Don’t worry if your pie dough has some breaks/cracks/rips in it once you get it transferred to the pan. It’s so easy to fix!
Since you rolled the dough out to a circle bigger than your pan, you’ll have excess dough. Just tear off a piece of the extra dough and use your fingers to patch the ripped area, pressing and smoothing it out.
No one will even know once the pie is baked 🙂
TRIM EXCESS DOUGH AND SHAPE
You’ll likely have excess dough hanging over the edges of your pie pan. I like to trim mine so there’s about an inch hanging over, then fold that overhang under itself so it’s about flush with the edge of the pan.
Then either crimp, use a fork, use a spoon, or decorate the edge however you like.
Food52 has a great post with tutorials on various decorated pie crusts!
VARIATIONS OF THIS RECIPE
- SWEET – I personally don’t like my pie crusts with any sugar added, but if you want some, you can add a Tbsp or so of sugar.
- SAVORY – if you’re making a quiche or pot pie with this pie dough you can add a touch of garlic powder and/or dried herbs to give it a savory flavor profile!
- VODKA – you may have heard of or seen pie crust recipes that have vodka in the dough. This is because the alcohol inhibits gluten formation, which makes the crust super tender. If you want to try it, use 2 Tbsp cold vodka and 2 Tbsp ice cold water.
- VINEGAR – another thing that can help to tenderize the dough and help prevent some gluten formation is to add a Tbsp of white vinegar to the dough. I don’t use it, but if you’re a beginner and nervous about possibly overworking the dough, vinegar can help “save” it. Trust me, you won’t taste it in the baked crust!
- DECORATION – feel free to decorate the edges of your pie crust however you like it best. Usually I just flute the edges, but sometimes I use the tines of a fork to make patterns as well.
- EGG WASH – for pies that can create a soggy bottom crust, after you shape your crust in the pie pan, beat an egg with a splash of water, then brush it over the crust. Place the crust back in to the refrigerator while you make your filling. The egg wash will harden in the refrigerator and create a sort of seal or barrier that won’t let the crust get soggy from the pie juices!
MAKING PIE CRUST AHEAD OF TIME
I love pie crust because you HAVE to make it ahead of time. So not only is it great for make ahead desserts, it forces me to plan ahead lol.
The reason you have to make the dough ahead of time is so it can chill. As we learned above, the fats in the pie dough have to be cold in order to create those wonderful flaky layers.
STORAGE
Pie dough discs can be stored in the refrigerator (wrapped tightly) for up to 4-5 days! You can also freeze tightly wrapped pie dough for up to 6 months. To get the longest shelf life out of frozen pie dough, I wrap it tightly in 2 layers of plastic wrap, then seal it in a freezer bag.
SPECIAL EQUIPMENT FOR THIS RECIPE
The following links are affiliate links.
The Chunky Chef, LLC is a participant in the Amazon Services LLC Associates Program, an affiliate advertising program designed to provide a means for sites to earn advertising fees by advertising and linking to amazon.com. For more information regarding this program and what it means for you, please see my Privacy page.
- Pastry Cutter – this has been my tool for years and has served me well!
- Rolling Pin – I love the adjustable rings on this rolling pin – taking all the guesswork out of getting the right thickness.
- Bench Scraper – in case your pie dough is sticking a little to the work surface, using a bench scraper will help get it right off.
- Pie Pan – I have several of these pie pans, they’re great!
- Glass Pie Dish – if you prefer a glass pie dish, this is a great brand that works well.

BE SURE TO SCROLL DOWN TO CHECK OUT OTHER READERS’ COMMENTS FOR TIPS AND REVIEWS.
AND DON’T FORGET, IF YOU’VE MADE THIS RECIPE, LEAVE A COMMENT AND PLEASE GIVE IT A STAR RATING LETTING ME KNOW HOW YOU ENJOYED IT!
Did you make this? Be sure to leave a review below and tag me @the_chunky_chef on Facebook and Instagram!

Ingredients
- 1 1/4 cups all purpose flour
- 1/2 tsp kosher salt
- 6 Tbsp vegetable shortening (about 1/4 cup + 2 Tbsp) cubed and chilled
- 2 Tbsp unsalted butter cubed and chilled
- 4 Tbsp ice cold water possibly more or less, depending on your climate
Instructions
COMBINE DRY INGREDIENTS WITH FATS
- To a mixing bowl, add flour and salt and stir to combine.
- Add butter and shortening and use a pastry cutter to cut the fats into the flour mixture until it looks like a coarse meal with pea-sized bits.
ADD WATER
- To a small glass, add ice and about 1/2 cup water. Use a Tablespoon to drizzle ice water, 1 Tbsp at a time into the crumbly mixture, stirring with a rubber spatula after each Tbsp is added. Do this until you’ve added 4 Tbsp of the ice water. Set any remaining water aside.
- Stir dough and watch for large clumps to form. If clumps don’t form (this can happen in drier climates and months), add additional ice water, 1 Tbsp at a time, until clumps form.
FORM DOUGH INTO A DISC
- Flour a work surface and transfer pie dough to surface. Lightly flour your hands and use your hands to fold the dough over and into itself until all the residual flour is worked into the dough.
- Form dough into a disc shape, roughly 1 inch thick. Wrap tightly with plastic wrap and chill in the refrigerator for at least 2 hours, but up to 4-5 days.
ROLL OUT DOUGH
- To roll out the dough, start with a lightly floured work surface and be gentle with the rolling pin. Always start from the center of the dough and work outward in all directions, turning the dough a quarter turn as you go. This helps you get a reasonably even circle and keeps the dough from sticking to the surface.
TRANSFER TO PAN/DECORATE
- Transfer to dough to pie pan and decorate the edges however you like.
PROCEED WITH PIE RECIPE
- Proceed with pie per the pie recipe's instructions.
Want to save this recipe for later? Click the heart in the bottom right corner to save to your own recipe box!
Chef Tips
- Recipe can easily be doubled to make 2 crusts
Nutrition Disclaimer
The Chunky Chef is not a dietician or nutritionist, and any nutritional information shared is an estimate. If calorie count and other nutritional values are important to you, we recommend running the ingredients through whichever online nutritional calculator you prefer. Calories can vary quite a bit depending on which brands were used.

Brandi Miller says
This is the best pie crust Ive ever had. Loved it. Instructions were easy to follow. I will definitely make again. I am going to make the buttermilk biscuit recipe next.
Kevin says
No more store bought pie crust! Homemade is best!
Catalina says
I love making pies. I will definitely try your crust recipe next time!
Toni Dash says
I love it! So easy to make! Thanks for the recipe!
Erin | Dinners,Dishes and Dessert says
This Flaky homemade pie crust recipe looks incredibly delicious!
Beth says
This looks incredibly delicious! I can’t wait to make a pie using this recipe soon! So excited for the flakiness!