

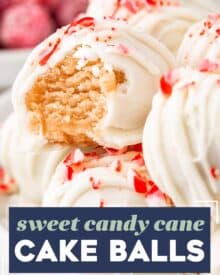
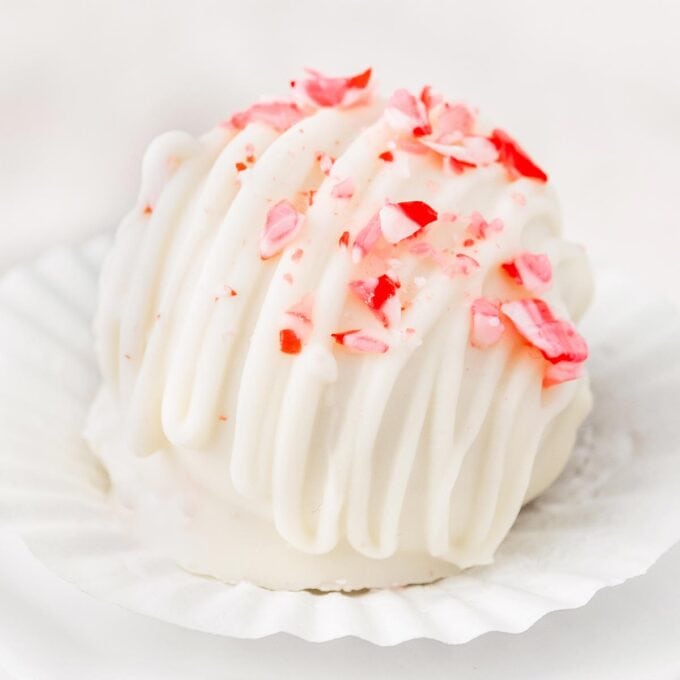
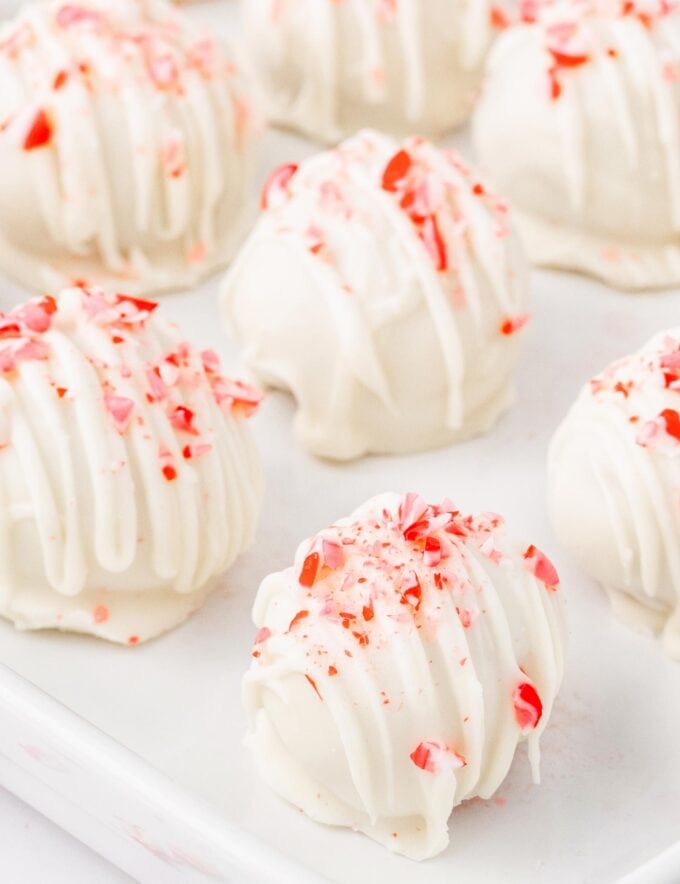
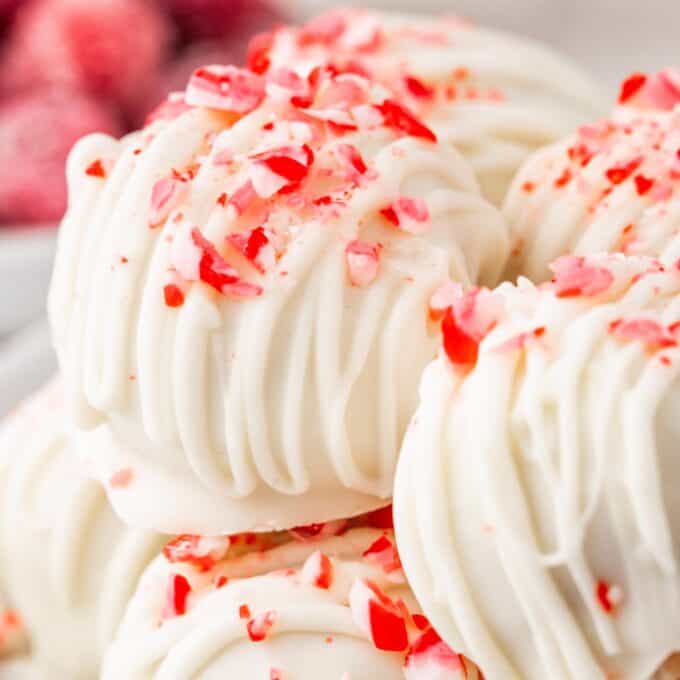
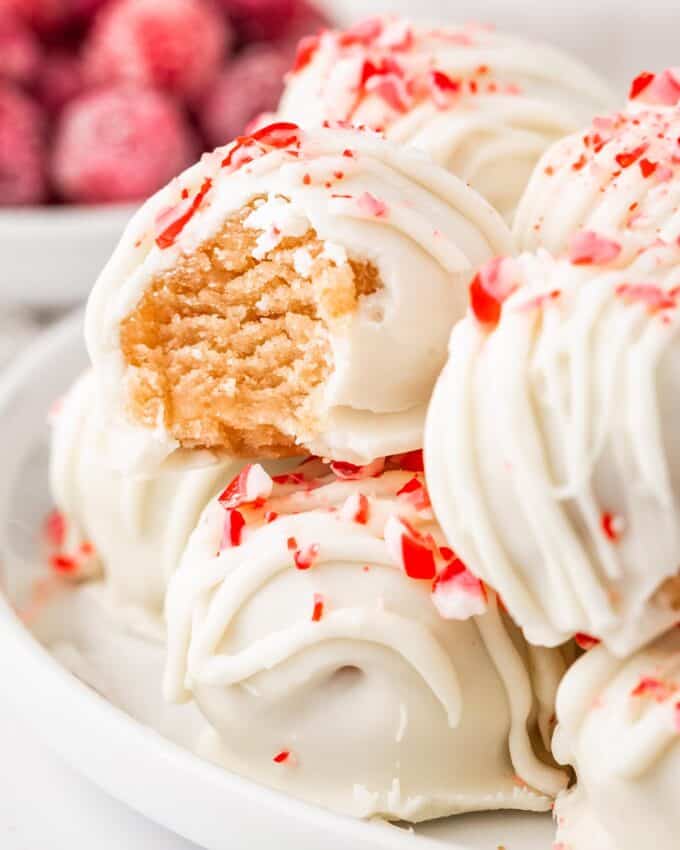
These candy cane cake balls are full of sweet peppermint flavor and crunch, coated in a vanilla candy coating, and sprinkled with more crushed candy canes! Perfect for the holidays, these are just like cake pops (just without the stick), and a favorite among people of all ages!
This is one of my Holiday Dessert recipes I know you’ll want to keep on hand!
Holiday baking time is in full swing, and I don’t know about you, but I could use some more (mostly) no bake treats. My oven is working overtime and no bake desserts are generally quicker and easier.
The hardest part about this recipe is probably dipping the cake balls in the melted candy coating. And that’s not even that difficult, it’s just a little tedious, especially if you’re being particular about how they look.
It’s actually a fun recipe to make with kids, since they can help with every step, and will likely have a lot of fun rolling the balls and dipping them in the coating!
So let’s get to the details so you can enjoy these cake balls as much as we did!
How to make candy cane cake balls?
This is just an overview; the full ingredients and directions are in the recipe card toward the bottom of this post.
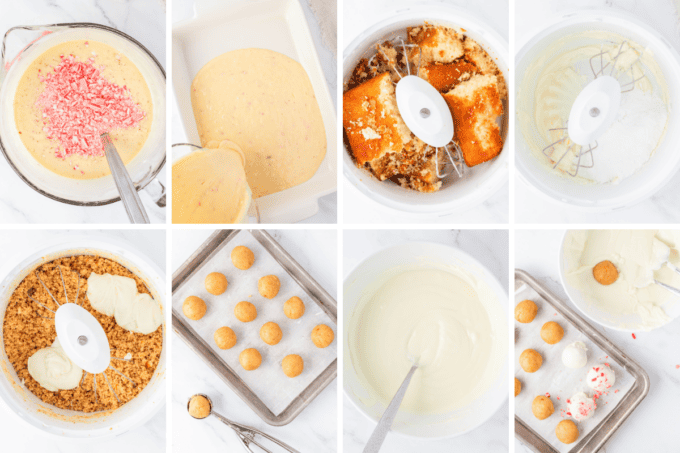
- Mix cake batter. Follow the directions that are on the box of cake mix, but add the peppermint extract and crushed candy canes.
- Bake cake. Bake according to package directions, then cool.
- Crumble cake. This I like to do this with a mixer.
- Make and add frosting. You don’t need too much frosting, just enough so that the cake mixture will stick together when rolled.
- Scoop and roll. Using a cookie scoop is the best way to ensure that the cake balls are all similar in size.
- Melt candy coating and dip. I like to use the microwave to melt the cake balls.
- Sprinkle. Once the balls have been coated in the candy coating, drizzle with some additional candy coating and sprinkle with crushed candy canes.
Helpful Tip!
While this recipe is by no means difficult, it does take some time to make. The cake has to be baked and then cooled, then the frosting has to be made, mixed into the cake crumbs, etc. So for that reason, I’ve also detailed how you can make this in stages.
Variations of this recipe
- Cake flavors – instead of a white cake, try using vanilla, or even chocolate.
- Homemade cake – to make this recipe easy, I developed it with a box of cake mix that you jazz up a bit, but if you’d like to use a homemade cake, you certainly can.
- Frosting – I love a homemade cream cheese frosting, but if you’d rather pick up a can of store-bought frosting, please feel free to use it. You can use cream cheese or vanilla frosting.
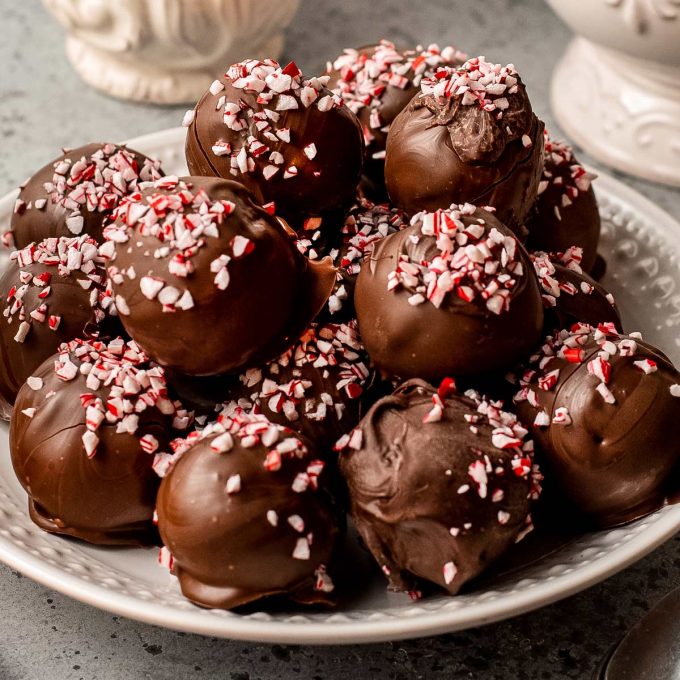
- White chocolate – in place of the vanilla candy coating, or almond bark, feel free to use white chocolate.
- Other chocolates – for a different look and flavor, try using milk or dark chocolate to coat the cake balls.
- Drizzles – I love the look of white drizzles on the white candy coating, but feel free to switch it up and use a contrasting candy coating or chocolate for the drizzles.
FAQ’s
The only difference is the stick that’s added to make it a cake pop, otherwise they’re the same thing. I like cake balls more, as they’re easier to store, and you have one less step (no stick).
Condensation can happen on the exterior of the cake balls if they’ve been refrigerated. It’s completely normal; just gently pat them with a paper towel and they’ll be just fine.
Making cake balls ahead of time
During the holidays, time is definitely at a premium! The more treats you can make ahead, the better.
The good news is that these cake balls can absolutely be made ahead of time.
You can also work ahead and make this recipe in stages.
Ways to prep ahead for this recipe
- Cake – the cake can be baked, cooled, and crumbled in advance.
- Frosting – the frosting can be made and kept refrigerated. Just give it a quick beat with a mixer to make it fluffy again.
- Rolling – once you’ve combined the cake crumbs and frosting, you can scoop and roll the mixture into balls and keep them wrapped in plastic wrap in an airtight container.
Freezing
These cake balls can absolutely be frozen!
Add the balls in even layers, separated by sheets of wax paper to avoid sticking, in an airtight freezer-safe container and freeze for up to 3-4 months.
Thaw overnight in the refrigerator before serving.
Storage
These cake balls should be stored in an airtight container in the refrigerator for up to 2 weeks.
They can also be stored at room temperature, but only for 1 week.
More Holiday Dessert Recipes:

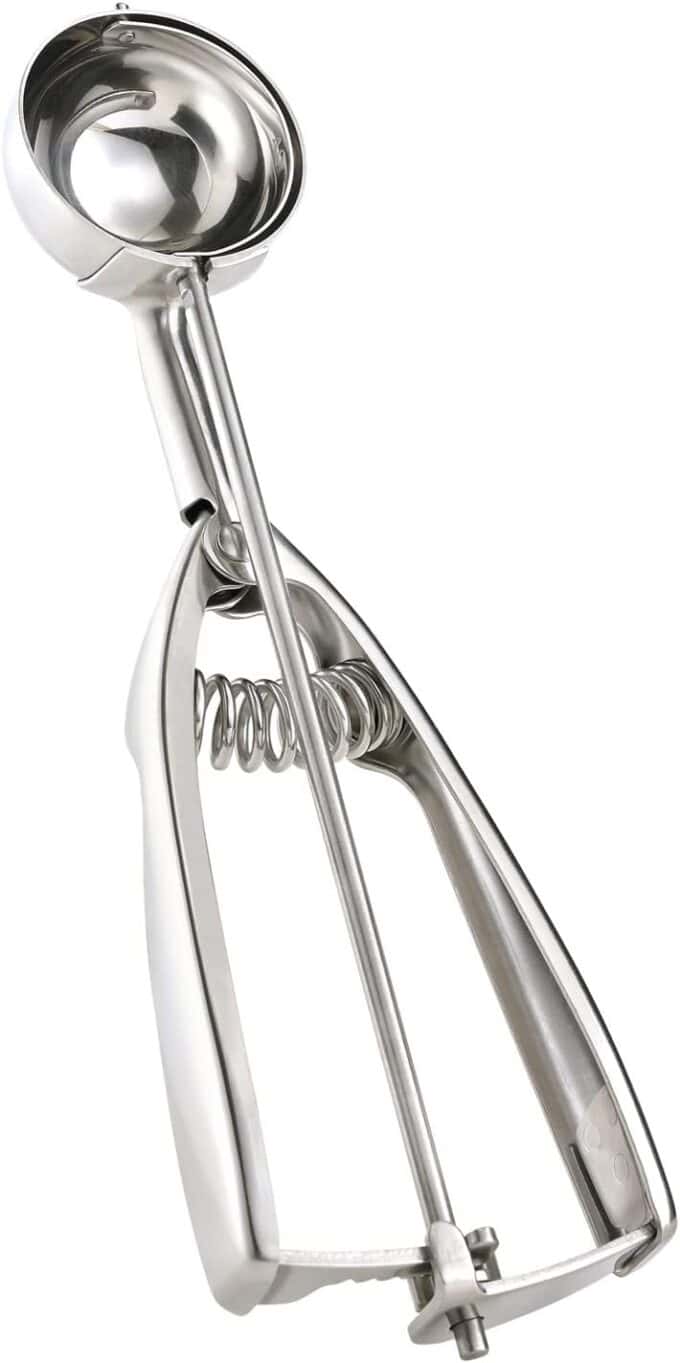
My Favorite Scoop!
Cookie scoops are the most versatile kitchen tool… you can use them for cake balls, cookies, meatballs, ice cream, and more! This scoop is the exact size you’ll need for these balls!
Did you make this? Be sure to leave a review below and tag me @the_chunky_chef on Facebook and Instagram!

Ingredients
Cake
- 8 standard size peppermint candy canes plastic wrappers removed
- 1 box (approx. 15 oz) white cake mix
- 1 cup water or whatever amount the box says you need
- 3 large eggs or whatever amount the box says you need
- 1/2 cup vegetable oil or whatever amount the box says you need
- 1/2 tsp peppermint extract
Cream cheese frosting
- 4 Tbsp unsalted butter softened to room temperature
- 4 oz cream cheese softened to room temperature
- 1/2 tsp peppermint extract
- 2 cups powdered sugar whisked to remove any lumps
Candy coating
- 24 oz vanilla candy coating may also be called almond bark
Instructions
Prepare
- Preheat oven to 350°F and lightly spray a 9×13" baking dish with cooking spray. Set aside.
Crush candy canes
- Gently break the candy canes into a few pieces and add to a plastic bag. Crush to small chunks with a rolling pin. *This can also be done in a food processor if you'd like, just be careful not to crush them into dust – you want small pieces.*
Make cake
- Prepare the cake batter, according to the package directions (mixing together the cake mix, water, eggs, oil, and peppermint extract).
- Stir in about 3/4 of the crushed candy canes, reserving the rest for sprinkling on top of the cake balls later.
- Transfer batter to prepared baking dish and bake for the time indicated on the box (typically around 25-29 minutes).
- Cake is finished baking when a toothpick inserted in the center comes out clean or with just a few moist crumbs.
- Set cake aside to cool completely.
Make frosting
- To a mixing bowl, add butter and cream cheese and beat with a mixer until creamed together. Add the peppermint extract and beat again.
- Add powdered sugar, 1 cup at a time, beating until combined. You're looking for a consistency that's like a thick frosting, so if you need the frosting to be thicker, add a bit more powdered sugar until it's the consistency you like.
Make cake balls
- Crumble the cooled cake with a mixer or by hand. To the crumbs, add 2 heaping Tbsp of the frosting and mix to combine thoroughly.
- Test to see if the amount is correct by rolling a bit of the mixture between your palms. If it rolls into a ball that stays together, you're good. If not, add a bit more frosting, a little at a time, until it's easily rolled into balls.
- Scoop the mixture using a cookie scoop or Tbsp measuring spoon, then gently roll it between your palms until it forms a ball.
- Add rolled cake ball to a wax paper lined baking sheet, then repeat with remaining cake balls. Add baking sheet to the refrigerator or freezer for about 10 minutes or so.
Melt coating and dip
- Add candy coating to a microwave-safe bowl and microwave in 30 second increments, stirring after each time, until melted.
- Pierce a cake ball on a fork, then dip in the melted candy coating. Gently tap the fork on the edge of the bowl to remove excess coating, then place back on wax paper lined baking sheet.
- Sprinkle with some of the reserved crushed candy canes, then repeat with remaining cake balls.
Chill and store
- Once all the cake balls have been dipped and sprinkled, return the baking sheet to the refrigerator for another 10 minutes or so.
- Transfer to an airtight container and store in the refrigerator for 2 weeks, or at room temperature for 1 week.
Want to save this recipe for later? Click the heart in the bottom right corner to save to your own recipe box!
Chef Tips
- I’ve estimated that this recipe will yield about 30-35 cake balls, which you’re free to divide up into as many servings as you’d like.
- I typically use Pillsbury or Duncan Hines cake mix, but feel free to use the brand you like best.
Nutrition Disclaimer
The Chunky Chef is not a dietician or nutritionist, and any nutritional information shared is an estimate. If calorie count and other nutritional values are important to you, we recommend running the ingredients through whichever online nutritional calculator you prefer. Calories can vary quite a bit depending on which brands were used.
Stephanie says
These taste amazing. 5/5 for taste. But it loses a star for how long these take to make. First, the cake takes a minimum of 30 minutes to bake, but then there’s cooling it down. No cake cools completely in 10 minutes. It took 30 to cool the cake. Overall the recipe time took double just due to the intervals of baking. Not a fan. Additionally, the frosting recipe has 2 cups of powdered sugar, 4 Tbsp of butter, and cream cheese but we only use 2 Tbsp to mix with the cake? Such a waste. At the end of the day am I giving up on making cake balls? No. Would I pull this exact recipe again? Also no.
The Chunky Chef says
It’s unfortunate you didn’t have a great experience, but I can’t possibly state exactly how long it will take a cake to cool, since every house is at a different temperature, etc. If you’d like to try and scale down the frosting so you only make the amount needed, you certainly could, or you could use store-bought frosting as I indicated. The frosting stores pretty well if you wanted to store the leftover frosting for another baking project. Best of luck to you on your search.
Catalina says
These candy cane cake balls are the epitome of holiday cheer! The combination of moist cake and the crunch of candy canes—it’s like a festive explosion in every bite!
Sandra says
This is so good!! My kids enjoyed them! Such a perfect treat for the holidays!
Erin says
Looks absolutely fantastic! I’m excited to make this!
Beth says
These look fantastic! I love the combination of peppermint flavor and that creamy texture of the cake balls. Yummo!
Cammy says
Your recipes are explained very well and I find them easy to follow! Love these holiday ones because they’re different and not typical! I always get great results, too…thank you!