


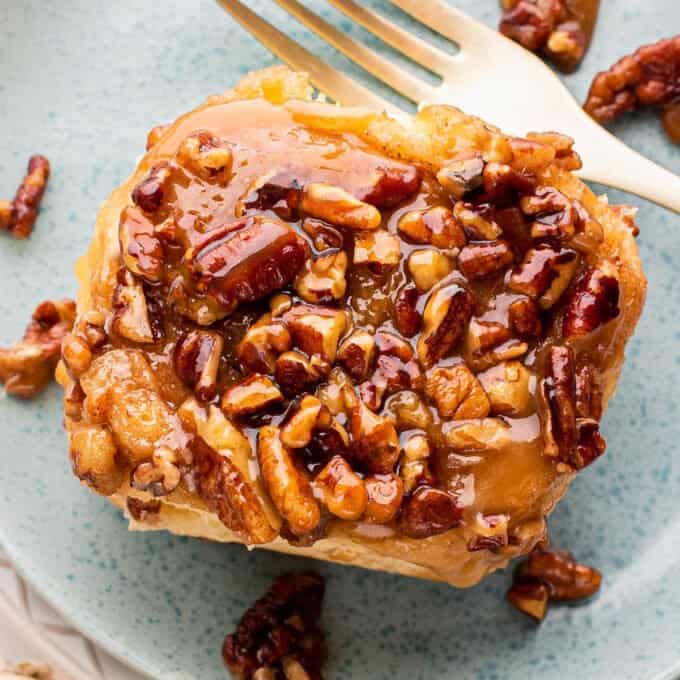
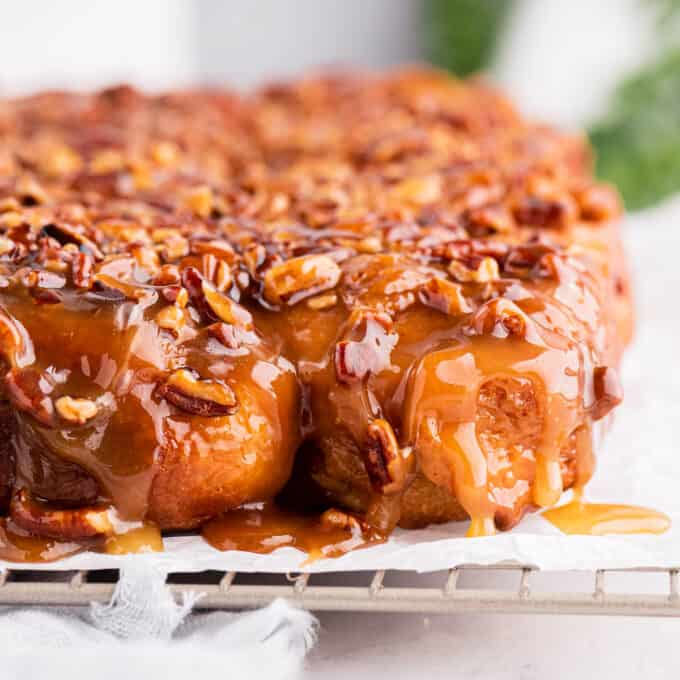
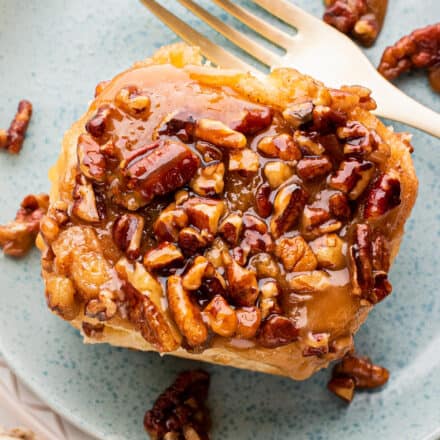
These caramel pecan sticky buns are so soft and fluffy, and absolutely dripping in a maple caramel sauce that is out of this world! They’re easy to make ahead of time, and the perfect decadent breakfast/brunch treat!
This is one of my Breakfast recipes I know you’ll want to keep on hand!
Is there anything better than sinking your teeth into a warm, gooey cinnamon roll? YES! Sinking your teeth into a warm, gooey, sticky bun!!
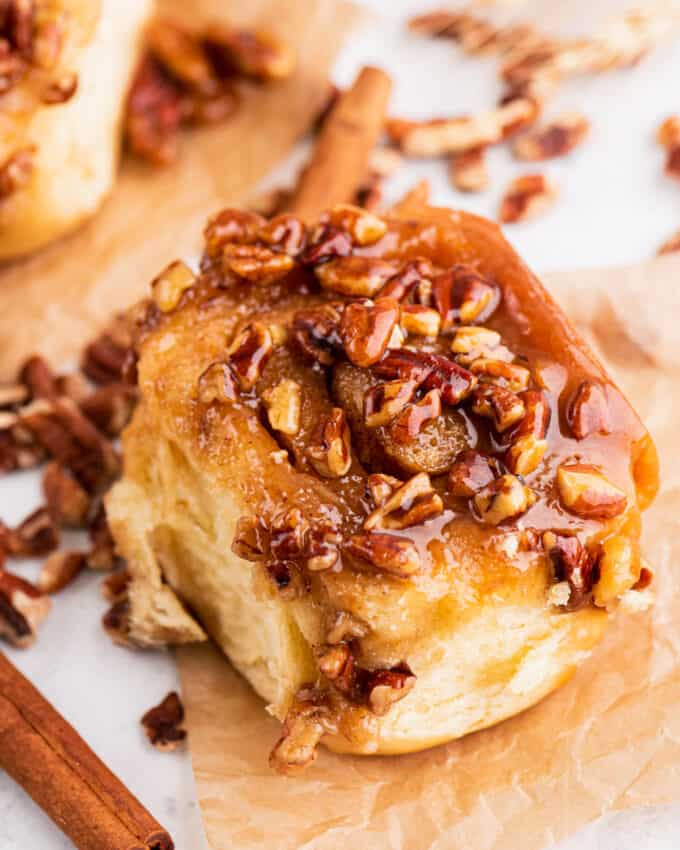
Sticky buns are like cinnamon rolls more delicious cousin… full of that amazingly buttery cinnamon sugar, but topped with homemade maple caramel and toasted pecans!
This recipe is a little more involved than my usual recipes, but I promise two things. First, you can absolutely do this… even if you’ve never worked with yeast before. And secondly, it will be SO worth the extra effort.
I promise these sticky buns are a breakfast or brunch that your whole family will absolutely love waking up for!
This recipe is not new to the website, it’s been posted for several years… but I thought it could use some better photos, as well as some additional information and clearer instructions.
If you’re a fan of the recipe, don’t worry, nothing about the actual recipe has changed!
How to make sticky buns?
This is just an overview; the full ingredients and directions are in the recipe card toward the bottom of this post.
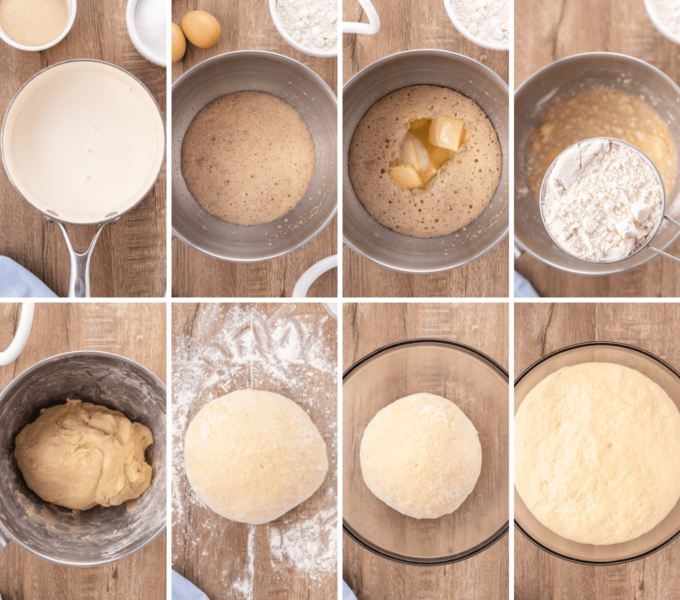
- Warm the milk and bloom yeast. This activates the yeast, and makes sure it’s good to use.
- Add butter, eggs and salt.
- Add flour. Add flour in 1 cup increments, mixing after each addition.
- Knead dough. Increase mixer speed to medium and mix/knead about 5 minutes, until dough is soft and tacky, but not sticky.
- Turn out dough and form into ball. Transfer ball to greased mixing bowl.
- First rise. Let dough rise for about 2 hours, or until doubled in size.
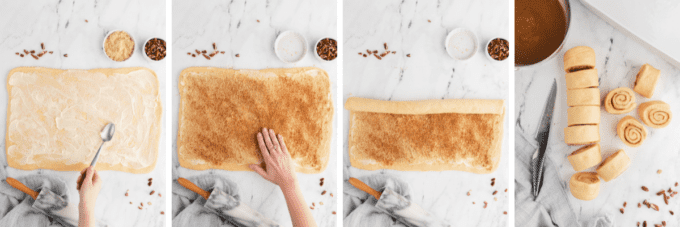
- Turn out dough and roll into rectangle. Your rectangle should be approximately 12×18″.
- Dot or spread softened butter on dough. I prefer to spread the butter.
- Sprinkle dough with cinnamon and sugars.
- Roll dough up into a log shape, rolling up the long side of the rectangle.
- Slice into rolls. Set aside while you make the caramel.
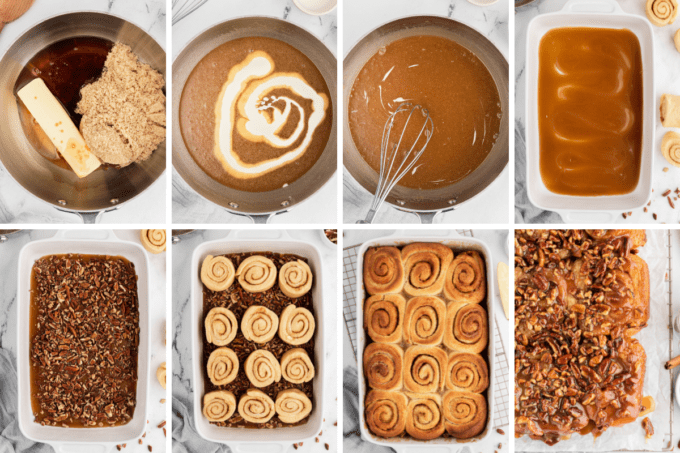
- Make caramel. Then add to the bottom of a greased baking dish.
- Add pecans and rolls. Just lay them right on top.
- Let rolls rise for 1-2 hours, until puffy and larger.
- Bake in preheated 375°F oven for about 25 minutes.
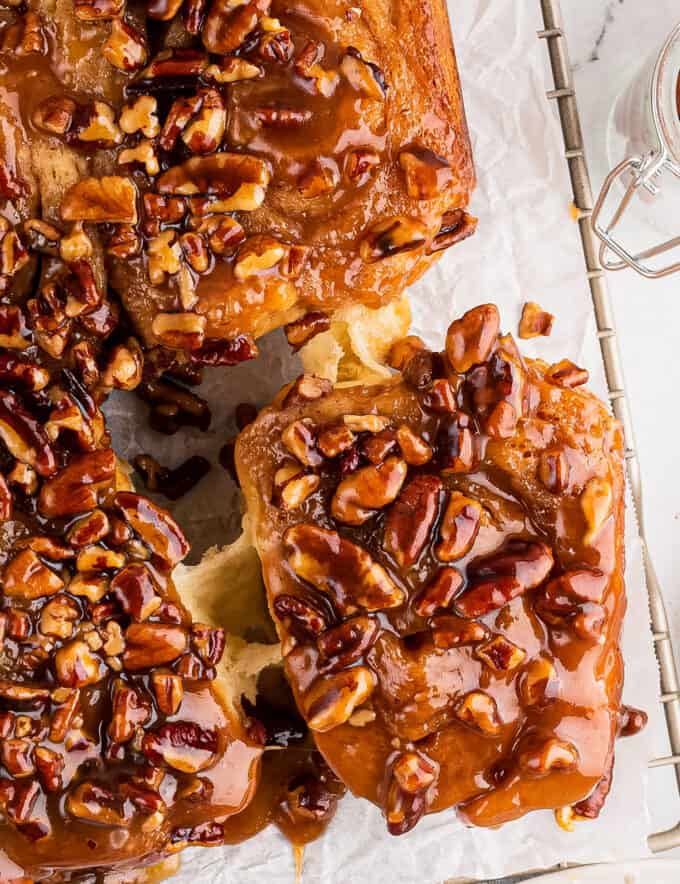
- Invert. Just like making a pineapple upside down cake, all that gooey goodness is on the bottom of the baking dish, so carefully flip it over.
Helpful Tip!
Make sure to let the sticky buns rest after baking before you try to invert the pan. Just 5-10 minutes is all it takes, but if you don’t let it rest, the caramel will be too runny and you won’t have much left on top after you flip them. Plus, you could very easily burn yourself.
Variations of this recipe
- Overnight – this recipe is very easily adapted to an overnight recipe! See the “make ahead” section below for all the details.
- Filling options – if you’d like to really double up on the caramel, try adding a generous drizzle to the top of the dough before you roll it up. You could also try some mini chocolate chips or extra pecans as well.
- Other nuts – pecans aren’t your thing? You can use peanuts, almonds, or walnuts if you’d like. Not traditional, but delicious!
- Apple – adding some apple pie filling to the dough before it’s rolled up gives these sticky buns a caramel apple flavor.
- Bacon – helllllllo sweet and savory! Adding some chopped cooked bacon pieces to both the filling and the topping is so delicious.
- Rum – I have plans to develop a fantastic rum butter cinnamon roll recipe, but a great alternative would be to substitute the maple syrup in the caramel for rum (or if you don’t want too strong of a flavor, do part rum, part water).
FAQ’s
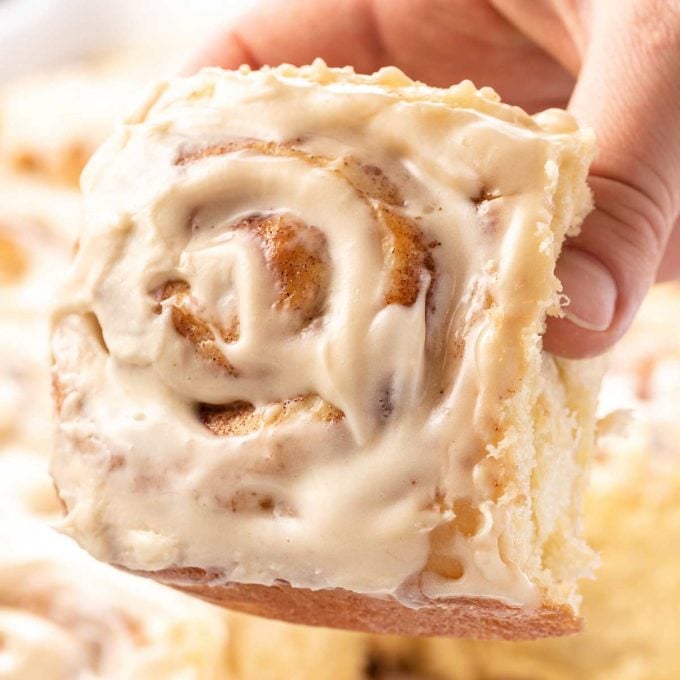
The main difference here is in the topping. Both sweet rolls are filled with a butter, brown sugar and cinnamon filling, but cinnamon rolls are generally topped with a cream cheese or vanilla icing glaze. Sticky buns are traditionally topped with caramel and pecans or other nuts.
Also, with cinnamon rolls, the topping is added after the rolls have been baked. With sticky buns, the topping is added to the bottom of the baking dish, then the rolls are baked on top of that. You invert the pan after baking to give them that glorious topping.
From my research, it appears they originated in the US in Pennsylvania (some sources specifically say in the city of Philadelphia). The German and Dutch settlers brought the recipe when they settled there.
Making sticky buns ahead of time
This recipe, along with most other sweet roll recipes, can be adapted to be made ahead of time. You may have seen this called “overnight” sweet rolls.
Making the dough and slicing them into rolls is great because this lets the dough rise slowly, which not only gives you more time, it lets the flavors of the dough develop a bit more.
You’ll make the caramel pecan topping and add it to a baking dish, then add the sliced rolls on top of the pecans. Cover the dish well, you don’t want dried out rolls, then refrigerate for 8-18 hours.
The morning you want to bake the sticky buns, remove the baking dish from the refrigerator and let it sit in a warm spot for 1-2 hours, until puffy.
Once the sticky buns have risen, preheat the oven to 375°F, then bake as directed.
Freezing
I haven’t tested freezing them unbaked, but baked sticky buns can be frozen for 2-3 months. Make sure to wrap them tightly with foil and place in an airtight container for freezing.
Thaw them overnight in the refrigerator, then warm them up and enjoy!
Storage
Leftover sticky buns should be stored in an airtight container at room temperature for up to 3 days.
You can refrigerate them to make them last another couple of days, but that can dry them out. So use your best judgement when it comes to storing.

Tips for working with yeast!
If you’ve never worked with yeast before, it can be a little intimidating. But I promise it’s not quite as difficult as it may seem, and you CAN do this!
- No stand mixer – you don’t have to use one, so don’t be discouraged if you don’t own one. You just use a bowl and wooden spoon, but you’ll have to knead by hand until the dough comes together.
- Proof your yeast – after sitting with the warm milk, the yeast should be frothy and foamy looking. Sometimes yeast can be older than we think, and it just won’t activate and work. Proofing means you don’t have to make the whole dough before finding out the yeast was dead! If it doesn’t foam up, then that yeast is likely dead and won’t work for this recipe. Start the recipe over with a new batch of yeast.
- Make your own warm spot for the dough – most people, myself included, don’t know where a naturally warm spot is in their kitchen… or maybe it’s the dead of winter and there’s no warmth anywhere. No worries! Preheat your oven to 200°F and let it preheat for about 3-4 minutes. Then turn your oven OFF, don’t let it get all the way to 200°F. Place the bowl of dough in the oven to rise. Alternately, you can turn on the light in your cold oven and add the bowl of dough to the oven with the door shut.
- Easy slicing – Slicing the sticky bun dough into wheels can be tricky. Use a very sharp serrated knife, or some unflavored dental floss (seriously, make sure it’s unflavored – no one wants spearmint flavored rolls!). Slide the floss underneath the log, bring both sides up, cross them over each other, and pull tight. Easy slices
- Not picture perfect – don’t worry if your sticky buns aren’t absolutely perfect in shape. Odds are, they won’t be… mine never are anyway! Homemade treats are supposed to be a bit rustic, and once people take a bite, they won’t care what they look like… trust me!
- Just breathe – first things first, take a deep breath. If you’ve never worked with yeast before, you can still make these. Working with yeast isn’t as difficult as it’s made out to be… it just takes some time. You have to have a little patience.
More Sweet Breakfast Recipes:
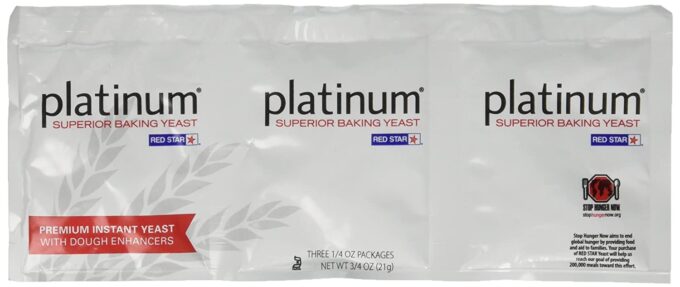
My Favorite Yeast!
Of course you can use any yeast you’d like, or feel comfortable using, but this is my all-time favorite yeast… and the kind I use for all my recipe development and testing.
Be sure to scroll down to check out other readers’ comments for tips and reviews.
And don’t forget, if you’ve made this recipe, leave a comment and please consider giving it a star rating letting me know how you enjoyed it 🙂
Did you make this? Be sure to leave a review below and tag me @the_chunky_chef on Facebook and Instagram!
Ingredients
Dough
- 1 cup whole milk
- 2/3 cup granulated sugar
- 1 1/2 Tbsp active dry or instant yeast (about 2 standard packets)
- 1/2 cup butter, softened to room temperature and cut into bite sized pieces
- 2 large eggs
- 1/2 tsp kosher salt
- 4 1/2 cups all-purpose flour
Filling
- 1/3 – 1/2 cup butter, softened to room temperature
- 1/2 cup light brown sugar
- 1 1/2 tsp ground cinnamon
Topping
- 1/2 cup butter
- 1 cup packed light brown sugar
- 1 tsp vanilla extract
- 1/4 cup maple syrup (the real stuff!)
- 3 Tbsp heavy cream
- 1 1/2 cups chopped pecans (I like a mixture of chopped and pieces)
Instructions
Prepare
- Lightly grease a large mixing bowl with a drizzle of vegetable oil and set aside.
Make the dough
- In a small saucepan, heat milk over MED heat until warmed. Pour warm milk into the bowl of a stand mixer and stir in the granulated sugar and yeast. Let mixture sit about 5 to 10 minutes. Yeast mixture should be foamy looking and smell “yeasty”. This step to to activate the yeast and make sure it’s still good. If mixture doesn’t look foamy, discard and start over with new yeast.
- Fit the stand mixer with the dough hook attachment and add butter, eggs and salt, then mix on LOW speed until combined. Gradually add in the flour, in about 1 cup increments. When all the flour has been added, increase mixer speed to about MED, and mix about 5 minutes, or until a soft dough forms.
- Dough should be soft and smooth, slightly tacky but not sticky. If dough is too sticky, add extra flour, 1 Tbsp at a time, and mix until it’s soft and smooth. If dough is too stiff, add some water, about 1/4 tsp, and mix until dough is soft.
Knead the dough
- Lightly flour your counter or other flat surface and transfer dough onto it. Dust your hands with flour and knead by hand about a minute or so, or until the dough comes together. Form the dough into a ball and transfer to prepared mixing bowl.
First rise
- Cover bowl with plastic wrap, loosely, and a clean kitchen towel. Place in a warm spot for about 2 hours, or until doubled in size.
Roll dough
- Once dough has doubled in size, turn it out onto a lightly floured surface and roll into a rectangle, roughly 12×18 inches in size. Use the rolling pin to make sure the dough is an even thickness.
Make the filling
- In a small bowl, combine brown sugar and cinnamon.
- Spread dough rectangle with softened butter, then top with brown sugar and cinnamon mixture. Gently use your fingers to pat the sugar/cinnamon mixture to help it stay in place during the rolling process.
- Starting with one of the longer sides of the rectangle, roll up tightly into a log shape. I find starting to roll one side, rolling away from you once, then moving down the line a bit and doing the same thing, repeating until you’re all the way across gives you the most even rolling method.
- Once you have an 18 inch long log, carefully slice the log in 12 evenly sized rolls.
Make the caramel pecan topping
- In a small saucepan, heat butter, brown sugar, maple syrup and vanilla over MED heat until melted and smooth. Remove from heat and whisk in cream.
- Butter or grease a 9×13 inch baking dish. Pour caramel sauce into bottom of baking dish, lifting and tilting dish to make sure caramel is evenly coating the bottom. Sprinkle pecans evenly over the top of the caramel.
Second rise
- Arrange rolls on top of the caramel and pecans, cut side up, then cover tightly with foil and let rise again for about 45 minutes – 1 hour, or until larger and puffy.
Bake
- While the second rise is happening, preheat the oven to 375°F degrees, and once fully heated, bake sticky buns about 25 minutes. If you find the tops of the rolls are getting TOO golden brown, cover loosely with foil during the second half of baking.
Cool and invert
- Remove pan from oven and let cool 5-10 minutes, then place a large serving tray or sheet pan over the top of the baking dish.
- Very carefully, and using oven safe gloves/mitts, hold onto both the tray and the dish and flip them both over together to invert the rolls. Lift up the baking dish and set aside.
- Serve rolls warm, with additional caramel sauce if desired.
Want to save this recipe for later? Click the heart in the bottom right corner to save to your own recipe box!
Chef Tips
No stand mixer:
- If you have one, by all means use it! But you don’t have to use one, so don’t be discouraged if you don’t own one. You just use a bowl and wooden spoon, but you’ll have to knead by hand until the dough comes together.
Check your yeast:
- After sitting with the warm milk, the yeast should be frothy and foamy looking. If it doesn’t, then that yeast is likely dead and won’t work for this recipe. Start over with a new batch of yeast.
Make your own warm spot for the dough:
Most people, myself included, don’t necessarily know where a naturally warm spot is in their kitchen… or maybe it’s the dead of winter and there’s no warmth anywhere. No worries!- Preheat your oven to 200°F and let it preheat for about 3-4 minutes. Then turn your oven OFF, don’t let it get all the way to 200°F.
- Place the bowl of dough in the oven to rise.
- Alternately, you can turn on the light in your cold oven and add the bowl of dough to the oven with the door shut.
Easy slicing:
- Slicing the cinnamon roll dough into wheels can be tricky. Use a very sharp serrated knife, or some unflavored dental floss (seriously, make sure it’s unflavored – no one wants spearmint flavored rolls!).
- Slide the floss underneath the log, bring both sides up, cross them over each other, and pull tight. Easy slices!
To make overnight sticky buns:
- Complete steps up to the second rise (but don’t do the second rise). Place the rolls on the caramel/pecans in the baking dish, cover tightly with foil, and refrigerate 8-18 hours.
- Remove baking dish from refrigerator and let rise in a warm place for 1-2 hours, then uncover and bake as directed.
Nutrition Disclaimer
The Chunky Chef is not a dietician or nutritionist, and any nutritional information shared is an estimate. If calorie count and other nutritional values are important to you, we recommend running the ingredients through whichever online nutritional calculator you prefer. Calories can vary quite a bit depending on which brands were used.


Judy Aman says
I love this recipe. I’m planning to make it for an upcoming camping trip to the ocean with family.
Can I freeze them after I get them in the pan on the caramel sauce, just before the second rise?
The Chunky Chef says
So glad you love it! As I mention in the post, I haven’t tested freezing these sticky buns unbaked. So I can’t speak to how well it’ll turn out, but if you experiment, I’d love to know how it goes 🙂
Kayley says
Every time I try to make them ahead of time and put them in the fridge. They never rise for the 2nd rise to bake.
Michelle says
Can I use water instead of milk for the dough. I can’t have dairy.
The Chunky Chef says
I’ve only tested this recipe as written. So without testing and retesting it myself, I can’t say for certain if that would work. If you do some experimenting, I’d love to know how it turns out!
Lora says
These beauties just got inverted and they are PERFECT! My husband is already devouring one but he stopped long enough to tell me they’re freaking amazing! There ya go! Thank you for a fun and delicious recipe!
safya says
OMG !!!!! I made the recipe it was just amazing , the caramel is just incredible . Thank you so much !!