


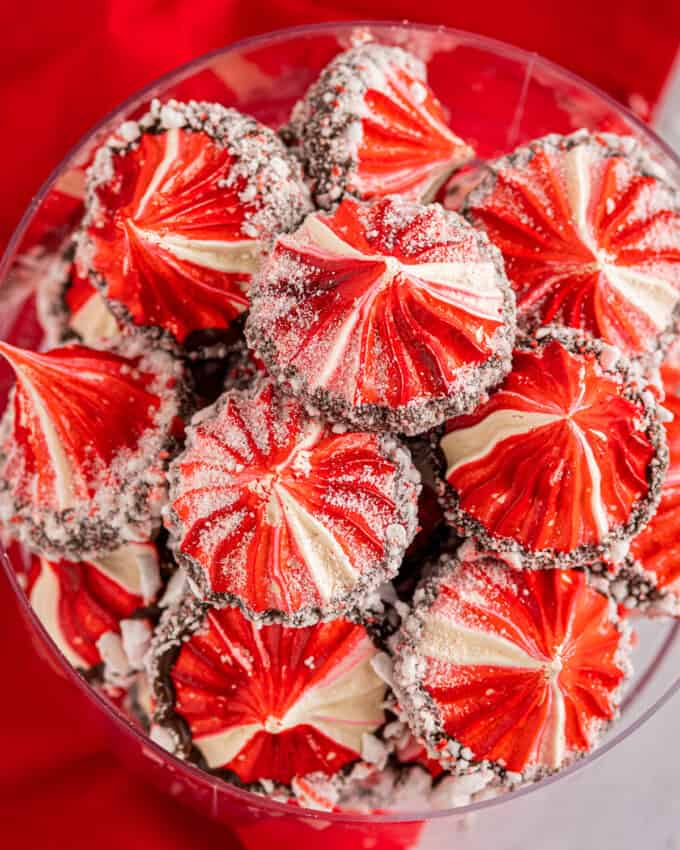
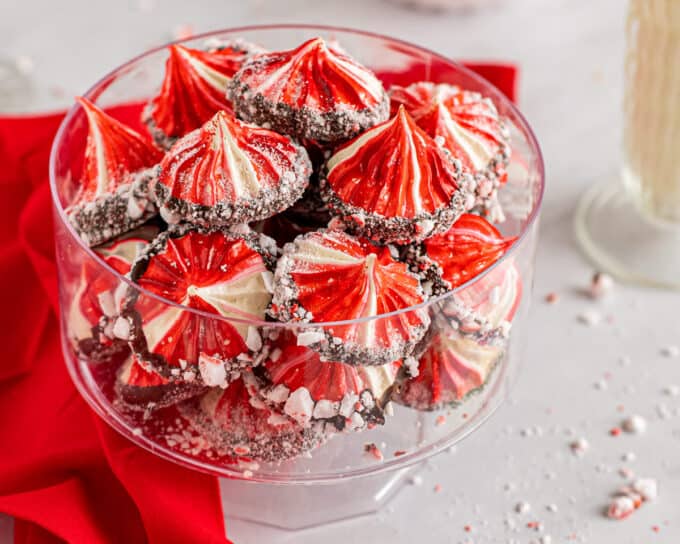
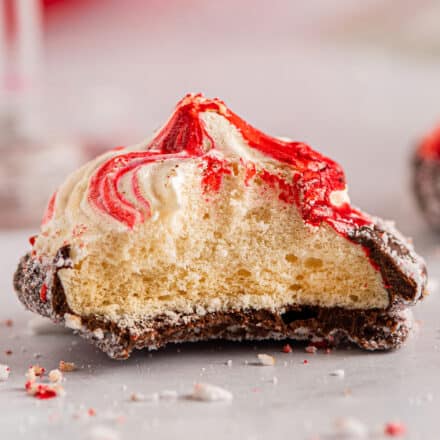
Crunchy and light meringue cookies are flavored with a hint of sweet peppermint, and swirled with red coloring. They are dipped in smooth chocolate and then sprinkled with peppermint pieces for flavor and crunch.
This is one of my Holiday Dessert recipes I know you’ll want to keep on hand!

Meringue cookies are such a fun treat. They’re so crisp and light, sweet and delicate, and just plain pretty. However, they also have a reputation for being difficult to make.
Well, I won’t say this is a beginner-friendly recipe, but it’s not a super advanced one either. Meringues take time and patience to make, and there are a lot of things that can cause them to not turn out well.
But don’t worry, I’ve detailed all those things below in this post, as well as a helpful “pro tips for making meringues” section. We’ll walk through it step by step, together.
These cookies may take you a try or two to perfect, but once you have it down, you’ll be making meringues like a true pastry chef.
How to make meringue cookies?
This is just an overview; the full ingredients and directions are in the recipe card toward the bottom of this post.
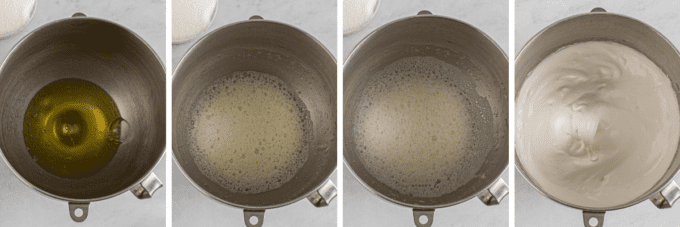
- Add egg whites to stand mixer bowl. Make sure there aren’t any traces of yolk.
- Beat until foamy. Then add salt and cream of tartar.
- Beat until foam has increased in volume.
- Stream in sugar. Do this as the mixer is running. Add extracts.
- Beat until stiff peaks form. The meringue batter should be thick and marshmallowy, and hold it’s shape.
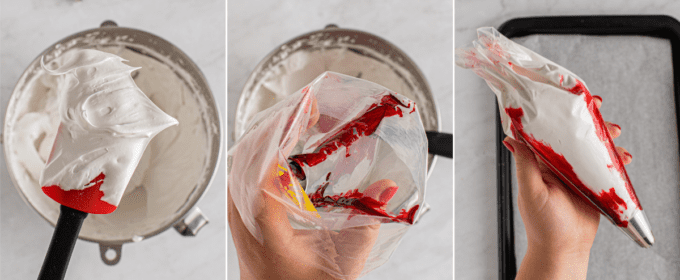
- Add food coloring to piping bag. I like to use a butter knife, but a toothpick will work as well.
- Fill piping bag.
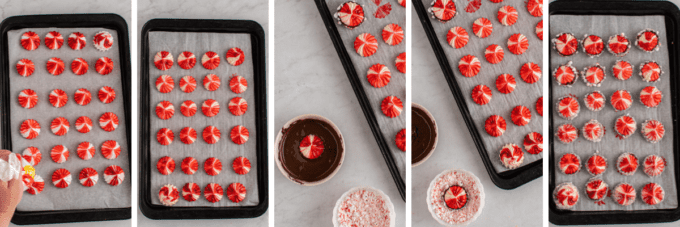
- Pipe meringues onto baking sheets. Do this as soon as you’ve filled the piping bag, since over time the meringue batter will lose it’s ability to hold it’s shape well.
- Bake. Bake for 1 hour, then leave the meringues in the oven while it’s turned off for 1-2 more hours.
- Dip x2. Once the cookies have cooled, dip the bottoms in chocolate, then in peppermint.
Helpful Tip!
If you have a stand mixer, this recipe is a great use for it. You can make these cookies with a hand mixer, but if will take longer, and your arm will likely get pretty tired. Check out all my pro tips for making meringues down further in the post.
Variations of this recipe
- Plain – if you’d prefer not to make these meringue cookies peppermint, or dip them in chocolate, you can absolutely leave all that out.
- Other colors – maybe you’d like a different color meringue? Feel free to use any color you want.
- Milk chocolate – milk chocolate can be substituted for the dark chocolate if you prefer a sweeter tasting chocolate.
- White chocolate – for an even sweeter chocolate, try using white chocolate instead.
- Other mints – any crushed mints will work for this recipe, including crushed up candy canes.
- Other shapes – you can use any piping tip to make these meringue cookies, so the shape they are is totally up to you.
FAQ’s
The purpose of cream of tartar is to lower the pH of your egg mixture, making it more acidic, which in turn, makes them more stable. You can make these without it, by substituting 1 tsp of lemon juice. However, I much prefer to use cream of tartar, as I find it’s easier to get the meringues to hold their shape better.
Essentially there is too much moisture in the cookies. This can happen in a couple of different ways. First, you may have accidentally added too much food coloring/extract liquid. This is why I much prefer the gel food coloring since it doesn’t add extra liquid. Secondly, this can also happen if you make the meringues in a humid environment. And lastly, the cookies needed longer in the oven (either during the baking process or leaving them in the oven to partially cool). To counteract that, simply add them back to the oven for another 30-60 minutes, until they’re dry, but not browned.
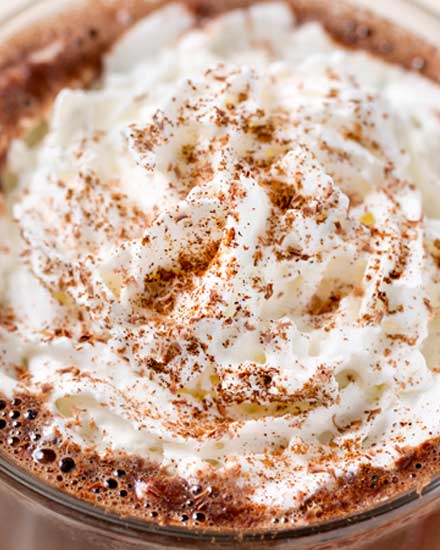
If you’ve ever made homemade whipped cream, it’s the same process. But if you haven’t, I promise it’s not hard to tell. When you detach and pick up the whisk beater from the mixer, and turn it upside down, so the whisk end is facing up, the egg whites will stand up in a peak (like a little mountain), and not fold over onto itself. This is a great visual guide from Taste of Home.
Making meringue cookies ahead of time
I find these cookies taste best when made fresh, but I understand the holiday season is extremely busy. So if you need to make these ahead of time, you can.
However, note that over time they may become sticky and chewy, rather than crisp and light.

Storage
Meringue cookies should be stored, dry, in an airtight container at room temperature, for up to 2 weeks.
Freezing
For longer storage, these cookies can be frozen in freezer-safe containers for up to 3 months.
Thaw at room temperature.
Pro tips for making meringues!
The idea of making meringues can be quite intimidating, but I promise you can do it. It may take a try or two, but baking is a skill, and perfecting any skill takes time. These tips should help you out on your journey to perfect meringues!
- Mixer – a stand mixer is super helpful here, with the wire whisk attachment. However, you can use a hand mixer instead, it will just likely take longer and be a bit of an arm workout. It’s not advisable to make meringue cookies with no mixer at all.
- Preparation – have all your baking sheets set out and lined before starting. Also make sure your oven is already preheated. Once you have the meringues ready to go, you want to get them piped fairly quickly, since the longer the batter sits, the more unstable and less pipe-able the batter will become.
- Mixing bowl – make sure that both the mixing bowl and wire whisk are completely free of any moisture or oil before starting this recipe. The smallest amount of grease or moisture can ruin your meringues.
- Egg whites – even the smallest bit of yolk can cause problems with meringues, so for the best results, separate one egg at a time in a small bowl, then transfer that egg white to the mixing bowl. Repeat with all eggs.
- Mixing speed – as tempting as it can be to increase the mixer speed to get through whipping the egg whites faster, don’t go above a medium speed. You want small bubbles, and increasing the speed to high will incorporate too much air and make your meringues harder to set up and pipe.
- Adding the sugar – for the best texture, add your sugar slowly. Either a little bit at a time, beating in between each addition, or a slow, steady stream of sugar added as your mixer is running.
- Humidity – if you live in a very humid climate, or your home has a lot of humidity, it will be pretty difficult to make meringues. The moisture in the air can make the egg whites not quite as stable, which means they won’t hold their shape as well.
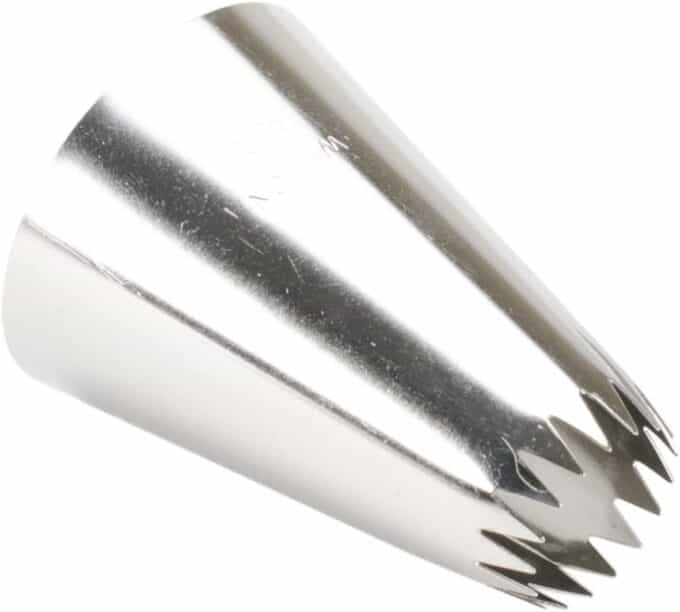
My Favorite Piping Tip!
While you can use any piping tip you’d like, this is the one I like to use for these cookies.
Did you make this? Be sure to leave a review below and tag me @the_chunky_chef on Facebook and Instagram!
Ingredients
- 5 large egg whites room temperature
- 1/8 tsp salt
- 1/2 tsp cream of tartar
- 1 cup granulated sugar
- 1/4 tsp vanilla extract
- 1/4 tsp peppermint extract
- red gel food coloring
- 1 cup dark chocolate chips melted
- 1 cup crushed peppermint
Instructions
Prepare
- Preheat oven to 200°F and line 2 baking sheets with parchment paper and set aside.
- Check that the mixer bowl and attachment are completely free of moisture or oil.
Beat eggs
- Add egg whites to the bowl of a stand mixer fitted with a wire whisk attachment. Beat on MED speed for about 30 seconds or so, until tiny little foam bubbles appear.
- Add salt and cream of tartar, then beat again on MED speed for about a minute, until the foam increases in volume a little.
- Keep the mixer going on MED, and slowly pour in the sugar. I know it's a pain to do this slowly, but it does make a difference in the final product, so just take your time.
- Once all the sugar has been added, add the peppermint and vanilla extracts and keep beating on MED speed. You'll see the mixture go from foamy and translucent to white and opaque. Your meringue batter is finished when it is thick, white, glossy, and marshmallowy.
- Check for stiff peaks by turning off the mixer, and removing the whisk attachment. Turn it upside down so the whisk is pointing towards the ceiling. If the meringue batter stays pointing up, and doesn't fold back on itself, those are stiff peaks, and your batter is ready.
Pipe
- Fit a piping bag with an open star tip (I've linked to the one I use below in the "chef tips" section). Use a butter knife or toothpick to spread 3 thick lines of red gel food coloring on the inside of the piping bag, spread out so there is an even amount of space between each line.
- Fill the piping bag 2/3 or 3/4 of the way with the meringue batter. Hold the piping bag directly over the top of the prepared baking sheet.
- Pipe any shape you'd like. I prefer to hold the bag about 1/2 inch above the baking sheet, and just gently squeeze the bag, lifting as you squeeze, then stop squeezing but keep lifting to finish and give the meringue a "chocolate kiss" like shape. Keep about an inch in between each meringue to make sure adequate air flow will get to all sides of the meringues in the oven.
- Repeat with all the batter.
Bake
- Add baking sheets to preheated oven and bake for 1 hour. Once the baking time has elapsed, turn off the oven and keep the door closed, but leave the meringues in there for another 1-2 hours. This ensures they are fully baked without getting browned.
- You'll know the meringues are ready to come out of the oven when they are light, dry, and come off the baking sheet very easily.
- Add meringue cookies to a wire cooling rack to finish cooling (if they aren't cooled already).
Dip
- Add a piece of two of parchment paper to your cutting board, counter, or other flat work surface. Dip the bottoms of the meringue cookies in the melted dark chocolate, then into the crushed peppermint. Place on the parchment paper, then repeat with remaining cookies.
Want to save this recipe for later? Click the heart in the bottom right corner to save to your own recipe box!
Chef Tips
- This is the tip I use to pipe my meringue cookies (amazon link).
Meringue Tips
- Mixer – a stand mixer is super helpful here, with the wire whisk attachment. However, you can use a hand mixer instead, it will just likely take longer and be a bit of an arm workout. It’s not advisable to make meringue cookies with no mixer at all.
- Preparation – have all your baking sheets set out and lined before starting. Also make sure your oven is already preheated. Once you have the meringues ready to go, you want to get them piped fairly quickly, since the longer the batter sits, the more unstable and less pipe-able the batter will become.
- Mixing bowl – make sure that both the mixing bowl and wire whisk are completely free of any moisture or oil before starting this recipe. The smallest amount of grease or moisture can ruin your meringues.
- Egg whites – even the smallest bit of yolk can cause problems with meringues, so for the best results, separate one egg at a time in a small bowl, then transfer that egg white to the mixing bowl. Repeat with all eggs.
- Mixing speed – as tempting as it can be to increase the mixer speed to get through whipping the egg whites faster, don’t go above a medium speed. You want small bubbles, and increasing the speed to high will incorporate too much air and make your meringues harder to set up and pipe.
- Adding the sugar – for the best texture, add your sugar slowly. Either a little bit at a time, beating in between each addition, or a slow, steady stream of sugar added as your mixer is running.
- Humidity – if you live in a very humid climate, or your home has a lot of humidity, it will be pretty difficult to make meringues. The moisture in the air can make the egg whites not quite as stable, which means they won’t hold their shape as well.
Nutrition Disclaimer
The Chunky Chef is not a dietician or nutritionist, and any nutritional information shared is an estimate. If calorie count and other nutritional values are important to you, we recommend running the ingredients through whichever online nutritional calculator you prefer. Calories can vary quite a bit depending on which brands were used.

Krystle says
So many yummy flavors and the texture is perfect. Didn’t last long in my house!
Catalina says
These cookies are amazing. They are festive and so cute. Perfect for our Christmas table!
Catalina says
We
Vikki says
Super festive and delicious! Definitely making these again
Beti | easyweeknightrecipes says
These cookies are gorgeous!! I need to give these a try!
katerina @ diethood.com says
WOW! These cookies are incredible!! My family would love them!
Sandra says
These are really amazing cookies!! My kids enjoyed making and eating these!
Erin | Dinners,Dishes and Dessert says
These cookies look outstanding!! These would disappear fast in our house!