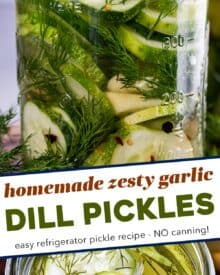
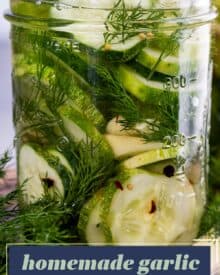
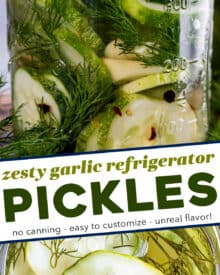
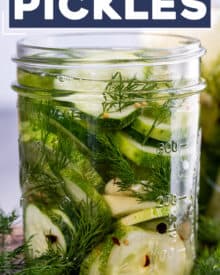
Homemade refrigerator pickles require zero canning expertise or equipment! Crisp, zesty, and packed with a punch of amazing flavor – you have to try them!
This is one of my Pantry/Basics recipes I know you’ll want to keep on hand!
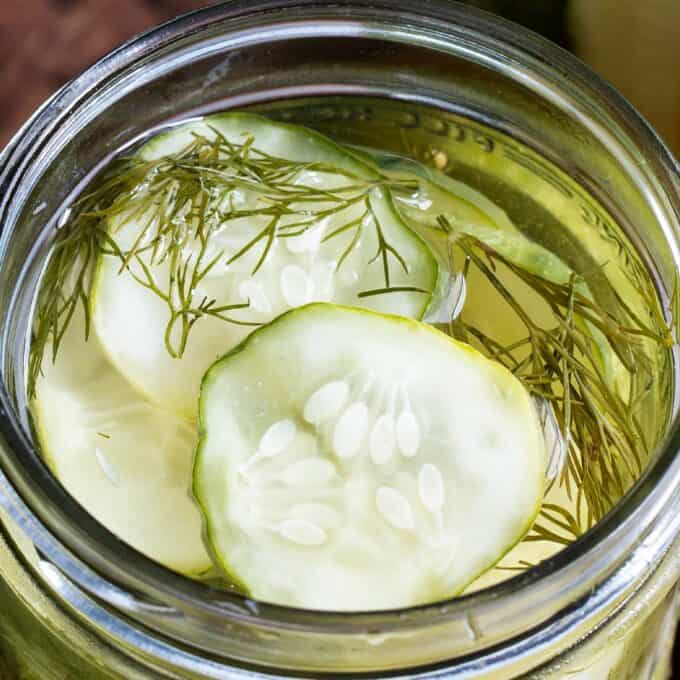
Do you ever get a craving for the perfect crisp dill pickle? We’re dill obsessed in this house, and I’ve been on a mission to make the perfect pickles.
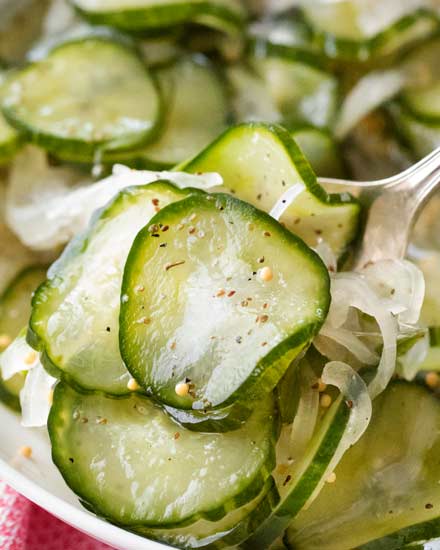
For me, the perfect pickle is crisp, with a good snap when you bite into it. It’s bold and zesty, filled with garlic-dill flavor, and just a tiny bit of kick. It’s also made with the freshest cucumbers.
The problem is, the time of year when cucumbers are at their peak freshness, is also one of the hottest times of the year around here. Definitely not when I want to be dragging out canning equipment and boiling a bunch of water.
That’s the genius of these refrigerator pickles, theres’ NO canning required! Just make a quick brine, add it to the cucumbers and flavor aromatics (garlic, peppercorns, mustard seeds, etc), seal and refrigerate. Easy peasy!
Why you’ll love this recipe!
- Customize-able – these pickles are yours to tweak so that they’re just what you’re looking for.
- Homemade – with homemade pickles you don’t have to worry about what preservatives are in them, or if any food dye was added.
What do I need to make this recipe?
- Cucumbers – I find pickling cucumbers (sometimes called Kirby or salad cucumbers) worked best.
- Water – nothing fancy, just plain tap water.
- Vinegar – I prefer white or apple cider vinegar for this recipe.
- Salt – there’s a hefty amount of salt in this recipe, but they’re not salty. The salt is part of the pickling process.
- Sugar – the small amount of sugar helps balance all the savory flavors.
- Dill – I find fresh dill is best.
- Garlic – Just as with the dill, fresh garlic is best.
- Peppercorns – I use black peppercorns, but any variety would be good.
- Mustard seeds – this is standard in pickling.
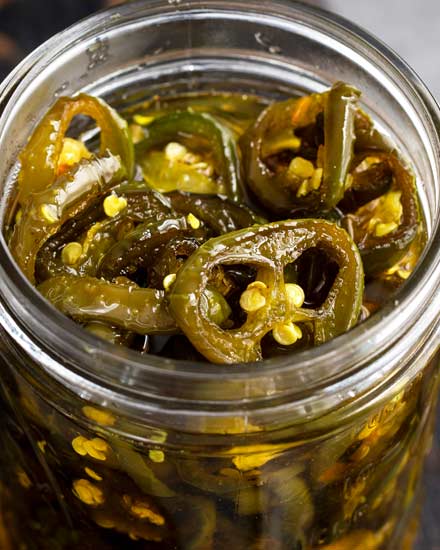
- Red pepper flakes – this adds a touch of heat that rounds out the flavors.
- Celery seed – the celery seed adds a subtle yet delicious flavor.
How to make homemade pickles:
This is just an overview; the full ingredients and directions are in the recipe card toward the bottom of this post.
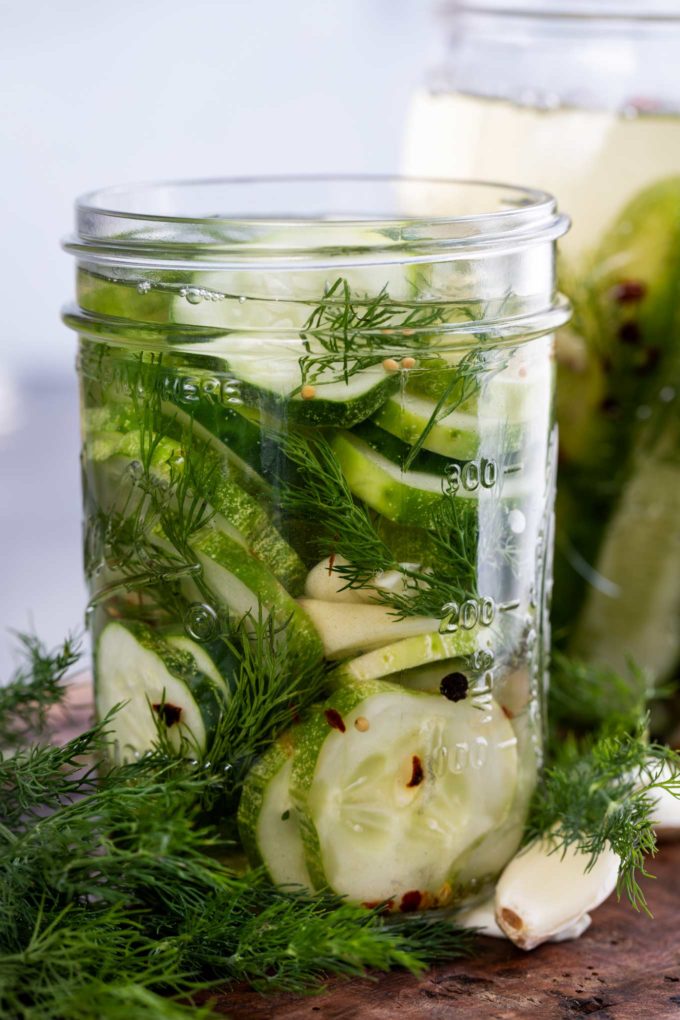
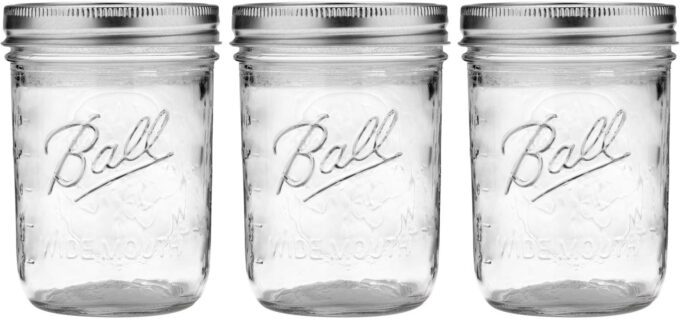
- Slice cucumbers and prepare jars. If slicing into rounds, cut the slices about 1/4″ thick. I like to use glass canning jars, but technically, since these pickles aren’t canned, you can use plastic containers, as long as they have airtight lids.
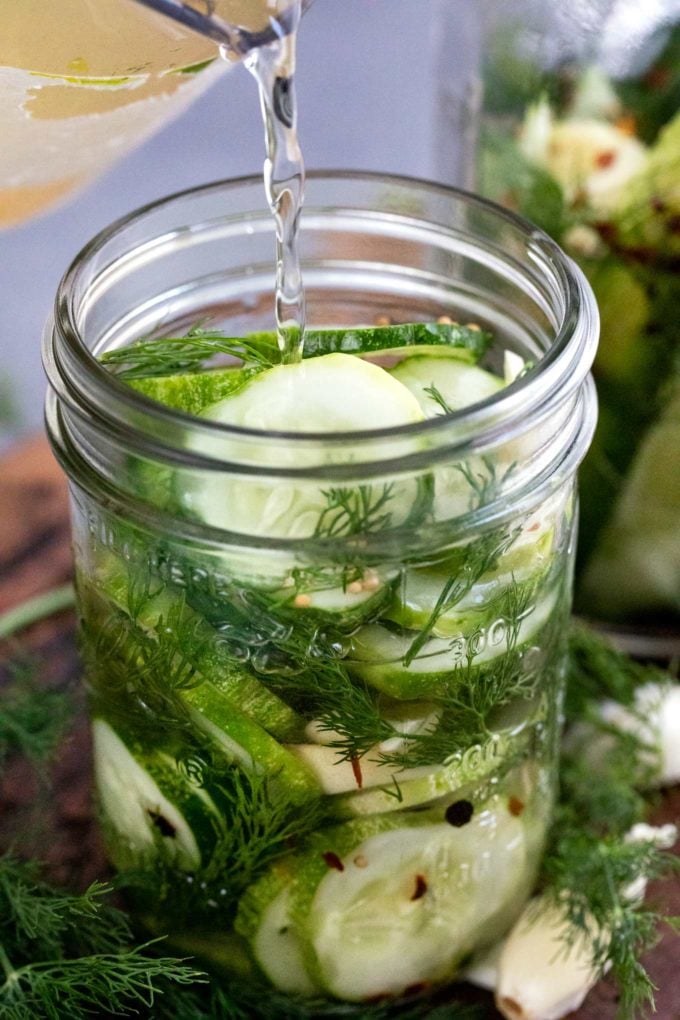
- Make brine and cool. Combine the water, vinegar, salt and sugar in a saucepan, and heat until solids are dissolved. Let cool to room temperature.
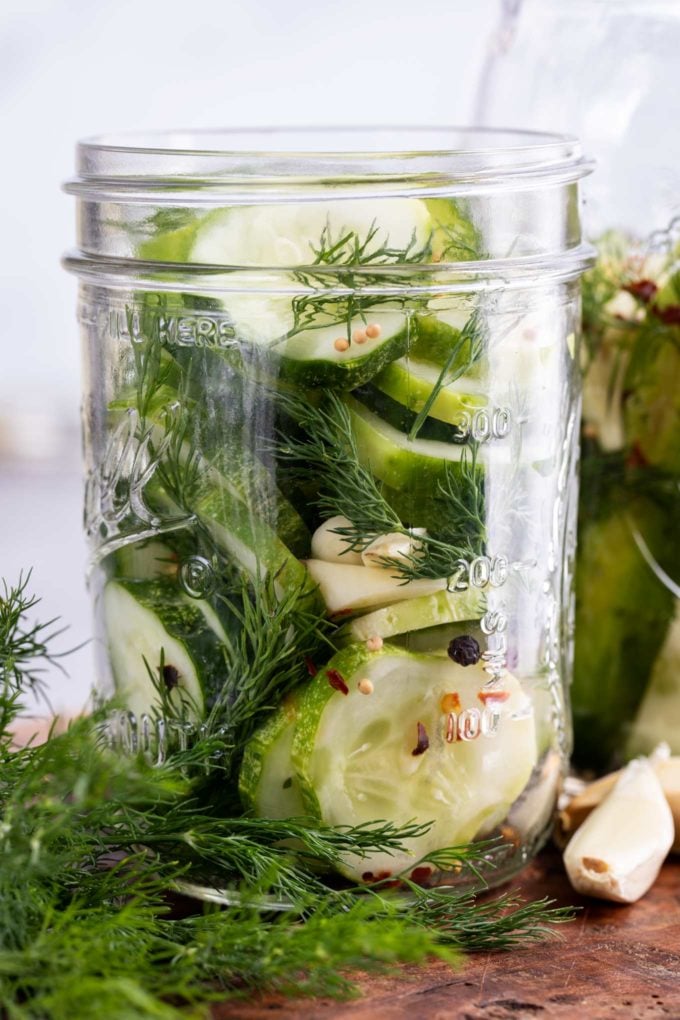
- Add cucumbers and other ingredients to jars. When adding cucumbers to jars, make sure you leave enough room for the dill, garlic, mustard seed, black peppercorns, red pepper flakes and celery seed, plus the brine.
- Add brine. Pour in enough brine to cover the cucumbers, making sure to leave a 1/2″ or so at the top.
- Seal and refrigerate. Seal jars to be airtight and refrigerate for at least 5 days. Pickles will last 4-6 weeks after those 5 days.
Helpful Tip!
The best pickles are made with the freshest ingredients, especially the cucumbers. The cucumber skin should be firm, with no deep blemishes. Try to find consistently sized cucumbers, so your pickles will be uniform in size.
Variations of this recipe
- Sweet – these are definitely not sweet pickles, but if you’d like them more on the sweet side, feel free to increase the sugar amount. I’ve not experimented to come up with the perfect amount, but I’d suggest to try 1/2 cup and go from there.
- Spicy – I made these a mild heat level to accommodate most palates, but if you want more of a kick, feel free to add as much red pepper flakes as you want. You could also add some sliced jalapenos, or Thai chiles for some extra heat.
- Cucumbers – I found the cucumbers that had the best crunch were the pickling cucumbers. They may also be labeled as Kirby, or salad cucumbers. They’re shorter than regular cucumbers, with a bumpy and sometimes lighter skin. If you can’t find them, English cucumbers will work as well. They may also be labeled as hothouse or seedless cucumbers.
- Other veggies – I haven’t specifically tested this brine with other veggies, but I think it would work well with green beans, carrots, cauliflower, etc. Whatever you normally like to pickle.

FAQ’s
These are refrigerator pickles, so they stay nice and crisp/fresh just in the refrigerator. However if you wanted to experiment with canning this recipe, you’re certainly welcome too. I just don’t have the canning expertise to advise you.
Making pickles ahead of time
Pickles are a natural make-ahead recipe, as the recipes are designed to be made a little while before you eat them. This recipe was developed so the pickles have a week to sit in the refrigerator.
As tempting as it may be to break the seal and go to town before then, they really taste best when left to sit.
Storage
Refrigerator pickles are good for 4-6 weeks, when kept refrigerated and the lids are sealed after each use.
I like to take a permanent marker and write down the date I made the pickles on the lid, so I’ll know when it’s been 4-6 weeks. Honestly, our pickles never last that long before we devour them!
More Pantry/Basics Recipes:
This recipe was originally posted in June 2020, but has been updated in 2025 with additional information.
Did you make this? Be sure to leave a review below and tag me @the_chunky_chef on Facebook and Instagram!

Ingredients
- 6-7 pickling cucumbers
- 2 cups water
- 1 cup white vinegar (or apple cider vinegar)
- 1 Tbsp kosher salt
- 1/2-1 tsp granulated sugar
- fresh dill
- 4-6 cloves garlic peeled and smashed/roughly chopped
- 10 whole black peppercorns
- 1/2 tsp whole yellow mustard seeds
- 1/4 tsp red pepper flakes
- pinch celery seed
Instructions
Prepare
- Slice 6-7 pickling cucumbers into slices about 1/4" thick, or into spears. Gather glass jars and lids. Set aside.
Make the brine
- In a saucepan, add 2 cups water, 1 cup white vinegar, 1 Tbsp kosher salt, and 1/2-1 tsp granulated sugar (if using), and heat, stirring occasionally, over MED HIGH heat until sugar and salt have dissolved. Set aside to cool to room temperature.
Assemble jars
- While brine is cooling, add cucumbers to jars. Make sure to leave enough room for the brine and other ingredients.
- Add fresh dill, 4-6 cloves garlic, 1/2 tsp whole yellow mustard seeds, 10 whole black peppercorns, 1/4 tsp red pepper flakes, and pinch celery seed.
- Pour in enough brine to cover the cucumbers, making sure to leave a 1/2" or so at the top. Seal jars to be airtight.
Chill
- Refrigerate for at least 5 days. Pickles will last 4-6 weeks after those 5 days, but will lose some of their crispness towards the end of their "shelf" life.
Want to save this recipe for later? Click the heart in the bottom right corner to save to your own recipe box!
Chef Tips
- Recipe makes enough for 2 pint-size jars, or one quart-size jar. Can easily be doubled, tripled, etc for larger batches.
- The amount of dill is left unspecified, as this will vary from person to person.
- Whole pickles or half pickles can be made, but I would prick the skin of the cucumber a few times with a fork to allow the brine to penetrate the skin.
Video
Nutrition Disclaimer
The Chunky Chef is not a dietician or nutritionist, and any nutritional information shared is an estimate. If calorie count and other nutritional values are important to you, we recommend running the ingredients through whichever online nutritional calculator you prefer. Calories can vary quite a bit depending on which brands were used.
Diana says
Amazing recipe & super easy!! We love them!
Pam says
Dill pickles are so easy to make and delicious. I’m not crazy about dill pickles but I don’t stop eating these until there gone!
I give them as gifts and everyone ask when I’m gona make more. Thanks for sharing
Nancy says
WOW! I made pickles for the first time using this recipe and shared with my family and friends that donated to the cause (dill, cucumbers, moral support). 5 stars from everyone! I’m making more tonight:)
Thanks!!!
Camille Telthorster says
Love these pickles!!! Can you make pickled eggs using this recipe too?
Connie says
I make this at least monthly. I only leave out mustard seed and celery seed, only because I keep forgetting to buy it, but I don’t think it suffers without it. My whole family loves them. We used to buy Grillo’s, which we love, all the time, and honestly, this recipe is identical – maybe even better! Thank you so much for this.
Kent A says
So I made this as written, and another har where the only tweak was subbing 1/2 cup of apple cider vinegar for an equal amount of white vinegar. I learned that this really changes everything. The cider vinegar adds flavor, but seriously ups the pucker factor. It also draws out waaay more of the spicy flavors, while masking the dill and garlic. That version was literally the spiciest pickle I’ve ever had short of ghost pepper pickles. That version was a bit painful to eat, but that’s OK too! When I do these again, I’m going to drop the cider vinegar by at least 50%.
The other thing is that if you’re really going for the crunch, there’s plenty of stuff you can add, but the most important thing is to just keep those cukes cold. This is what Claussen puts on their jars, and they definitely know how to keep pickles crunchy.
I heated and cooled the brine, but left the pickles in the fridge until combining. This recipe gave me the crunchiest pickles I’ve ever had, so it’s a really good recipe, highly recommended!
Jerrie Nicholson says
I made the pickles by the recipe minus the sugar. After one week I opened them, they have a nice crunch but are a bit flat in flavor, and have a rather strong vinegar bite.
How can I remedy this? More salt, more garlic? A tad of sugar?
Thank you.
Jerrie
Amanda says
Hmm there’s definitely supposed to be tangy with a bit of zip from the vinegar, but they shouldn’t taste overly vinegar-y. I know you said you didn’t use the sugar, but did you deviate from the recipe in any way? Used the same vinegar, measured correctly, etc?
REBECCA says
THESE ARE AWESOME! THIS WAS MY FIRST TIME MAKING HOMEMADE PICKLES AND I AM SO GLAD I FOUND YOUR RECIPE! I WILL BE MAKING THESE AGAIN AND AGAIN AND AGAIN! ALL OF MY FRIENDS AND FAMILY ABSOLUTELY LOVED THESE AND ARE BEGGING ME TO MAKE MORE! THE ONLY THING I CHANGED WAS THE MUSTARD SEED AND CELERY SEED, ONLY BECAUSE I DIDN’T HAVE ANY AND FORGOT TO BUY THEM WITH THE REST OF MY INGREDIENTS, SO I USED GROUND MUSTARD AND CELERY SALT INSTEAD. I WILL MAKE THEM WITH THE SEEDS NEXT TIME WHEN I AM MORE PREPARED LOL. THE POWDER AND SALT MADE THE BRINE CLOUDY BUT IT STILL TASTED AWESOME!
Jeannie says
I hate it when people review a recipe but actually made so many changes it was nothing like the original and yet … this was a great start and can be tailored to any taste. I love spicy and I am also impatient!! Cut my cukes (English) into slightly thicker slices, put sliced habaneros, thai chilis and garlic into the brine while cooking. The slices fresh jalapeno peppers into the containers with the cukes. Still they were gone in days. Mostly because I kept taste testing them! I also unselfishly drink the spicy brine. Yum!!
afton says
if i eont have access to fresh dill can i use dill spice? how much would I use?
The Chunky Chef says
I’ve not tested it, so I can’t give you an exact amount, but I would start with 2 tsp and go from there 🙂
Robert Garten says
What happens to the pickles after 4-6 weeks?? How do they change? Any danger of toxins after 6 weeks?
The Chunky Chef says
Without extensive testing, I can’t say what will happen after 6 weeks… ours never last that long before they’re gone lol. I would think they’d lose their texture and start to break down. For liability reasons I can’t speak to any danger of toxins, but I’d stick to the timeline I detailed in the post 🙂
Ginger Farmer says
LOVE THE LOOK OF THE PICKLES BUT WAS WONDERING , SINCE DILL IS USED IS THIS A DILL PICKLE.
The Chunky Chef says
Yes, they’re a zesty dill flavor 🙂
Kellee says
Silly question but this is my first attempt at pickles. Are the measurements for garlic, red pepper flakes, etc. for each jar or total?
The Chunky Chef says
Not a silly question at all 🙂 It’s total for the recipe, so you’d divide them amongst the two jars.
Coraline says
Looking forward to trying this recipe! How much dill do you use?
The Chunky Chef says
I used about 2-3 sprigs per jar. I left that amount blank since it will vary from person to person 🙂
Toni says
I will definitely give this a try! It looks delicious!
Sara Welch says
Pickles are my go-to snack! Looking forward to having these on hand to enjoy whenever I’d like!
Kimberly says
LOVE refrigerator pickles, so crunchy, refreshing and easy to make!
Erin | Dinners,Dishes and Dessert says
This Refrigerator pickles looks incredibly delicious!
Suzy says
The perfect way to preserve cucumbers! We loved how easy it was to put together!
Beth says
I love pickles! I can’t to make these right at home! Thanks!