

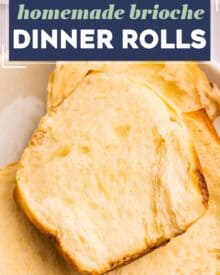
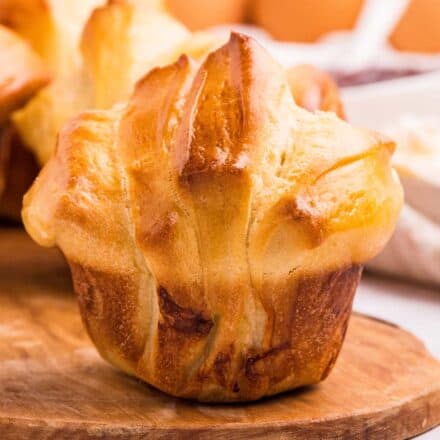
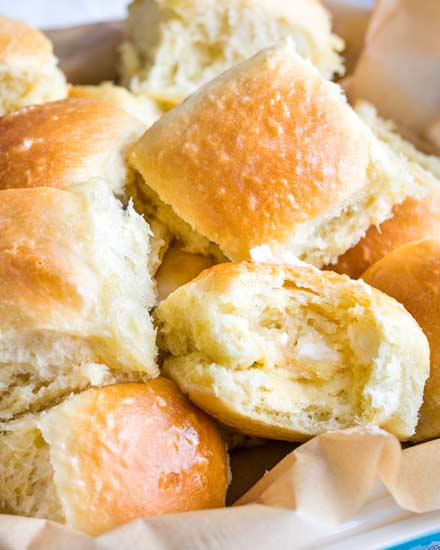
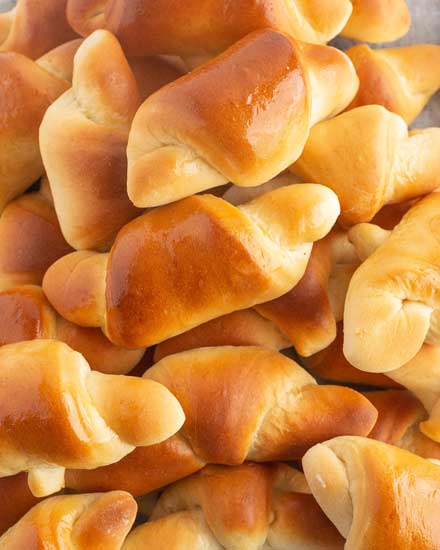
These homemade pull-apart brioche dinner rolls are perfect for your Thanksgiving or holiday dinners! With a make-ahead option, you’ll be amazed at how easy it is to make bakery-quality rolls in your own kitchen!
This is one of my Bread recipes I know you’ll want to keep on hand!
Tis the baking season! This time of year is when everyone’s ovens are working overtime.
If you’re hosting a holiday dinner, serving some homemade dinner rolls will make you a super-star!
And even if you’re just attending a dinner elsewhere, a batch of rolls makes a great gift to bring for the host.
Making these rolls, like making any other yeast bread, takes time. Bread-making is an art-form, and can’t be rushed. Yeast is a living organism; a fungus, which consumes sugar and excretes carbon dioxide and alcohol as by-products.
Basically the yeast “eats” the sugar in the recipe, and then releases the carbon dioxide into air bubbles in the dough and expand them (like blowing a bubble with bubblegum), causing the dough to rise!
Why you’ll love this recipe!
- Amazing taste – a warm homemade dinner roll is hard to beat, taste-wise!
- Make ahead – since oven space and time is at a premium during the holiday season, you can easily make these rolls ahead of time and freeze them!
What do I need to make this recipe?

- Water – just regular tap water, warmed to about 80°F, so just slightly warmer than room temperature. You don’t want it too hot, or it’ll kill the yeast.
- Yeast – I use instant yeast most of the time, but active dry yeast will also work just as well.
- Sugar – I like to use granulated sugar.
- Milk – we always have whole milk on hand, so that’s what I typically use. Other types of milk will also work though.
- Flour – most dinner roll recipes (including my own), usually call for bread flour, but I wanted this one to just use all purpose, since that’s what most people keep on hand.
- Salt – I use kosher salt, but sea salt will also work.
- Eggs – this recipe was tested and developed with large eggs, so using a different size egg will yield different results.
- Butter – I like to use unsalted butter, so I can control the salt level. Salted can be used, just reduce the amount of salt you add.
How to make pull-apart brioche dinner rolls:
This is just an overview; the full ingredients and directions are in the recipe card toward the bottom of this post.
- Proof yeast. This ensures that the yeast is alive and will work in this recipe.
- Start to make the dough. Using just part of the flour allows the ingredients to fully incorporate. This step combines part of the flour, salt, warmed milk, and yeast mixture.
- Add eggs. I prefer to add them one at a time.
- Add butter. You can break the butter up into multiple pieces, or add the whole amount, whichever works best for you.
- Add flour. This is best done in parts, adding 1/3 cup at a time.
- Knead dough. If you have a stand mixer, use the dough hook. If you don’t have one, you can knead by hand.
- Add dough to oiled bowl. The cooking spray/oil keeps the dough from sticking to the sides of the bowl as it rises.
- Rise. You’re looking for the dough to double in size.
- Flatten dough. You can just press the dough into a rectangle or you can use a rolling pin.
- Cut dough. You’re looking for 48 pieces.
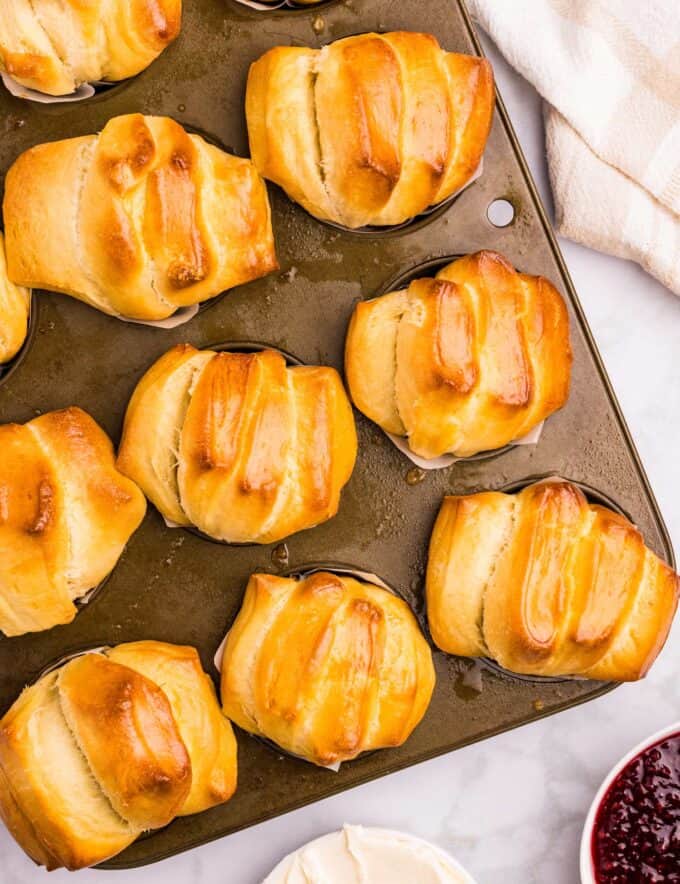
- Add to muffin pan. Using the parchment paper keeps the rolls from sticking to the pan and allows for easier removal.
- Second rise. They won’t really rise per se, but will be a bit puffier.
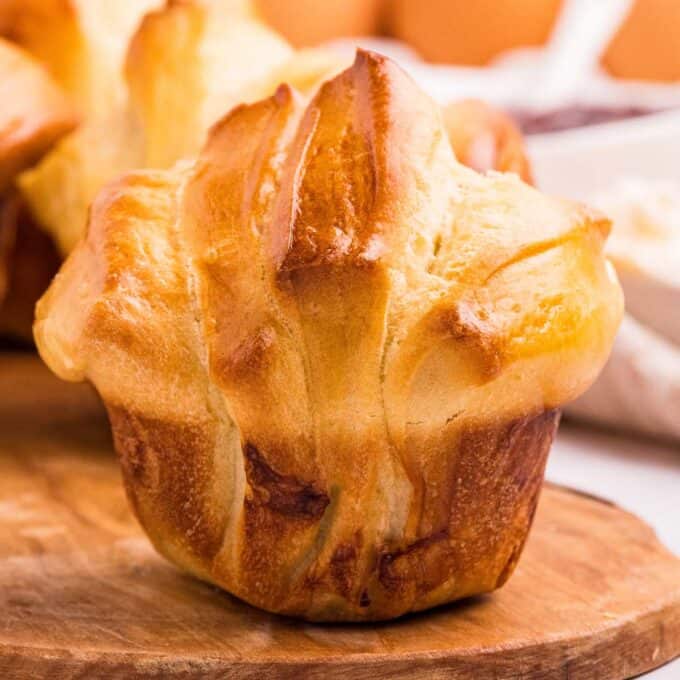
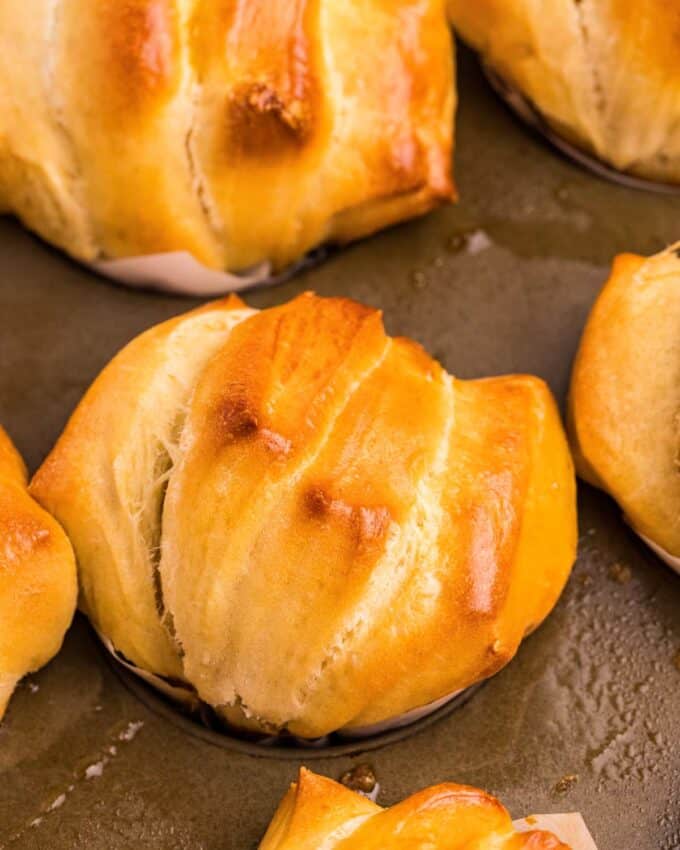
- Bake. After brushing with egg wash, bake until golden brown.
Helpful Tip!
You don’t have to use a stand mixer for this recipe, so don’t be discouraged if you don’t own one. Obviously it’ll be a bit easier, but not required. You can just use a bowl and wooden spoon to mix the dough, but you’ll have to knead by hand until the dough comes together. Hey, at least it’s a good arm workout!
Variations of this recipe
- Milk – I always use whole milk, because that’s what we use in our household, but this recipe will also work using 2%, 1%, and skim. I haven’t tested using non-dairy milks, so use your own discretion.
- Flour – I specifically love this recipe because it uses just regular all purpose flour (since most home cooks don’t always have bread flour on hand). However, if you want to try using bread flour, it should work, the rolls just might have a different texture due to the higher protein and gluten content.
- Honey – you can switch up some of the flavor by swapping out half the sugar with honey.
- Yeast – this recipe has been tested with both dry active yeast and instant yeast, and they work interchangeably. I haven’t tested this recipe using fresh yeast, so if you give it a shot, I’d love to know how it goes!
FAQ’s
My personal favorite is Red Star Platinum Superior Baking Yeast (click for amazon link). It’s an instant yeast, but I still proof it, just to make sure it’s still good. Other yeasts will certainly work too, but I always have this type around because it’s that good 🙂
Making dinner rolls ahead of time
If you’re making these for a holiday or big family dinner, odds are, you have plenty of other things cooking and you’re pretty busy!
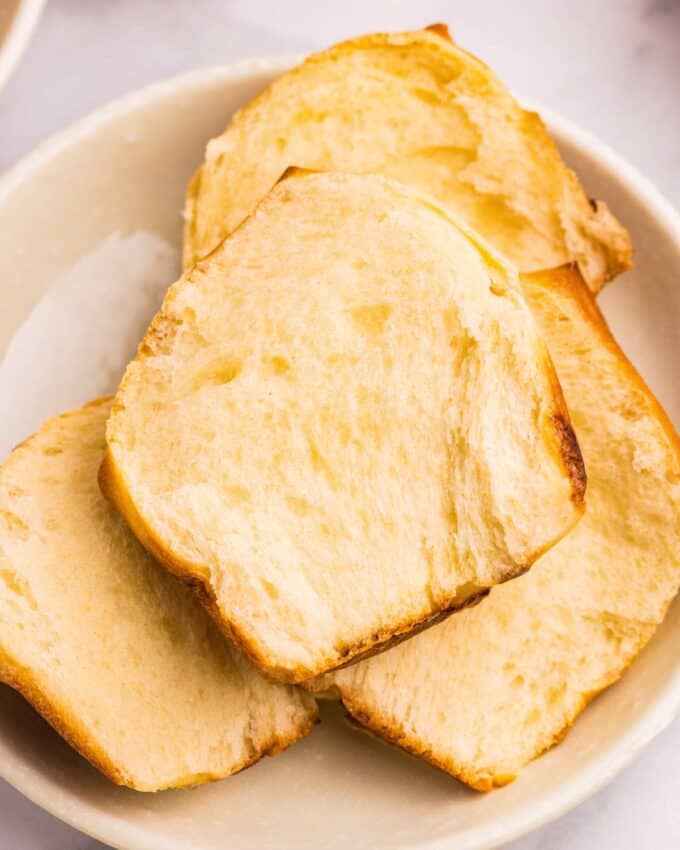
So thankfully, these rolls can easily be made ahead of time! I haven’t tested making the dough ahead, but the rolls can be baked, cooled, and frozen for up to 4-6 months.
Thaw in the refrigerator, and pop them in a 325°F oven for 10-15 minutes, or until warmed. Brush with some softened butter afterwards for a freshly baked texture, flavor, and appearance!

Storage
Leftover dinner rolls will keep for a few days at room temperature (in an airtight container).
Rolls can also be refrigerated in an airtight container for up to a week.

Tips for working with yeast!
If you’ve never worked with yeast before, it can be a little intimidating. But I promise it’s not quite as difficult as it may seem, and you CAN do this!
- No stand mixer – you don’t have to use one, so don’t be discouraged if you don’t own one. You can just use a bowl and wooden spoon, but you’ll have to knead by hand until the dough comes together.
- Proof your yeast – after sitting with the warm water, the yeast should be frothy and foamy looking. Sometimes yeast can be older than we think, and it just won’t activate and work. Proofing means you don’t have to make the whole dough before finding out the yeast was dead! If it doesn’t foam up, then that yeast is likely dead and won’t work for this recipe. Start the recipe over with a new batch of yeast.
- Make your own warm spot for the dough – most people, myself included, don’t know where a naturally warm spot is in their kitchen… or maybe it’s the dead of winter and there’s no warmth anywhere. No worries! Preheat your oven to 200°F and let it preheat for about 3-4 minutes. Then turn your oven OFF, don’t let it get all the way to 200°F. Place the bowl of dough in the oven to rise. Alternately, you can turn on the light in your cold oven and add the bowl of dough to the oven with the door shut.
- Not picture perfect – don’t worry if your dinner rolls aren’t absolutely perfect in shape. Odds are, they won’t be… mine never are anyway! Homemade breads are supposed to be a bit rustic, and once people take a bite, they won’t care what they look like… trust me!
- Just breathe – first things first, take a deep breath. If you’ve never worked with yeast before, you can still make these. Working with yeast isn’t as difficult as it’s made out to be… it just takes some time. You have to have a little patience 🙂
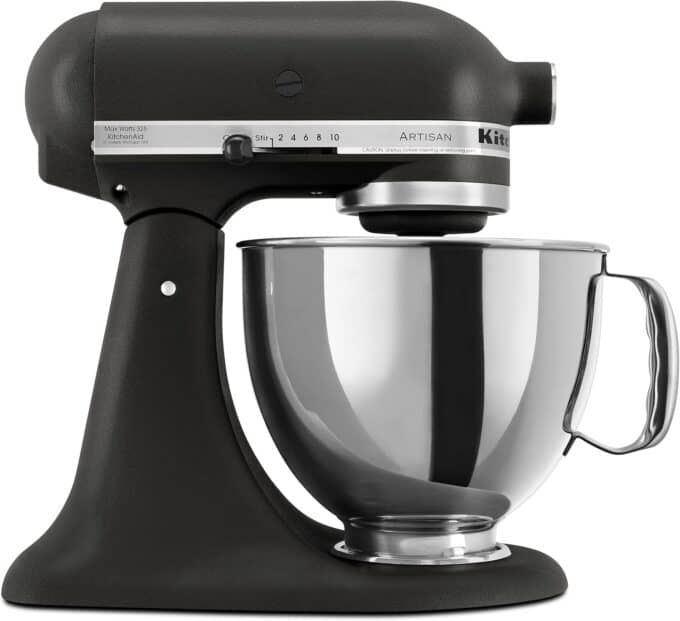
My Favorite Stand Mixer!
While not a requirement, if you have one or are in the market for one, a stand mixer makes kneading the dough so much easier!
Did you make this? Be sure to leave a review below and tag me @the_chunky_chef on Facebook and Instagram!
Ingredients
Dough
- 1/4 cup water warmed to about 80°F
- 1 packet (2 1/4 tsp) active dry yeast
- 1/4 cup granulated sugar divided
- 3/4 cup whole milk warmed to about 90°F
- 5 1/2 cups all purpose flour divided
- 1 1/2 tsp kosher salt
- 3 large eggs
- 1/2 cup unsalted butter softened to room temperature
Egg wash
- 1 large egg
- 1 Tbsp water
Instructions
Proof yeast
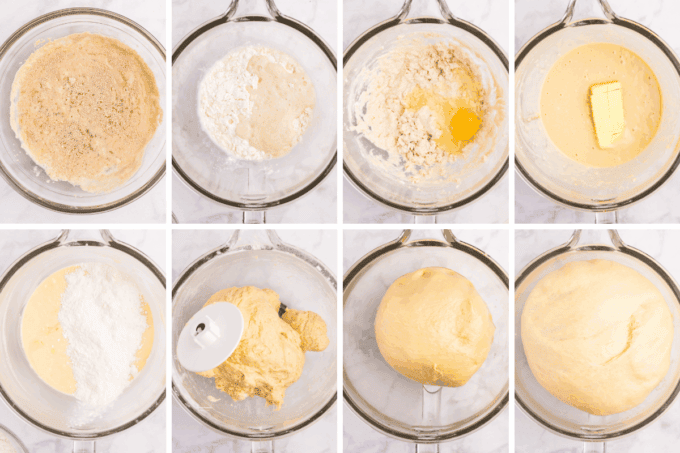
- To a small bowl, add 1/4 cup water, 1 packet (2 1/4 tsp) active dry yeast, and 1 Tbsp of the 1/4 cup granulated sugar. Stir to combine and set aside.
Warm milk
- Add 3/4 cup whole milk and remaining granulated sugar. Heat over MED LOW heat until the milk is about 90°F. An instant read thermometer works great for this, or you can test it and it should feel like a baby's warm bath water.
Start mixing dough
- To the bowl of a stand mixer fixed with the whisk or paddle attachment, add 2 cups of the 5 1/2 cups all purpose flour, 1 1/2 tsp kosher salt, the water/yeast mixture you made earlier, and the warmed milk.
- Turn mixer on LOW and mix until combined.
- Add 3 large eggs, one at a time, as the mixer is running, and then add 1/2 cup unsalted butter.
Finish and knead dough
- Once the eggs and butter are incorporated, switch out the paddle/whisk attachment for the dough hook.
- Slowly add the remaining flour, 1/3 cup at a time, mixing in between each addition. Due to different humidity amounts and elevations, you may not need all the flour, or you may need a bit more. You'll know you've added enough flour when the dough starts to pull away from the sides of the bowl.
- Increase mixer speed to about MED, and let the dough hook knead the dough for about 5 minutes, until the dough is smooth and elastic.
Let dough rise
- Spray a large mixing bowl with cooking spray, then transfer the dough to that bowl. Cover with a clean kitchen towel and let rise for about 2 hours, or until the dough has doubled in size.
- ** If you'd rather not use another bowl, you can transfer the dough to a clean surface, then spray the stand mixer bowl with cooking spray, and transfer the dough back to that bowl. **
Cut dough
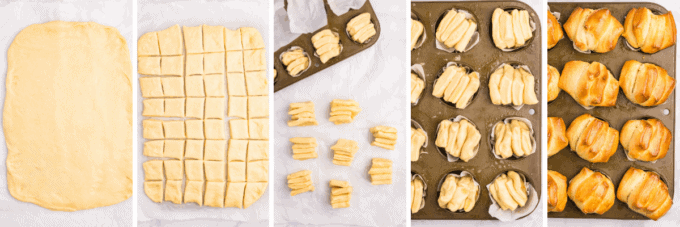
- Turn the dough out onto a clean, dry surface (I use my counter top), and flatten/roll the dough into a rectangle or square that's about 1/2" thick.
- Cut the dough into 48 similarly sized squares. I do this by cutting the dough in 4 vertical slices, then cut each slice into thirds, then cut each of the thirds into fourths.
- Cut a piece of parchment paper into 12 squares about 4×4" in size.
Second rise and bake
- Spray a muffin pan with cooking spray, and add the parchment squares over each well of the muffin pan.
- Stack 4 pieces of the cut dough on top of each other, then transfer to a parchment-lined muffin well.
- Repeat with the remaining pieces of dough, so you have 12 rolls.
- Preheat oven to 350°F.
- Cover loosely with plastic wrap or a lint-free kitchen towel and let rise for 10-15 minutes.
- In a small mixing bowl, combine 1 large egg with 1 Tbsp water, whisking until smooth. Brush this egg wash over each of the rolls.
- Bake in preheated oven for 30 minutes, or until golden brown and cooked through.
Serve
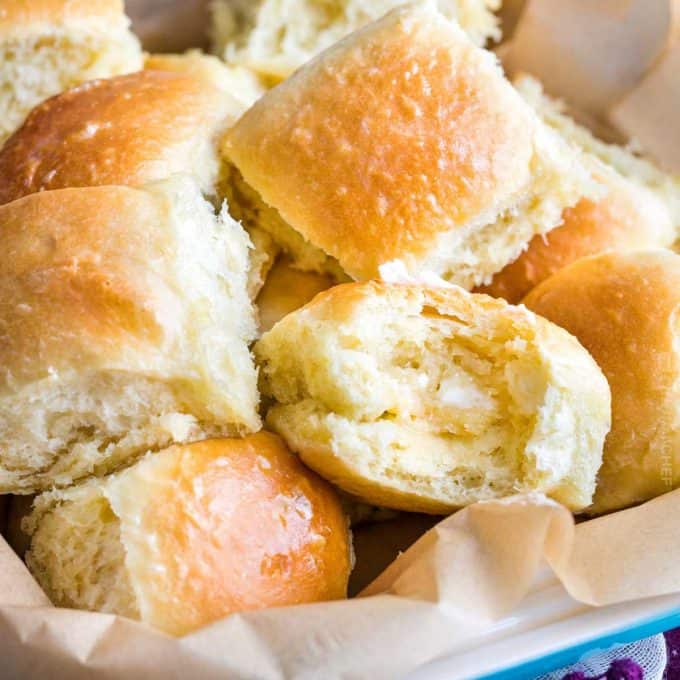
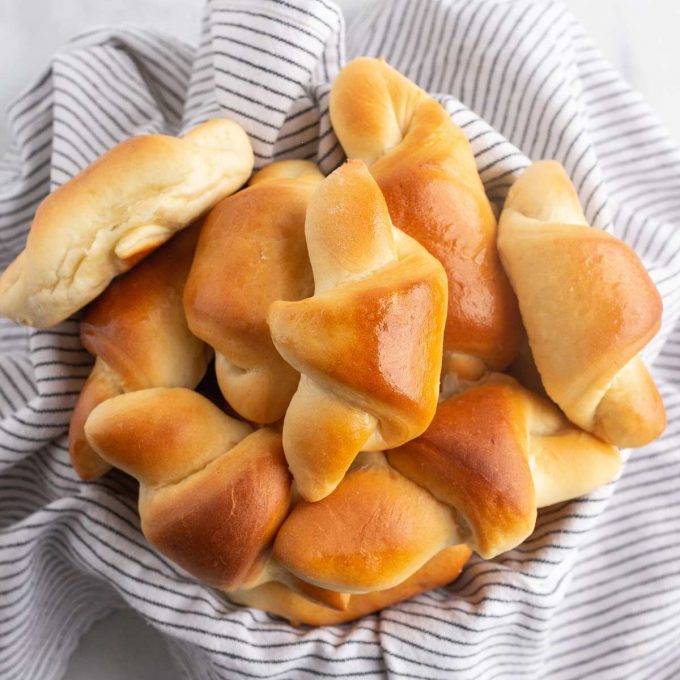
- Remove pan from the oven and carefully remove the rolls from the muffin pan. Let cool slightly and serve warm or at room temperature, with some butter or jam.
Want to save this recipe for later? Click the heart in the bottom right corner to save to your own recipe box!
Chef Tips
- This recipe makes 12 rolls, which you’re free to divide into as many servings as you’d like.
Nutrition Disclaimer
The Chunky Chef is not a dietician or nutritionist, and any nutritional information shared is an estimate. If calorie count and other nutritional values are important to you, we recommend running the ingredients through whichever online nutritional calculator you prefer. Calories can vary quite a bit depending on which brands were used.
Leave a Comment