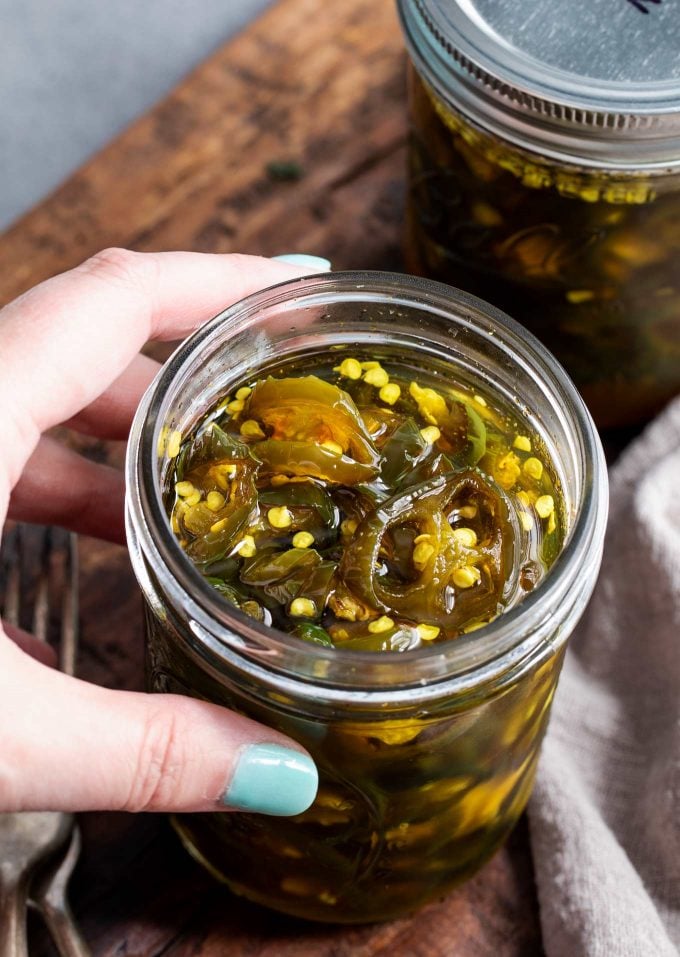
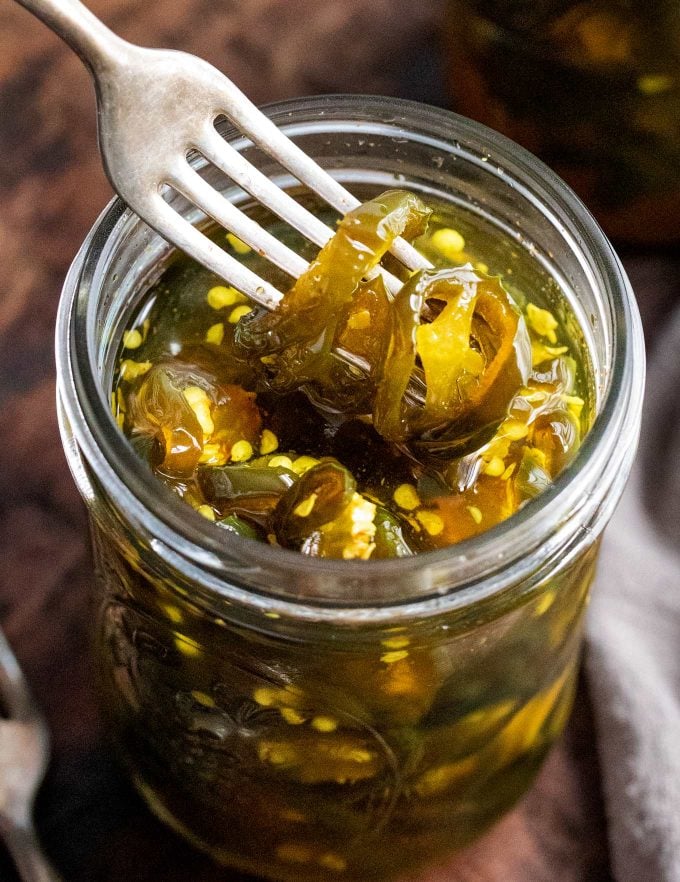
Candied Jalapeno are the perfect combination of sweet and spicy! Perfect on burgers, sandwiches, nachos, or just by themselves!
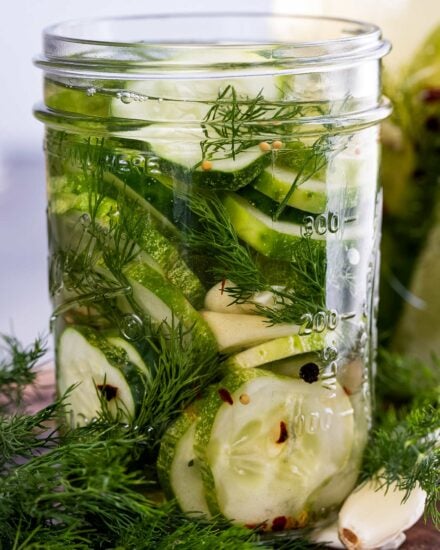
This candied jalapenos recipe has rapidly become a true family favorite! Perfect on sandwiches and so much more. We also love easy condiment recipes like my Creamy Beer Cheese, and Refrigerator Dill Pickles.
I don’t know about you, but this time of year I go condiment crazy. Give me all the pickles, all the bbq sauces, and all the candied jalapenos!!
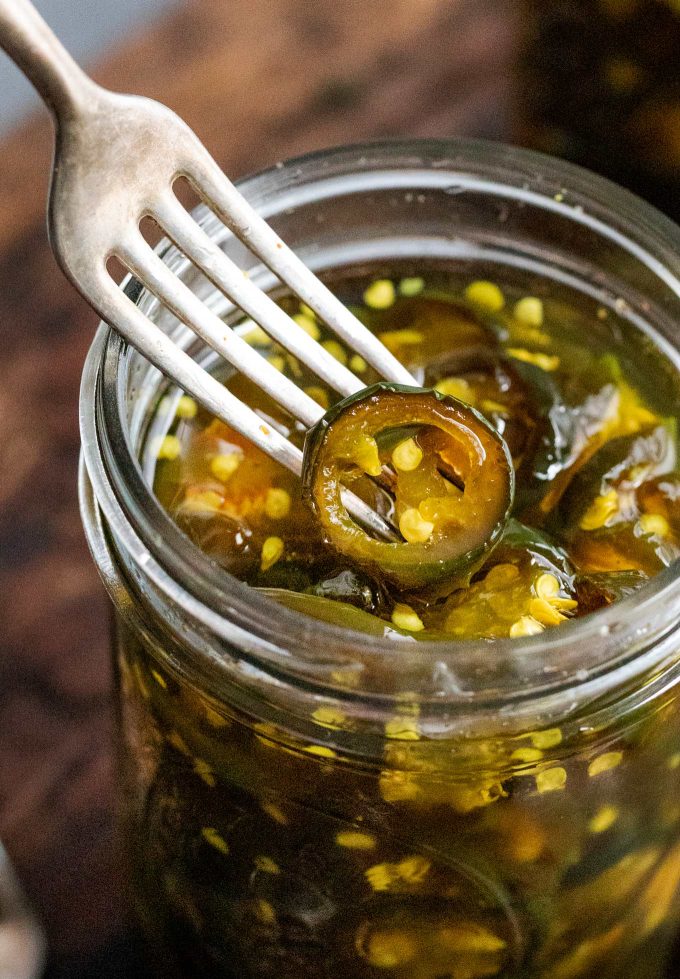
If you’ve never had a candied jalapeno, boy oh boy are you in for a treat my friend. They’re truly the perfect balance of sweetness and spiciness. The sugar tames the sharp heat from the jalapeno, turning it into this mouthwatering little gem.
They’re great on so many things… I’d be hard pressed to list them all! Nachos, pulled pork/chicken, burgers, sandwiches, chopped up on hot dogs, in potato/macaroni salads, in egg salad, on a cracker or bagel with some cream cheese, or just with a fork.
I found a similar recipe in an old church cookbook I’d had for a long while, and did some tweaking to our tastes a couple years back… and ever since then, it’s been a staple in our refrigerator!
And don’t worry if you’re nervous about canning or worried you don’t have the necessary supplies to can, as there’s actually no canning going on here! Just like my Refrigerator Dill Pickles, these babies just hang out in the refrigerator. No water baths necessary!
Of course, you can actually can them if you’d like. They’ll have a much longer shelf life that way, but I wanted to share the shortcut way here today 🙂
How to make candied jalapeños
- Slice peppers. You’re looking for slices about 1/4 inch thick. Set them aside for now.
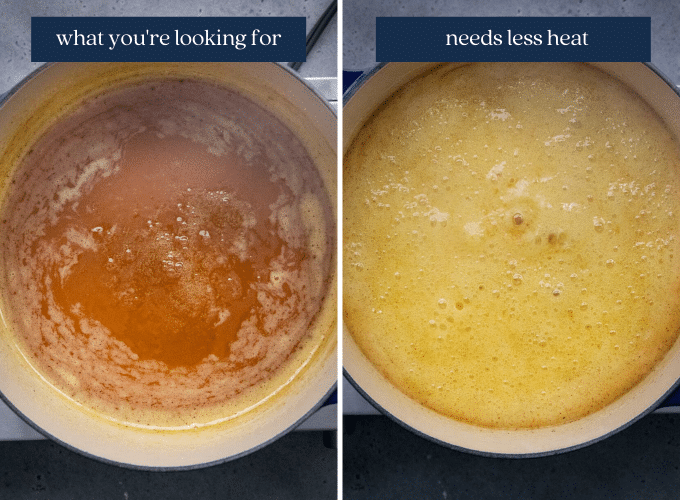
- Bring syrup mixture to a boil. Add vinegar, sugar, and spices to a large pot and heat until boiling. Once the mixture boils, reduce the heat and simmer for about 5 minutes. If you notice your mixture starts to foam up a lot, like the picture on the right, decrease your heat and stir it a bit to get it to calm down.

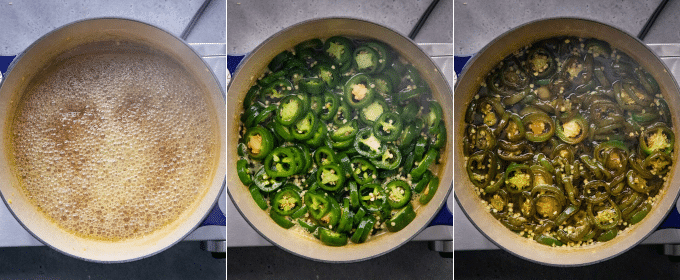
- Bring back to boil, then add peppers. Increase the heat and bring the mixture back up to a boil. Once boiling, add your sliced peppers, and allow to come back to a boil. Once boiling, reduce heat and simmer for about 4 minutes.

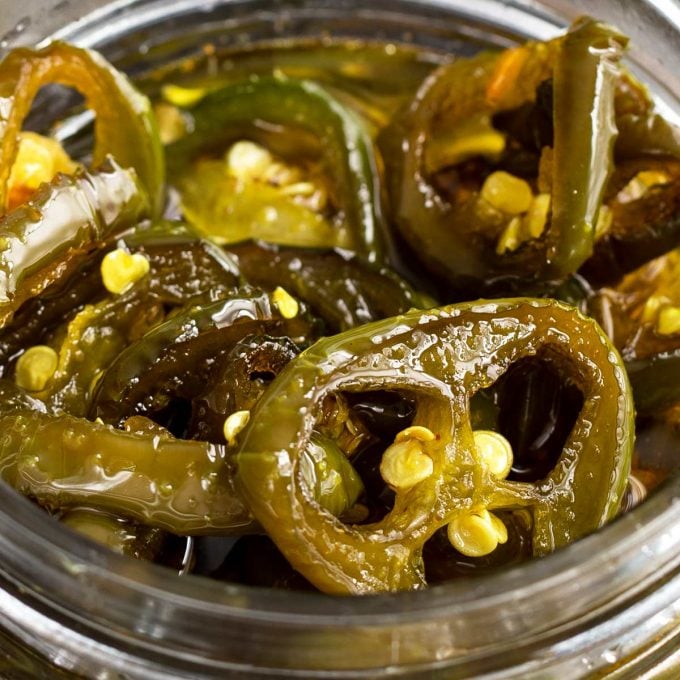
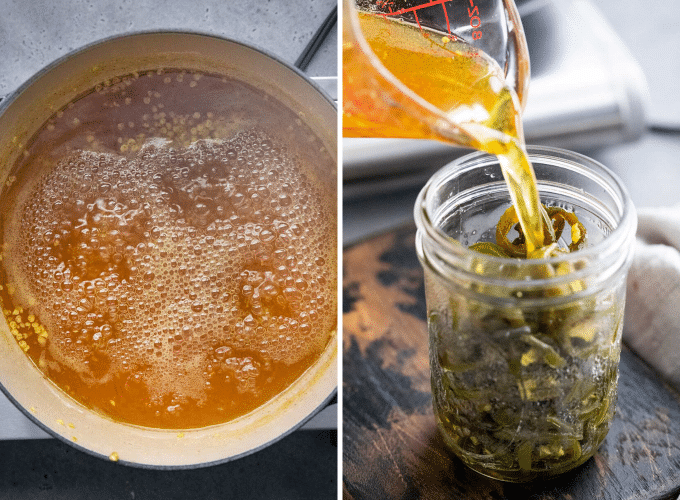
- Transfer peppers to jars. I like to use a slotted spoon to leave as much of the liquid in the pot as possible. Fill the jars to within about 1/4-1/2″ of the top of the jar.
- Boil the syrup and add to jars. Increase the heat again and bring the syrup to a full rolling boil. Boil for about 6 minutes. Either ladle, or transfer syrup to a pitcher to pour into the glass jars with the peppers. Fill the jars to within about 1/4-1/2″ of the top of the jar.
- Wipe rims, seal and refrigerate. Wipe the rims of jars with a damp paper towel and screw on canning jar lids. Refrigerate for at least 1-2 weeks (3-4 weeks for optimal flavor and texture).
ADDITIONAL COOKING TIPS
- Fresh is best – The best candied jalapeños are made with the freshest jalapeños. The pepper skin should be firm, with no deep blemishes. Try to find consistently sized peppers, so your slices will be uniform in size.
- Slicing – since you’ll be slicing 1.5 lbs of peppers, you’ll want a sharp knife and steady hand, a food processor with the slicing blade attached, or a mandoline.
- Gloves – jalapeños are notorious for varying in heat level, so to error on the side of caution, I like to wear disposable gloves when working with them. The oils from cutting peppers can get onto your skin and cause burning and skin irritation. And god forbid you do something like rub your nose or eye before you’ve THOROUGHLY washed your hands. Don’t ask me me how I know just how bad it’ll hurt… So trust me, glove up.
VARIATIONS OF THIS RECIPE
- Double – as crazy as it may sounds, once you try these sweet and spicy jalapeños, you might want to make a double batch the next time. This recipe is easily doubled… just make sure to double ALL the ingredients, but keep the cooking process and times the same.
-
If you hover over the serving size number in the recipe card down below, a slider bar will pop up. Just slide the bar in either direction, until the number of servings you want shows, and it’ll automatically calculate the correct amount of each ingredient!
-
- Peppers – technically you can “candy” any pepper, so if you’re up for it, you can try using hotter peppers, like serranos or habaneros! Keep the process the same.
- Milder – while candying tames the heat of the jalapenos quite a bit, if you’re really worried about the heat, you can core the peppers before slicing.
Making candied jalapeños ahead of time
This is a natural make-ahead recipe, as the jalapenos need a good couple of weeks to plump back up and for the flavors to mellow out and mesh together.
If I’m patient enough, I like to wait for 3-4 weeks before opening a jar, but let’s face it… sometimes I just want the sweet-heat goodness before then. 1-2 weeks is a good middle ground.
Storage
Candied jalapenos should be sealed in an airtight container and refrigerated. They should last about 2-3 months when kept refrigerated and the lids are sealed after each use.
I like to take a permanent marker and write down the date I made the pickles on the lid, so I’ll know when it’s been 2-3 months. Honestly, our’s never last that long before we devour them!
If you wanted to can them via a traditional water bath, they can last a good year in the pantry. But again, that’s only if you’ve canned them.
SPECIAL EQUIPMENT FOR THIS RECIPE
- Pint-sized Jars – I prefer these wide-mouth jars, as they’re easier to fill.
- Large pot – you can use any large pot, but I like to bust out my trusty dutch oven for this.
- Disposable gloves – your grocery store will likely have a much better price on these, but I wanted to show you the kind I like to use.
Did you make this? Be sure to leave a review below and tag me @the_chunky_chef on Facebook and Instagram!
Ingredients
- 1 1/2 lbs fresh jalapenos (about 30 peppers)
- 1 cup apple cider vinegar
- 3 cups granulated sugar
- 1 tsp garlic powder
- 1/4 tsp ground turmeric
- 1/4 tsp celery seed
Instructions
- Remove and discard stems from peppers, then slice into 1/4" slices. Set pepper slices aside.
- To a large pot, add cider vinegar, white sugar, garlic powder, turmeric, and celery seed and bring to a boil. Reduce heat to about MED LOW and simmer for 5 minutes.
- Raise the heat to about MED HIGH to bring mixture back to a boil. Once boiling, add the pepper slices. Allow to return to a boil, then reduce the heat again (to about MED LOW) and simmer for 4 minutes.
- Transfer the peppers using a slotted spoon to clean glass canning jars, filling jars to within 1/4 inch of the upper rim of the jar.
- Only the syrup should remain in the pot at this point. Increase the heat to bring to a full rolling boil. Boil like that for approximately 6 minutes.
- Ladle the syrup into the jars with the jalapeno slices. If you notice any air pockets, take a clean spoon and insert it into the jar to get rid of the trapped air. Fill jars to within 1/4-1/2" from the upper rim of the jar.
- Wipe the rims of the jars with a damp paper towel, then screw on canning jar lids. Label if desired and refrigerate for at least 1-2 weeks (3-4 weeks for optimal flavor). Candied jalapenos are good for up to 3 months if kept properly refrigerated.
Want to save this recipe for later? Click the heart in the bottom right corner to save to your own recipe box!
Chef Tips
- Recipe makes enough to fill approximately 2 pint sized jars.
- This recipe has not been tested with sugar substitutes or with reducing the amount of sugar – make changes at your own discretion and using your best judgement.
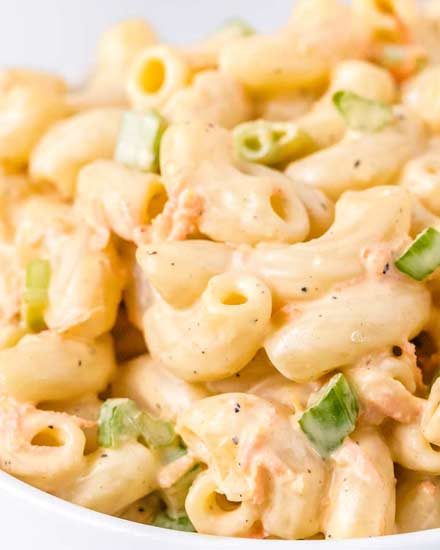
- Leftover syrup can be stored in glass jars as well. I love to add it to my macaroni/potato salad. It’s also amazing brushed on bacon!
Nutrition Disclaimer
The Chunky Chef is not a dietician or nutritionist, and any nutritional information shared is an estimate. If calorie count and other nutritional values are important to you, we recommend running the ingredients through whichever online nutritional calculator you prefer. Calories can vary quite a bit depending on which brands were used.
Dani Mcdonald says
I can’t wait to make this recipe. I make jalapeño jelly and this sounds just as versatile and yummy. My question is. Is there any reason I couldn’t double the recipe?
The Chunky Chef says
I haven’t tested doubling it, but I think it should work well 🙂
Julie H says
I keep getting requests for these from friends and family. I give jars as Christmas gifts since I grow my own peppers and it’s warm enough in the Deep South to grow them well into September. I use both hot banana peppers and jalapeños. Everyone loves them. Great recipe!
Bob Campbell says
Everyone love the Sweet Heat. I grow my own peppers and typically use several different varieties of hot peppers. This will be my third year making this recipe. I’ve given them away as Christmas Gifts because the red and green jalapenos look so festive.
J. J. says
I made these Sunday with jalapenos that I grew. We tried to wait for 2 weeks, but my husband and I have already been in them. I cored as many as I could and the heat level is just right. However, I noticed that some of the slices were tough (dry weather and stayed on the plant too long?) and I wondered if they will have softened up in 2 weeks or should I have cooked them a little longer? It’s a great recipe!
Bob Stockton says
Great recipe. Many compliments everytime I make them.
Lina Camp says
These are awesome
Christal wise says
I have canned these many times and it works great. I have some from 2 summer’s ago and they are still good since I did them in a water bath.
Rene says
When you say you canned them, are you talking about pressure canned or just the water bath?
Kylie Maak says
WB-pressure canning isn’t necessary as there’s enough acid
Caitlin F says
Can you use celery salt if you don’t have celery seeds?
The Chunky Chef says
I would guess so, but I’ve only tested this recipe as written.
Karen B says
I made these for Christmas gifts for my adult niece and nephews. They went through them in no time and were asking for more! Making them again this week and will can them soI can surprise them at Christmas again. Great recipe.
Terri Benson says
What a great idea! I have 3 sons and 2 grandsons. They will all go crazy!
Susan Callahan says
I think the recipe is terrific! I did try it day one and two and found I should have cored the japelenos, but I think in time it will be great.
Loved the simplicity of the recipe, I did use one cup jars and did the traditional canning for the pantry.
Terri Benson says
Thanks! That’s what I want to do, too! Figure boil in canner for 10 minutes.
Janet S Bentley says
How long did you pressure can or water bath these for the pantry
Kylie Maak says
10 mins 1/4 in headspace
Susan Callahan says
Excellent recipe, I made the candied japelenos and they were great, hot because of the peppers. I used the rest of the syrup in my macaroni salad and it was terrific!
Shelby says
I forgot to let the syrup boil for 6 mins after I put the peppers into the jars. Will it still be ok?
The Chunky Chef says
It may be pretty thin, but I can’t say for certain, since I’ve only made/tested this recipe as written.
Debbie says
If canning, do these need to be refrigerated or can they be left out?
The Chunky Chef says
I don’t have canning expertise, which is why I like these that don’t require canning. If you do some experimenting with canning, I’d love to know how it goes 🙂
Karen B says
I have canned preserved these before in July and given them as Christmas presents. The only complaint I got was “wish you had given us bigger jars!”
Christal wise says
I have canned these many times and it works great. I have some from 2 summer’s ago and they are still good since I did them in a water bath.
Beth says
How long do you process them in a canner?
Kylie Maak says
If you can properly they will be sealed and shelf stable -needing no refrigeration
1/4 in headspace 10 min WB
Andrew says
I too made the decision to cook down the syrup a little longer. It’s a game changer to an already amazing recipe.
I’m currently prepping for a 12 lb batch and this is the only recipe I’ll use. The guys at work harass me until I make them for them. 😂 They go fast!
Matthew Holley says
ChunkyChef is my go-to for several things, esp cowboy candy and homemade mac!
For a little “extra” cowboy flavor, I typically add a liberal amount of liquid smoke. It isn’t overpowering to the overall taste, but compliments the sweet heat very well. SAVE THE JUICE. I marinate chicken and steak in the juice for incredible fajitas on the griddle
Lola says
Do these freeze well?
The Chunky Chef says
I haven’t tested freezing this recipe, so I can’t say for certain how well that would work. If you do some experimenting, I’d love to know how it turns out!
Dave says
I don’t usually leave comments on recipes but this one is perfect. The ratios and ingredients were spot on and man, these jalapeños turned out amazing! I doubled the recipe which left a ton of spicy liquid so we used it to make spicy margaritas. I also can’t wait to chop some jalapeños up to put in my cornbread!
Laurie says
Tried these today for the first time in my life. They’re still warm, but I tried a couple. They are delicious. I make peasant bread and I wanna make jalapeño peasant bread with some cheese. Someone suggested to use candied jalapeños, so I made a batch of these. Thank you for the recipe.
I would leave a picture, but I don’t see a way to do that.
The Chunky Chef says
So glad to hear that you like them! Unfortunately, for spam reasons, I don’t allow readers to post photos (I’m sure you could imagine the kinds of photos I would receive). But if you have social media, I’m on Facebook, Instagram, and Pinterest and would love to see what you made!
Karen S says
Has anyone tried freezing these?
Lauren says
I’ve made this recipe so many times and have share it even more! The only change I’ve made is to boil the liquid a bit longer to make it thicker.