
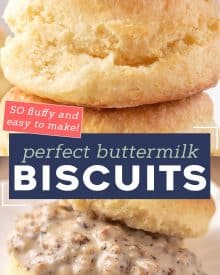

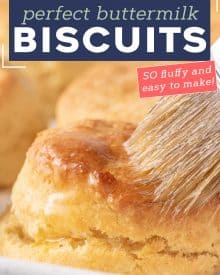
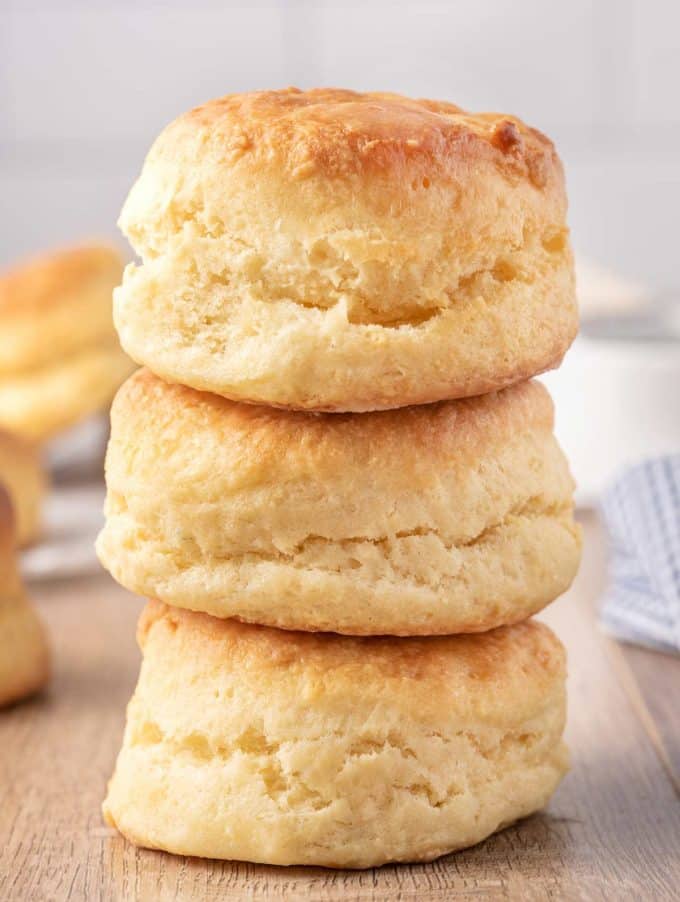
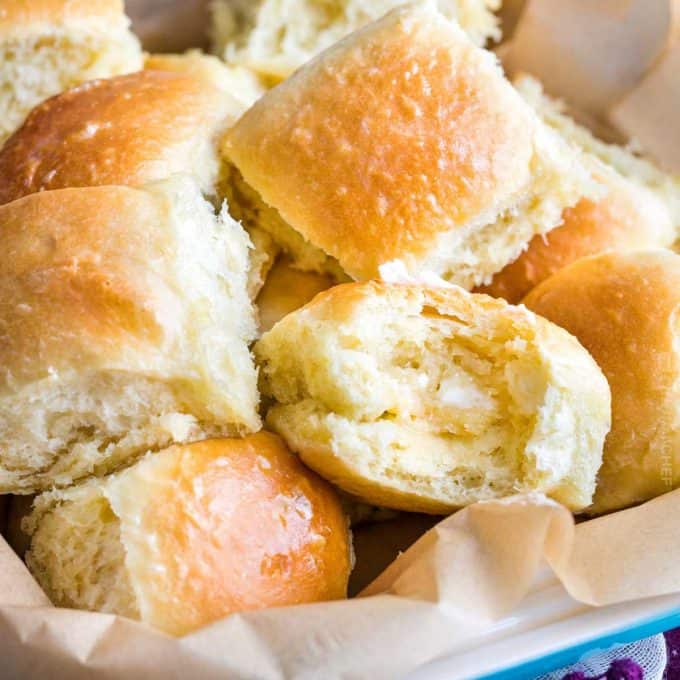
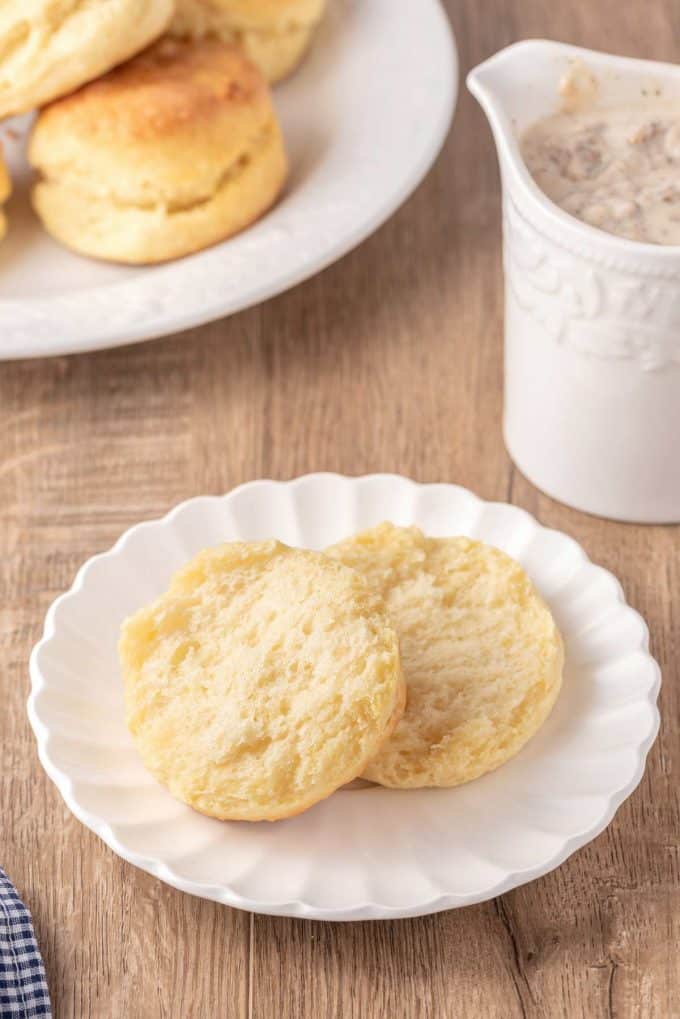
Learn how to make the BEST Buttermilk Biscuits from scratch! They’re so light and flaky, and plenty fluffy. Perfect for topping with sausage gravy, butter, honey or jam!
This is part of a series of recipes here on the site that I’m calling “Back to Basics“. In this series you’ll find recipes that are common building blocks for beginner cooks, as well as homemade versions of pantry/store-bought staples, such as cream of mushroom soup, pie crust, garlic bread, etc. With easy to follow instructions, detailed notes, and step by step photos, you’ll be on your way to being a master in your kitchen in no time!
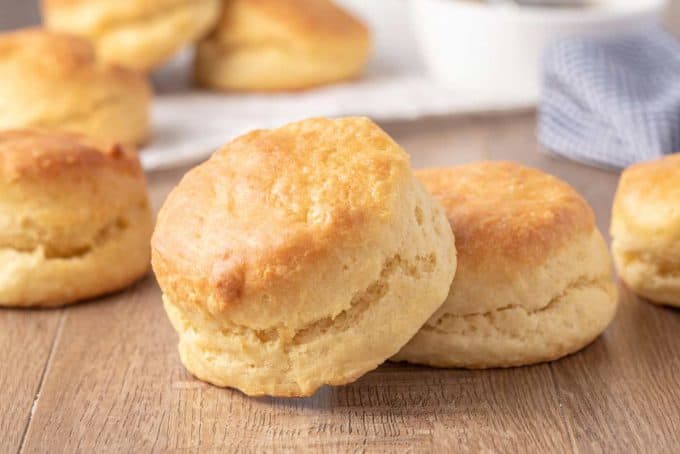
Is there anything better than a hot, buttery, fluffy biscuit? I mean you can eat them plain, or top them with just about anything!
Until about 10 years ago, for me, making biscuits usually involved opening a can… you know, the one that you peel the label and twist the can and it pops open (scaring you half to death)?
They were decent, but I always wanted to be able to serve up some amazing homemade biscuits. So of course I set about trying to make the very best biscuits.
Because once you try homemade biscuits, you won’t want to go back!
This recipe has been on the blog for years (since 2015), but it needed some new beautiful photos and super clear step by step instructions. So let’s dive in!
How to make buttermilk biscuits?
This is just an overview; the full ingredients and directions are in the recipe card toward the bottom of this post.
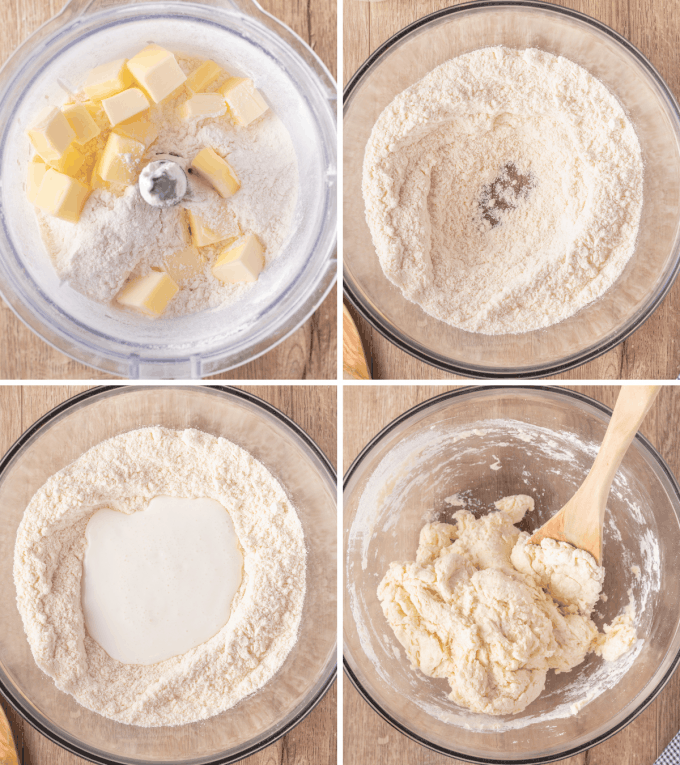
- Add the dry ingredients to a food processor. Top with cold cubes of butter.
- Pulse. Just pulse until coarse crumbs appear. Small pea-sized pieces of butter are great.
- Add to mixing bowl and make a well in the center. Pour in cold buttermilk.
- Stir until combined. Dough should be slightly sticky/tacky.
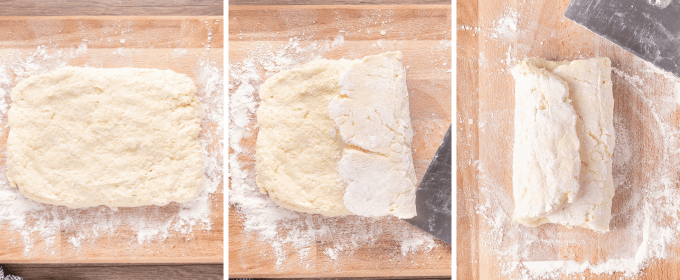
- Flour a work surface and turn out dough. If you have a big cutting board that will work, or you can just use your counter.
- Pat dough into a rectangle. You’re shooting for about 8-9 inches long.
- Fold the right side in towards the middle. Like you would if you were trifolding a piece of paper.
- Fold the left side in towards the middle.
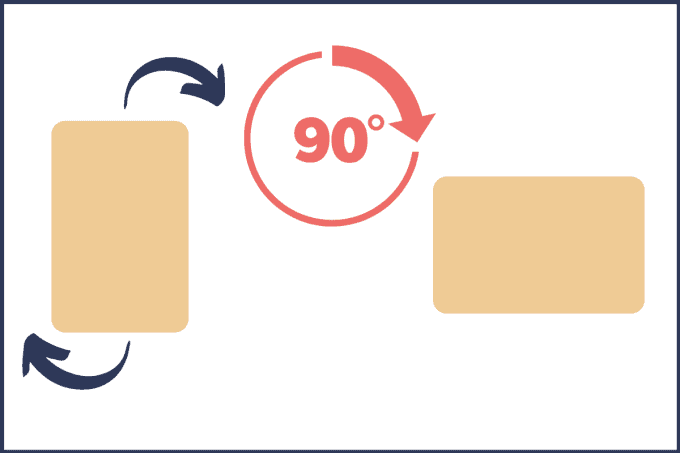
- Rotate the folded dough a quarter turn. After folding, the dough should be a vertical folded rectangle. Turn it to be horizontal.
- Pat dough down into 8-9 inch flat rectangle again.
- Repeat trifold folding process from process images above. Right into the middle, then left into the middle.
- You can technically stop here, as you’ve done the folding process twice. But for even more layers, rotate the dough a quarter turn again, pat it down, and trifold it one more time.
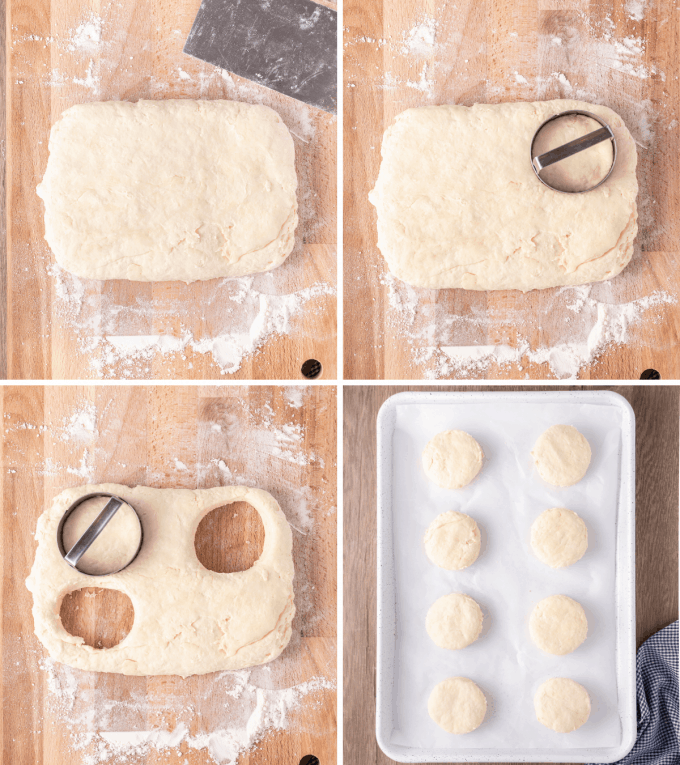
- Pat down the dough into a flat rectangle again. You’re shooting for about 1 inch thick.
- Use biscuit cutter to cut out as many biscuits as you can get from your rectangle. I can normally get about 4.
- Gather dough scraps together and re-pat into a flat, 1 inch rectangle.
- Cut out more biscuits. Again, I get about 4.
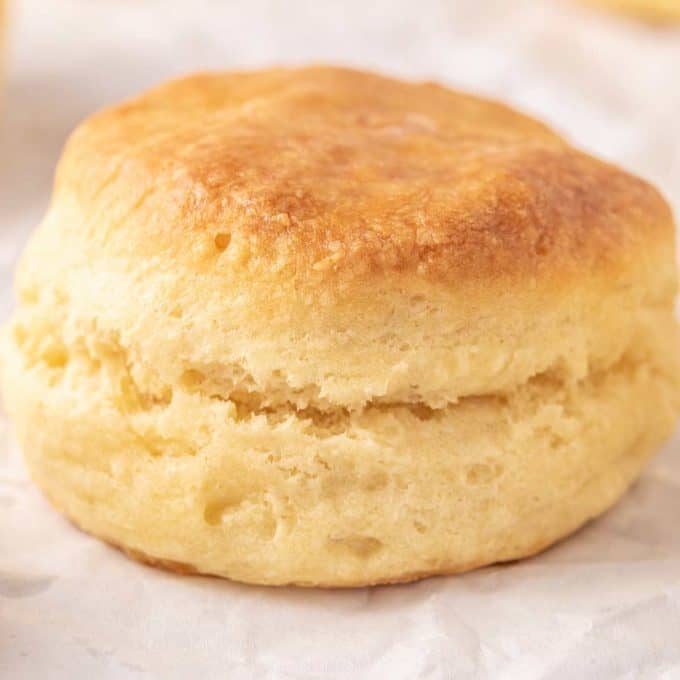
- Add biscuits to baking sheet and bake until golden brown and cooked through. This will take about 12-15 minutes.
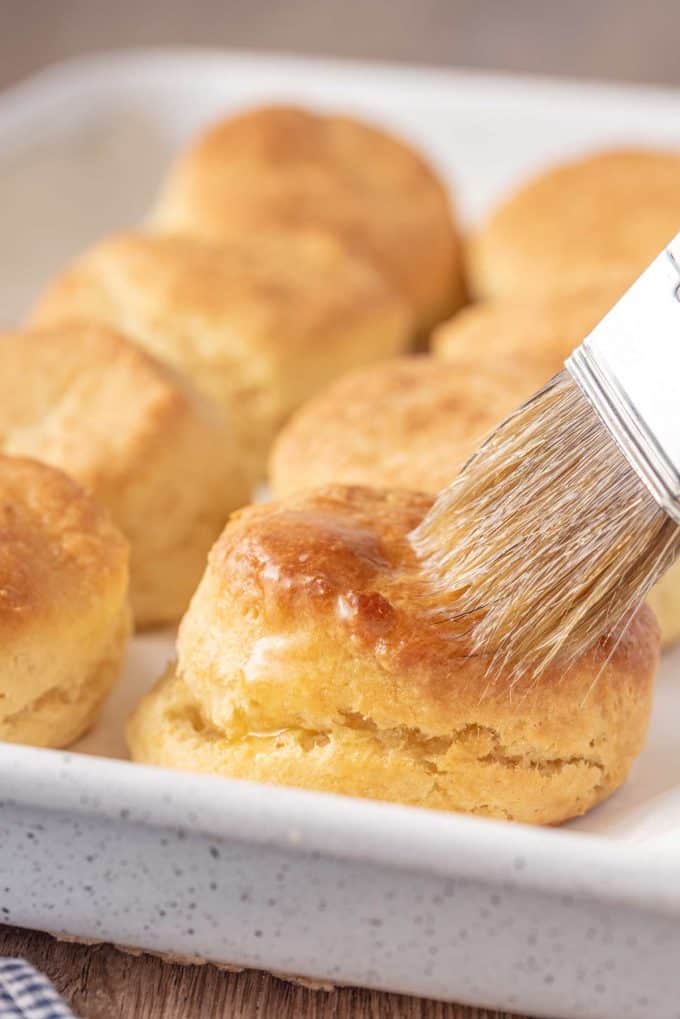
- Brush with melted butter if desired.
Helpful Tip!
When cutting the biscuit dough, don’t twist the biscuit cutter. Just push down, then pull straight up. If you twist, you run the risk of the twisting motion “sealing” the edges of the dough and inhibiting the rising process. For the tallest biscuits, don’t twist!
Variations of this recipe
- Honey – try swapping the granulated sugar for honey (and add it with the buttermilk). It adds a beautiful flavor!
- Self rising flour – if you have self rising flour, you can use it for this recipe! Just omit the salt and decrease the baking powder to 1 1/2 tsp.
- Buttermilk substitute – if you don’t have buttermilk on hand, you can make your own! Mix 1 Tbsp lemon juice or white vinegar with whole milk and let it sit about 10 minutes. It will look a bit curdled. Stir and use.
- Cast iron skillet – these biscuits can absolutely be baked in a cast iron skillet! No need to use parchment paper in that case, just add the biscuits and bake as directed.
- Cheese biscuits – try adding 1/3-1/2 cup shredded cheddar cheese (or your favorite) to the biscuit dough.
- Garlic herb biscuits – add 1/2 tsp each garlic powder, dried parsley, and dried chives.
FAQ’s
Buttermilk does two main things in this biscuit recipe. First, it adds a beautiful slight tang to the flavor of the biscuits. Secondly, it reacts with the leavening agents in the dough (the baking soda/powder) to help the biscuits rise in the oven.
Absolutely! The cold butter is the key to those flaky tall layers. As the cold butter in the dough hits the hot oven, it gives off steam and puffs up; making those fabulously tall, fluffy, and flaky biscuits.
Nope, in fact that would be bad for the dough. Biscuit dough should be handled gently and quickly, so the dough stays tender and cold. Overworking the dough will yield biscuits that are flat, hard and chewy.
You definitely want to use non-expired baking powder for this recipe, or your biscuits won’t rise. To test your baking powder, add a bit to hot water. If it bubbles and fizzes, you’re good to go! However, if your baking powder is older than 6 months, it’s best to just get a new can. The older one can still be used for cleaning purposes!
Making buttermilk biscuits ahead of time
I found that making the dough ahead of time didn’t work as well, since the leavening agents (specifically the baking powder), will start activating as soon as the ingredients are mixed. This means when the biscuits are baked, they won’t rise as much as they should.
Freezing
You can, however, cut the biscuits and immediately freeze them. Place the cut biscuits on a wax paper lined baking sheet and freeze for 1-2 hours, or until hard. Then transfer the frozen biscuits to a freezer safe container and freeze for up to 3 months.
To bake frozen biscuits, bake at 425°F for about 20 minutes, or until golden brown and cooked through.
Storage
Biscuits will keep for up to 3-5 days in an airtight container. You don’t have to refrigerate, but you can if you want to.
To reheat leftover biscuits, bake at 300°F for about 10-12 minutes, then brush lightly with melted butter.
Other Bread Recipes:
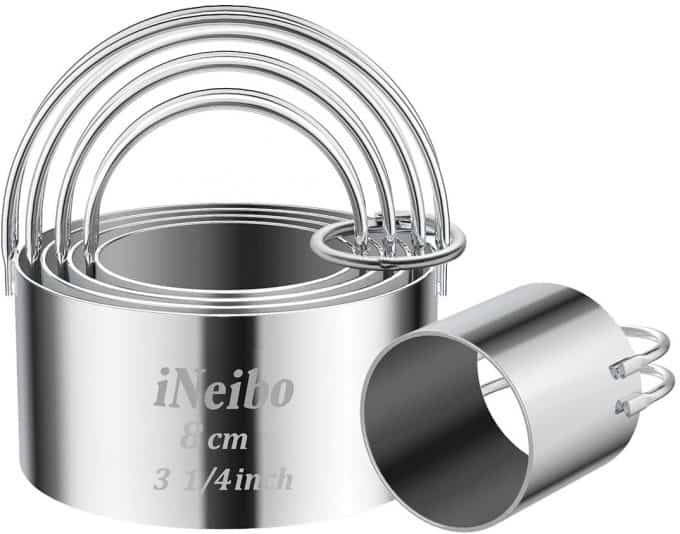
My Favorite Biscuit Cutters!
I really love that these cutters have the diameter etched on the side, and the handles make them easy to maneuver!
Did you make this? Be sure to leave a review below and tag me @the_chunky_chef on Facebook and Instagram!

Ingredients
- 6 Tbsp unsalted butter
- 2 cups all purpose flour
- 1 Tbsp sugar
- 1/4 tsp baking soda
- 1 Tbsp baking powder
- 1 tsp salt
- 1 cup buttermilk
Instructions
- Cut butter into small cubes. Place the butter on a plate and place in the freezer while you mix the dry ingredients. The butter should be very cold.
- Preheat oven to 450°F and line a baking sheet with parchment paper or nonstick foil. Set aside.
- In a food processor (or large bowl), add flour, sugar, baking soda, baking powder and salt. Pulse a time or two to combine (or whisk if you're using a bowl).
- Add the butter to the food processor and pulse to combine, until it looks like coarse crumbs (you could also use a pastry cutter or 2 forks in a large bowl).
- Add the butter and flour mixture to a large bowl and make a well in the middle. Add the cold buttermilk. Stir until dough is mixed and combined, it will be slightly sticky/tacky. If it's still really sticky, add a bit more flour!
- Turn out the dough onto a floured surface (I use my counter) and pat into a rectangle about 8-9 inches long.
- Gently fold the right side towards the middle, then fold the left side in towards the middle as well. It should look like a trifold paper.
- Rotate the dough a quarter turn (it should be horizontal), then pat down into a 8-9 inch long rectangle again. Repeat the folding technique from the step above, at least 1 more time, and up to 2 more times. So 2 or 3 times total. The more folding you do, the more layers you'll have.
- Pat dough down into a rectangle again, about 1 inch thick.
- With a 2.5 inch round biscuit cutter, push down to cut the dough and pull straight up (remember not to twist!). Leftover scraps can be combined and cut again – but no more than 2 or 3 more times.
- Place the biscuits on prepared baking sheet, almost touching each other, and bake at 450°F for 12-15 minutes until browned and cooked through.
- After the biscuits are baked, brush tops with melted butter.
Want to save this recipe for later? Click the heart in the bottom right corner to save to your own recipe box!
Chef Tips
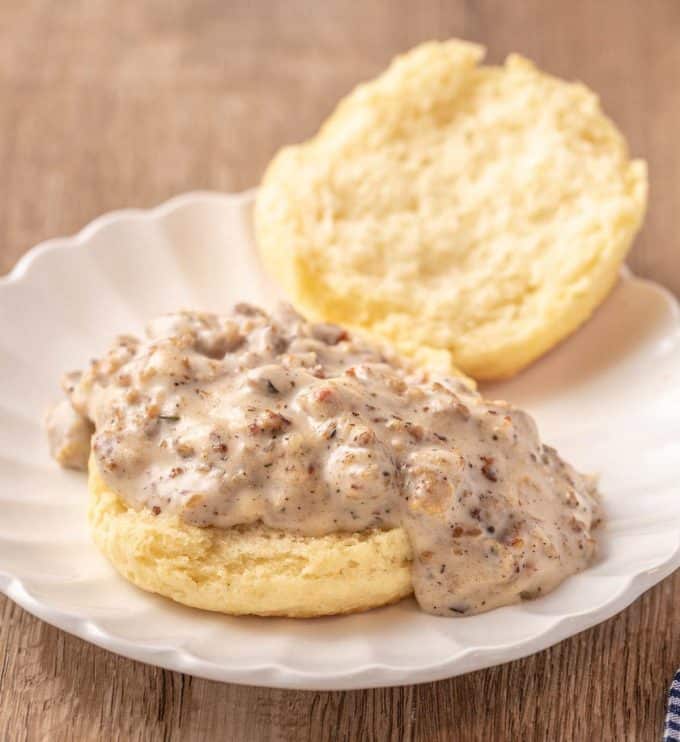
- These biscuits are amazing served with Sausage Gravy!
- As things like humidity, the way flour is measured, etc can affect the way recipes like these buttermilk biscuits turn out… use the flour/buttermilk measurements as an approximation. If you notice your dough is really sticky, add a bit more flour and work it in. If you notice your dough is not wet enough, add a tiny splash more buttermilk.
- Make sure the butter and buttermilk are very cold. It’s essential to having these biscuits turn out well.
- Don’t skip the folding of the dough – it creates those flaky layers.
- Try to work through the dough folding and cutting fairly quickly, as the colder the dough is, the higher the biscuits will rise.
- During really hot months, or if your kitchen is fairly warm, once the biscuits are cut and on the baking sheet, you can refrigerate for 10-15 minutes before baking.
Nutrition Disclaimer
The Chunky Chef is not a dietician or nutritionist, and any nutritional information shared is an estimate. If calorie count and other nutritional values are important to you, we recommend running the ingredients through whichever online nutritional calculator you prefer. Calories can vary quite a bit depending on which brands were used.
Kyle kyons says
Can the biscuits be made ahead of time frozen, thawed and baked later?
The Chunky Chef says
Hi Kyle 🙂 I’m not entirely sure, since once the baking soda and powder, they’ll start reacting with the other ingredients, which usually means they need to be baked right away. I have successfully baked the biscuits, then cooled and frozen them though.
Rachel says
Hmmmm Are you sure these should be baked at 450? Mine were basically burnt at the 11 minute mark ?
The Chunky Chef says
Hi Rachel, yes I’m very sure. I make these all the time and always bake them as directed, as have many other readers. Maybe your oven just runs hotter than mine? The high temperature is what makes the cold butter expand, creating steam and “lifting” the biscuits so they rise.
Rachel says
Maybe I’ll try it at 400 instead. Thanks! I was able to salvage some of them and what I tastes was good! Haha
Rachael says
Thank you so much for sharing this recipe, I just made it and it’s absolutely wonderful!! I am thinking about making the dough and freezing it, have you tried it before and how long did it last in the freezer for??
The Chunky Chef says
Hi Rachael 🙂 I’m so happy you loved the biscuits! I’ve never frozen the dough, but I have frozen the baked biscuits. They typically last a month or so, but we eat them before then 🙂
Jenna says
This is exactly how I make my sausage gravy with two exceptions- I put a dash of Worcestershire sauce and I put a pinch of red pepper flakes. Delicious!
Also, when I serve it, I cut a biscuit in half, place a fried egg on top, cover with sausage gravy and shredded cheddar and serve alongside homemade breakfast potatoes. SO GOOD
Jackie says
I love love love the biscuits. Super easy to make. I enjoyed them with jam. Thanks for sharing.
Nicole Nogowski says
Awesome biscuits! Usually I read comments for tips but The Chunky Chef already gave plenty. This is the 4th time I’ve made these and they turned out the best! Couldnt find the pan I usually use so ended up using a pie tin making them all touch. Also used a biscuit cutter vs glass. These biscuits raised the highest & were by far the fluffiest! Thank you!
Karin says
I only made the biscuits, but they were delicious and easy to make.
Melissa says
These biscuits were amazing! ? Just made up another batch to see how they freeze.
Cyndie says
Just made this morning, YUM! I had to sub evap milk as had no buttermilk, still excellent. Wanted to post a pic, but didn’t see anyway to do so.
The Chunky Chef says
Hi Cyndie 🙂 So happy you loved the biscuits and gravy!! Sadly, there’s no way to add pictures to comments, but if you’re on Instagram, feel free to share a photo and tag me (@the_chunky_chef).. because I’d love to see 🙂
Marlene Alterio says
Made these today for Mother’s Day brunch. These were amazing! Awesome recipe and a definite keeper! Thank you!
JaNan says
Hey! Can this biscuit dough be frozen for later?
The Chunky Chef says
Hello 🙂 I’ve never frozen the dough, because as soon as you mix it up, the leavening agents start to work. However, you can bake the biscuits, then freeze them 🙂
Christine says
These were great! Soft and fluffy. I grated the cold butter into the flour, tossed it in the freezer then mixed in the buttermilk and folded and cut them out. Love that they rose nice and high. I used a small juice glass to cut them out so I got 15 biscuits. I will definitely be making these again!
The Chunky Chef says
Hi Christine 🙂 I’m SO happy to hear that you loved these biscuits as much as we do!!
Caryn Hartmann says
Can you make the dough and refrigerate the night before you’re going to cook the biscuits? I’d love to make it and cut it all, then throw them in the fridge on the cookie sheet to bake first thing in the morning. Have you ever done that?
The Chunky Chef says
Hi Caryn 🙂 I haven’t ever done that… as the leavening agents start to react as soon as the ingredients are combined, so the final product might not look or feel like it should. But you could certainly try it! I do know that these reheat really well, so you could also bake them the evening before, then just pop them in the microwave to reheat them in the morning 🙂
Jennifer says
Ok my first time in 40+ years that I’ve made biscuits from scratch that weren’t hockey pucks! Followed exactly, turned out so beautiful – and tasty! Thank you thank you!
The Chunky Chef says
Hi Jennifer 🙂 Oh my, I’m SO happy to hear that!! Hockey puck biscuits used to plague me as well… it can be so frustrating!
Barb M. says
Hi, I just saw your biscuit recipe on Pinterest about an hour before dinner tonight. I had a Southern mom and have eaten and made many a different biscuit recipe in my time–about 55 years of cooking. I went straight to the kitchen and made these to go with dinner as I happened to have the buttermilk. I wanted to tell you that these are as good as any of my best results and a whole lot better than most peoples’ biscuits!! Yum–puffed up just as shown too–I never heard about not twisting the biscuit cutter. I did use a simple handheld cheese grater for the butter and it worked like a dream & cut combining time in half! Cannot believe I never thought of that before! Anyway–for anyone wanting to try making biscuits–this is THE recipe to try! Only change I will make next time is to cut the sugar in half or leave it out just because it’s never been in any of the various biscuits I’ve had and I think I would prefer them without it. No big deal and most people would probably like it in there. Next time I’ll make the sausage gravy too–I love biscuits and gravy!! I’ve never followed a recipe for it and it would be handy to have a set recipe. Thanks much! Barb
The Chunky Chef says
Hi Barb 🙂 Oh wow, I’m SO happy that you loved these as much as we do!! Growing up with a Southern Mom, I bet you had some of the best food around 🙂
Barb M. says
You better believe it–all homemade: Chicken and dumplings, Southern fried chicken, grits and hush puppies, gumbo and jambalaya, delicious pies, fried okra (uncommon in the North but really, really good), Hoppin’ John, biscuits and cornbread, corn fritters and more. It’s still my favorite food. Thanks for the great biscuit recipe. Unfortunately, my mom passed away when I was 17 and I never got my mom’s recipe box from my dad in time and he wasn’t sure what happened to it. I’m an only child and have lots of their belongings, but I would give almost anything to have her recipe box! Anyway–I know hers were made with butter and buttermilk too–so these can sub out easily!
The Chunky Chef says
Oh my goodness… can I go back in time with you and live at your house? That all sounds AMAZING!!! I love good homemade Southern comfort food 🙂 So sorry to hear about your Mom… that had to be hard. I’m glad my biscuits are similar to hers!
Jessica says
These biscuits are fantastic and so easy to make! My parents-in-law are coming to visit this weekend, and I want to make them a nice homey breakfast Saturday morning. I made a test batch of biscuits this afternoon and have already scarfed down two of them with homemade jam!! Two thumbs up. 🙂
The Chunky Chef says
Hi Jessica 🙂 I’m SO happy you love these biscuits!! And that’s very sweet of you to make your in-laws a comforting breakfast Saturday morning 🙂
Kathleen Sekula says
Tried these biscuits today and they are the real deal – such great flavor and texture! I’m making 30 for a shower this Saturday and am curious if you think I can cut the biscuits, place on the cookie sheet and have them hang out in the fridge until it’s time to bake them? I really want them fresh out of the oven but need to make them a couple of hours earlier to allow clean up time. Thanks for the recipe and the tips!
The Chunky Chef says
Hi Kathleen 🙂 I’m so happy to hear that you love these biscuits! I’ve honestly never tried to make them ahead and keep them in the refrigerator, but I have made them ahead of time, frozen them, and baked them from frozen. Maybe that would be a good option for you? I just don’t know if the refrigerator would kill the leavening action and make for flat biscuits :/
Lauren Hesse says
Made these for breakfast and they were delicious! Almost tasted like Cracker Barrel biscuits! My husband loved them too! Thank you for the great recipe! I wrote this one in my recipe book I’m writing!
The Chunky Chef says
Hi Lauren 🙂 I’m SO happy to hear that you both loved them!
Shana says
OMG, I had never made biscuits and gravy, cause for some reason it always seemed like a long process because something so delicious could not be this simple. But I can across this recipe and tried it the same night. And all I can say is WOW, so easy, so delicious. I will definitely be making this more often, though not too often, cause you know I don’t want to buy bigger pants 🙂
The Chunky Chef says
Hi Shana 🙂 I’m SO happy to hear how much you loved the biscuits and gravy! Lol I know what you mean about the bigger pants… comfort food goes right to the waistline!
Toni Morgan says
Hello, do you think I could make the dough and freeze it for later use? How log do you think I would have to bake it from it being frozen?
The Chunky Chef says
Hi Toni 🙂 I’ve never frozen the dough, so I can’t say for absolute certain… but I think freezing it would work 🙂 Start by adding 2-4 minutes onto the bake time, and adjust from there 🙂