​
  • Skip to primary navigation
  • Skip to main content
  • Skip to primary sidebar
Free Ebook!Subscribe to updates & get a recipe book!

Subscribe & Receive My Free Recipe Ebook!

The Chunky Chef

Comforting Family Recipes

  • All Recipes
  • Learn to Cook
  • Shop
    • My eBooks
    • Favorite Products
  • About
  • Contact
  • Trending:

    Slow Cooker

    Easy Dinners

    Desserts

    My Saved Recipe Box
  • Browse By:
  • Course
    • Appetizers
    • Breakfast
    • Main Dishes
    • Sides
    • Drinks
    • Desserts
    • Salads
    • Soups
    • Sandwiches
    • Healthy-ish
  • Ingredient
    • Chicken
    • Beef
    • Pork
    • Turkey
    • Seafood
    • Meatless
    • Pasta
  • Cuisine
    • Asian
    • Italian
    • Mexican
    • Hawaiian
    • Middle Eastern
    • Comfort Food
  • Method
    • One Pot
    • Crockpot
    • Instant Pot
    • Oven
    • Fried
    • Grilling/BBQ
  • Trending:

    Slow Cooker

    Easy Dinners

    Desserts

Home / Comfort Food

Homemade Artisan No Knead Bread

4.35
/5
50 minutes minutes
116 Comments
Jump to Recipe Print Pin
By: The Chunky Chefpublished: 08/23/2017

This post may contain affiliate links. Please read my disclosure policy.

Homemade No Knead Bread is perfectly crusty on the outside, with a soft fluffy inside, and is made using regular pantry ingredients.  Perfect with a pat of butter! #bread #homemade #pantry #noknead #baked #artisan #quarantine

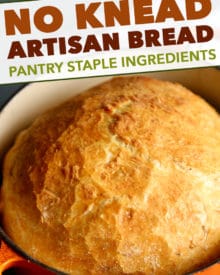
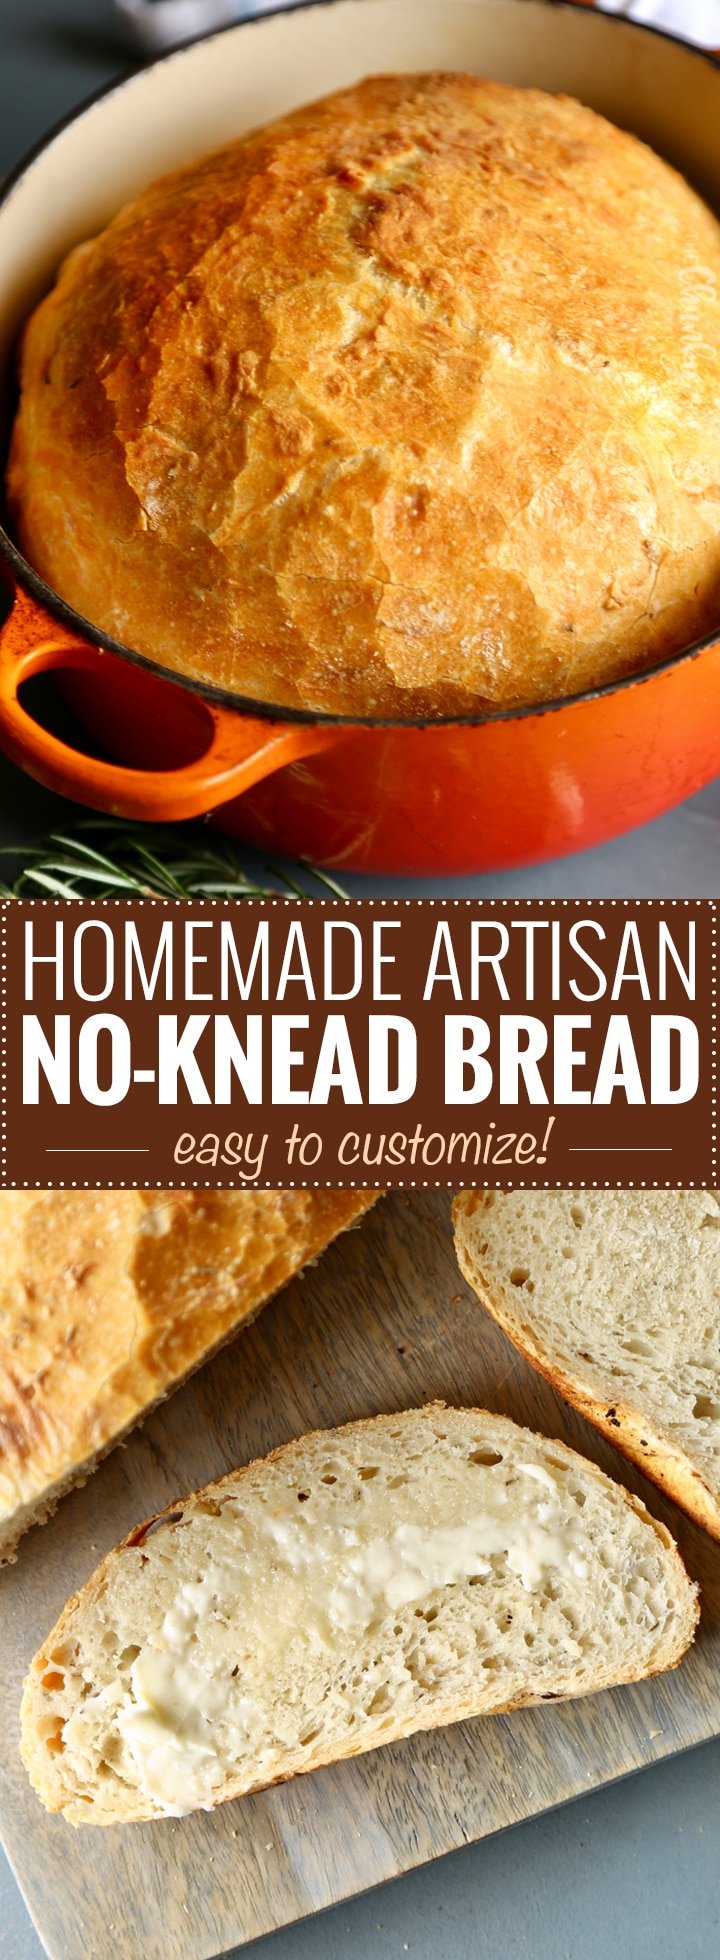
This no knead bread is perfectly crusty on the outside, with a fluffy interior that’s just begging for some creamy butter. Try it with your dinner tonight!


If you think crusty artisan bread is only available from the bakery… get ready to think again!  This no knead bread is made incredibly easy, and is easy to customize with add-ins for different flavor combinations!

Homemade Artisan No-Knead Bread | Perfectly crusty on the outside, with a soft fluffy inside, this no knead bread is perfect with any dinner! | https://thechunkychef.com
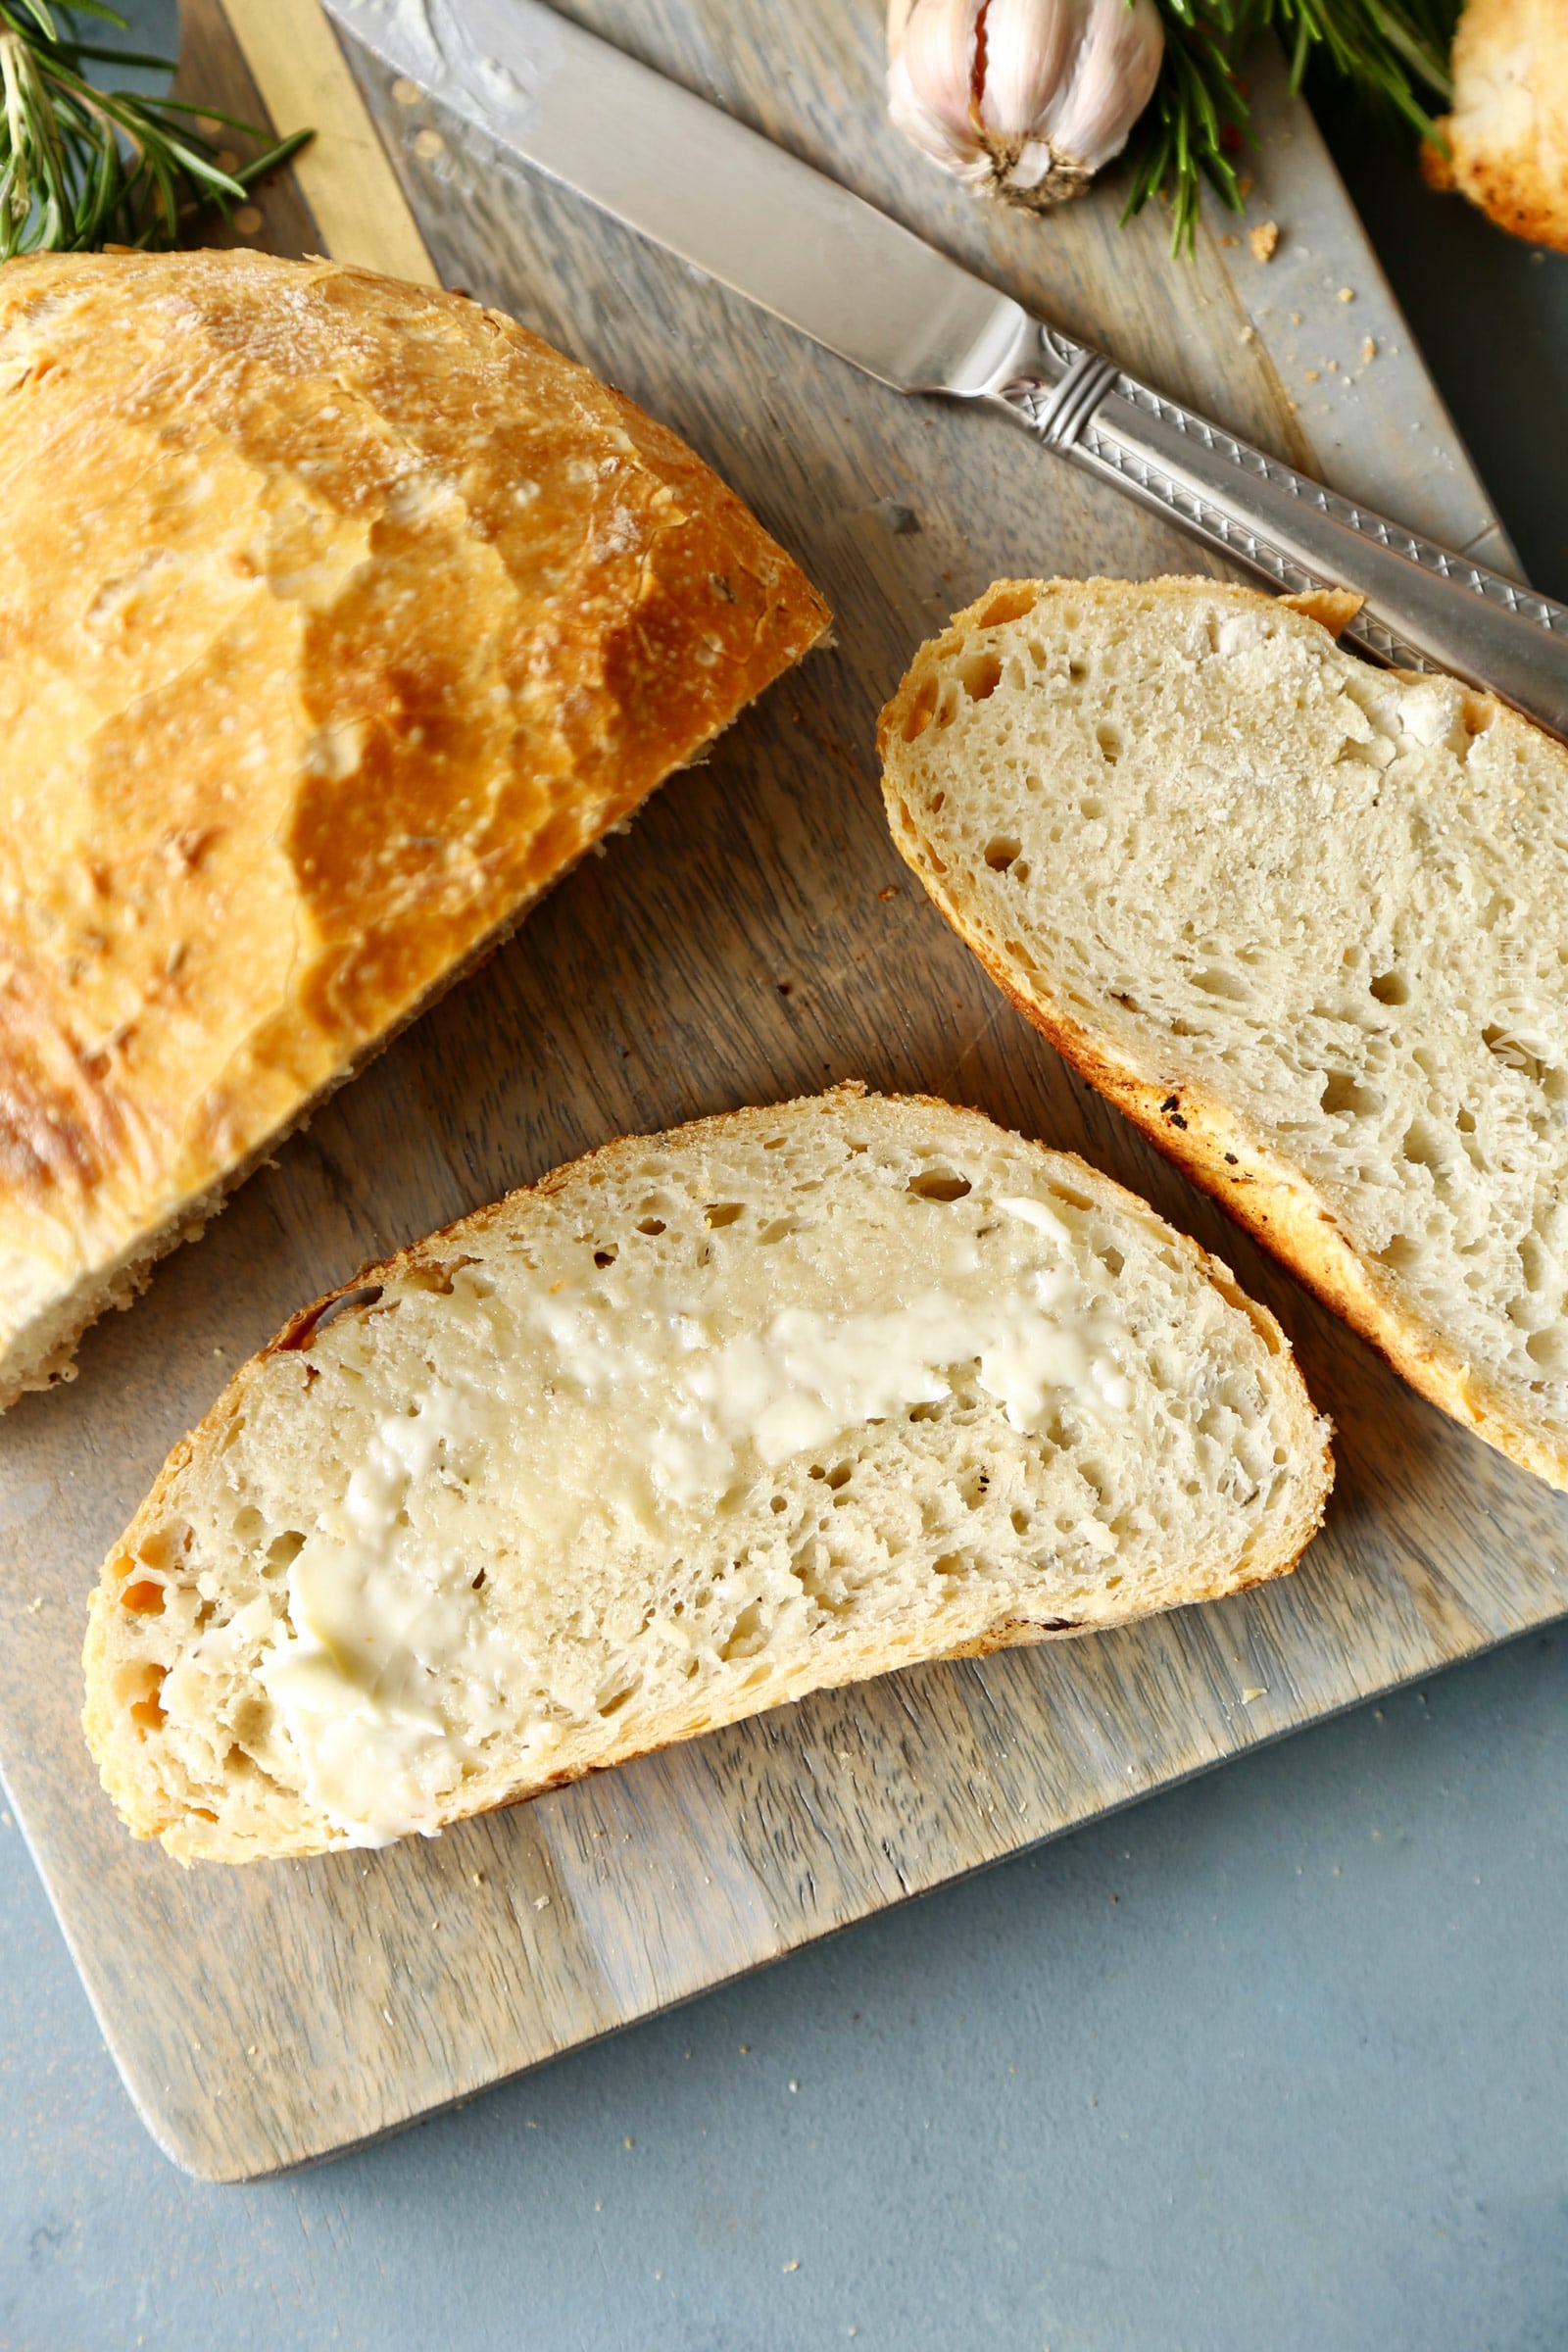
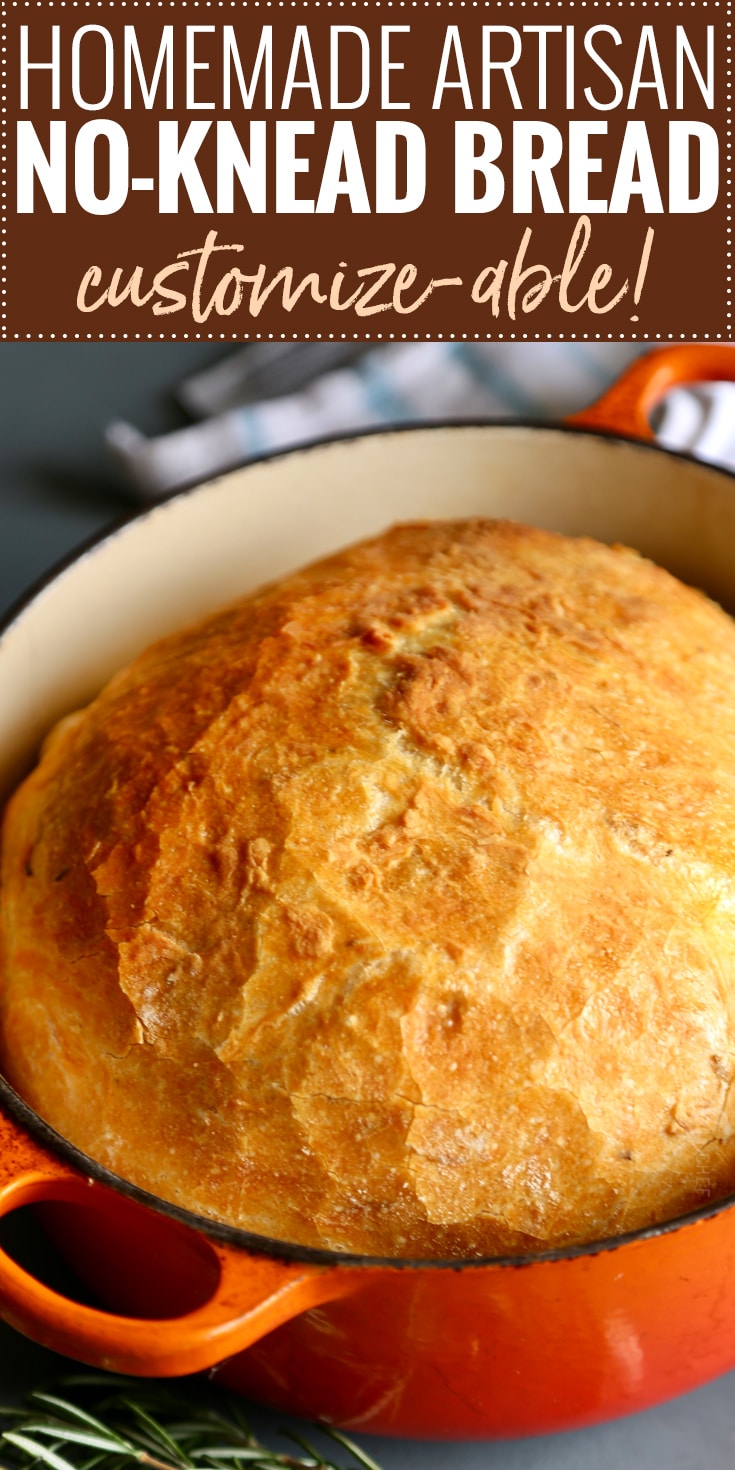
Are you a fan of those breads from the bakery, you know, the one’s with that deliciously crunchy crust and soft, fluffy inside?  Yep, this bread tastes just like that.  Personally, I think it tastes even better!!

It sounds fancy and complicated, but trust me on this one, it’s not.  In fact, there’s no kneading whatsoever!

I always thought homemade breads were complicated… involving a bunch of steps and rises.  Granted, there are some breads like that… but this bread just isn’t one of them.

Homemade Artisan No-Knead Bread | Perfectly crusty on the outside, with a soft fluffy inside, this no knead bread is perfect with any dinner! | https://thechunkychef.com

BUT SERIOUSLY… NO KNEADING??

Absolutely none!  No stand mixer needed… just a bowl and a wooden spoon.

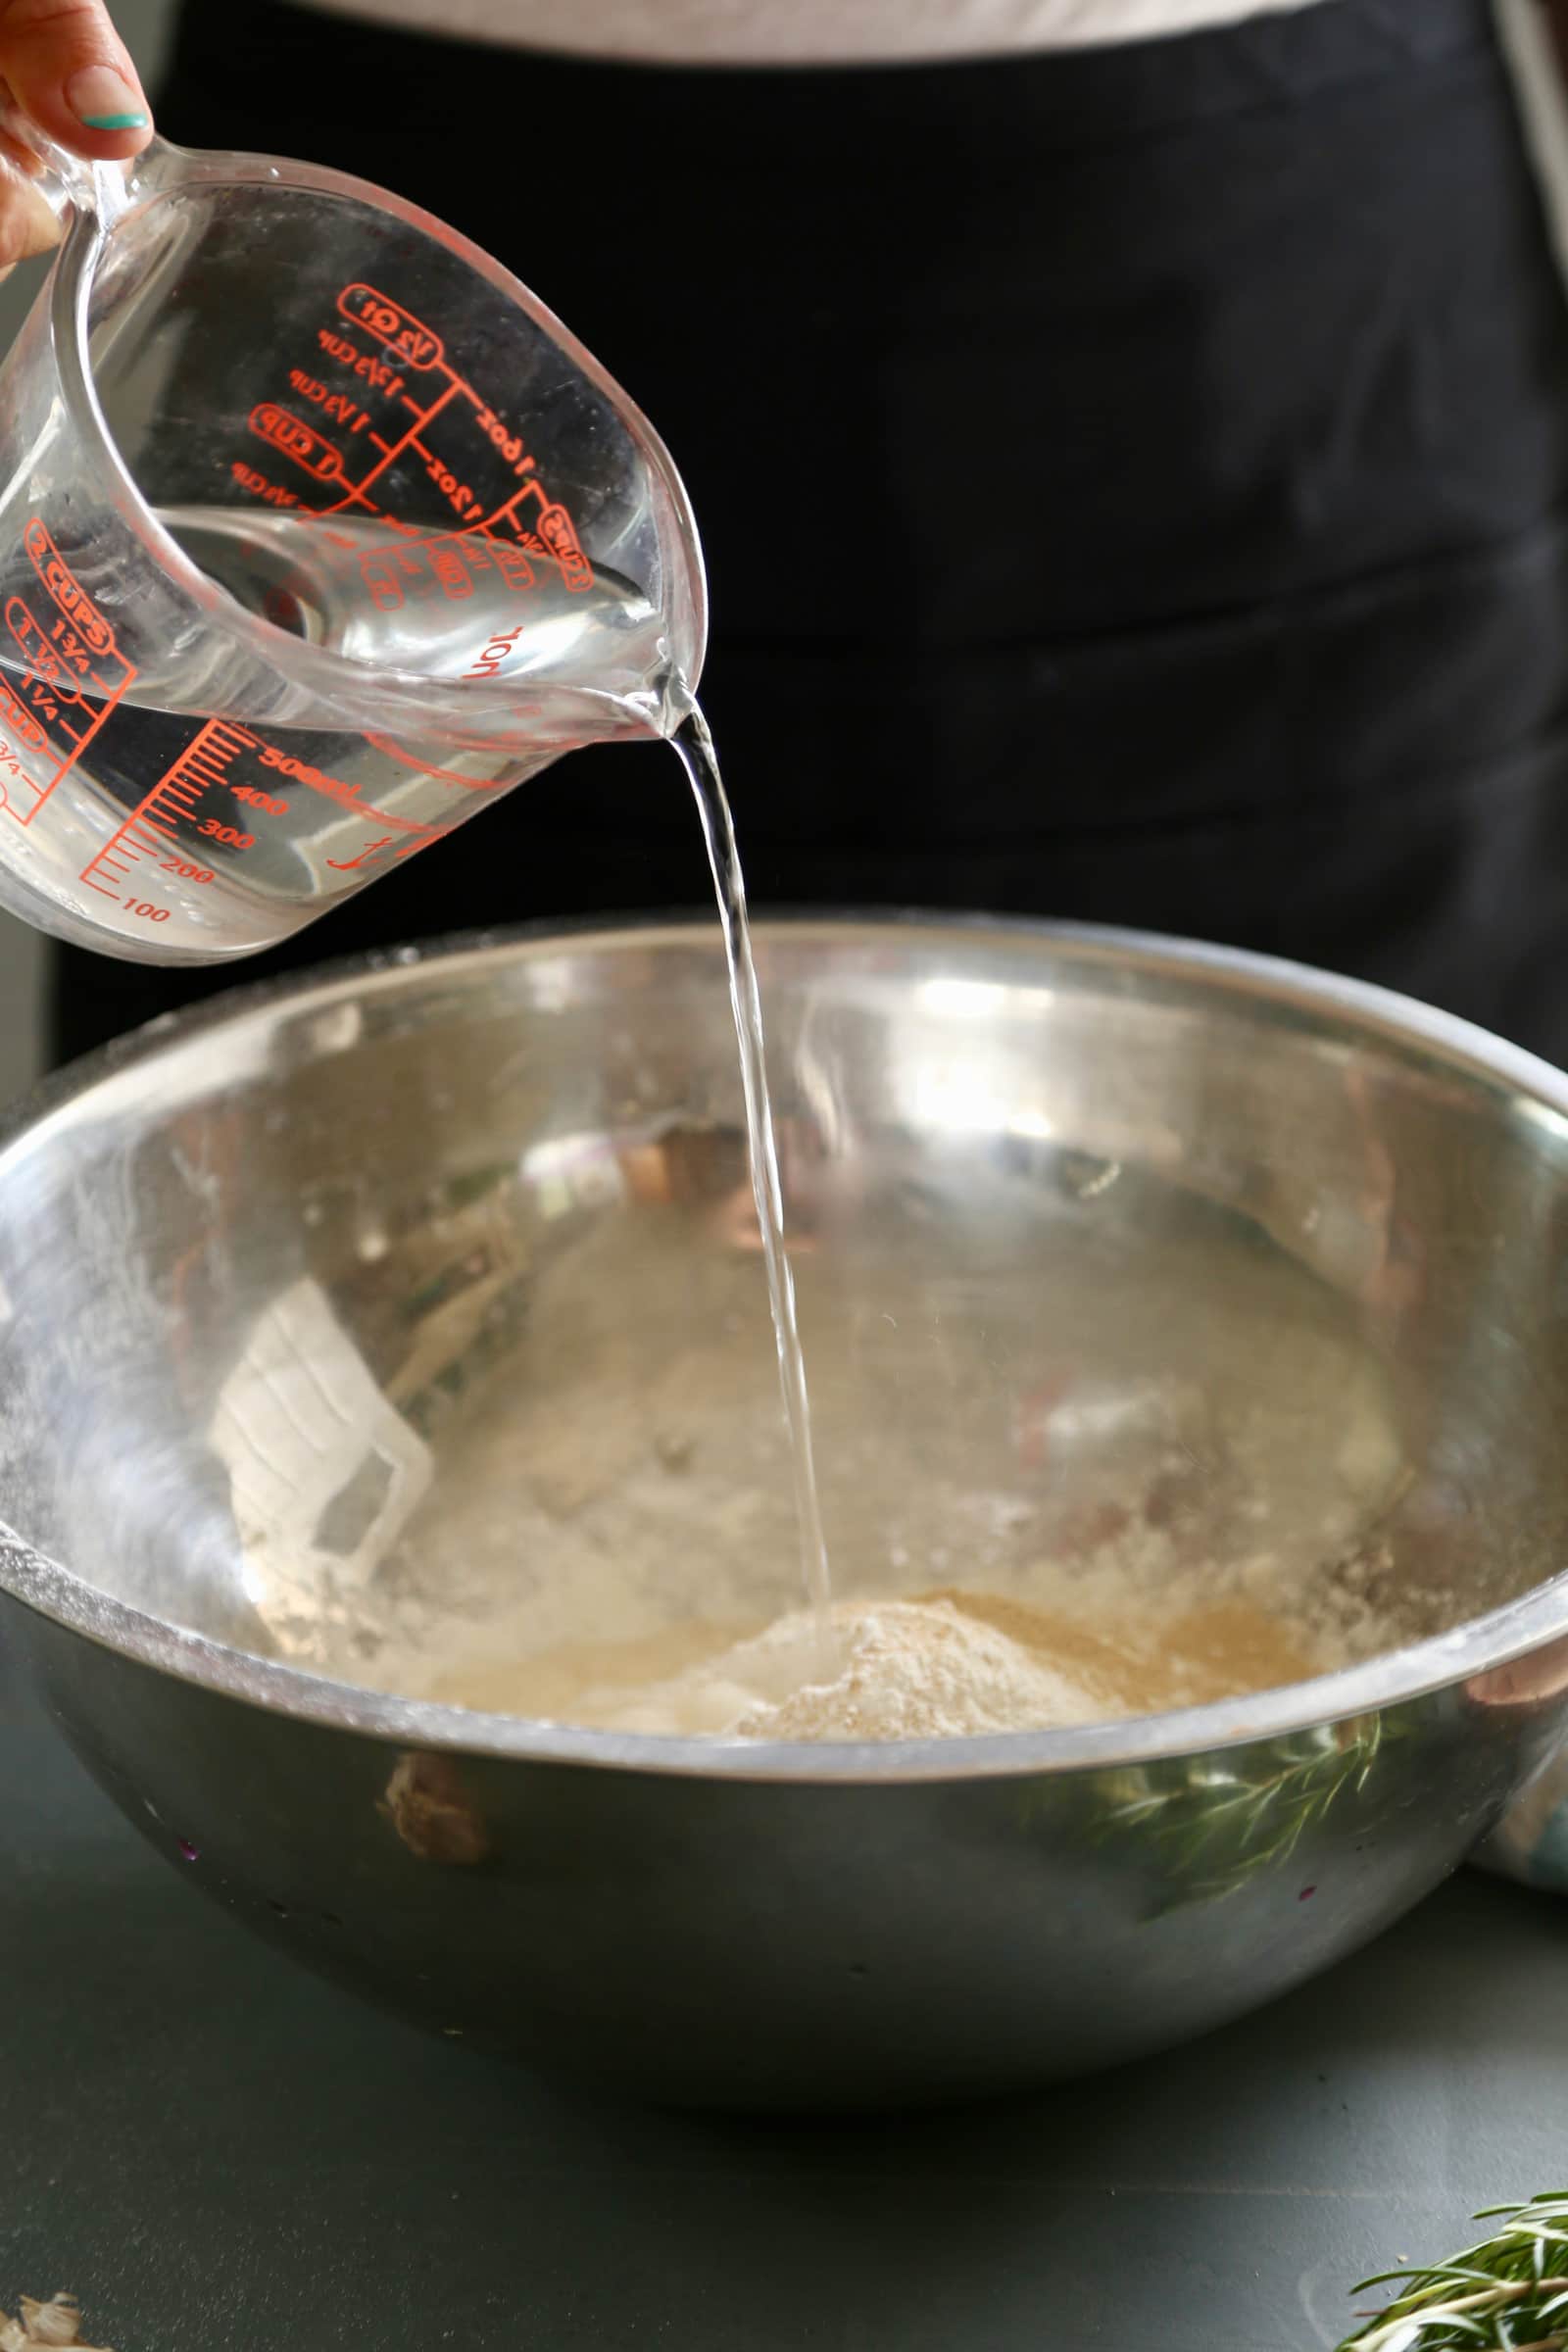
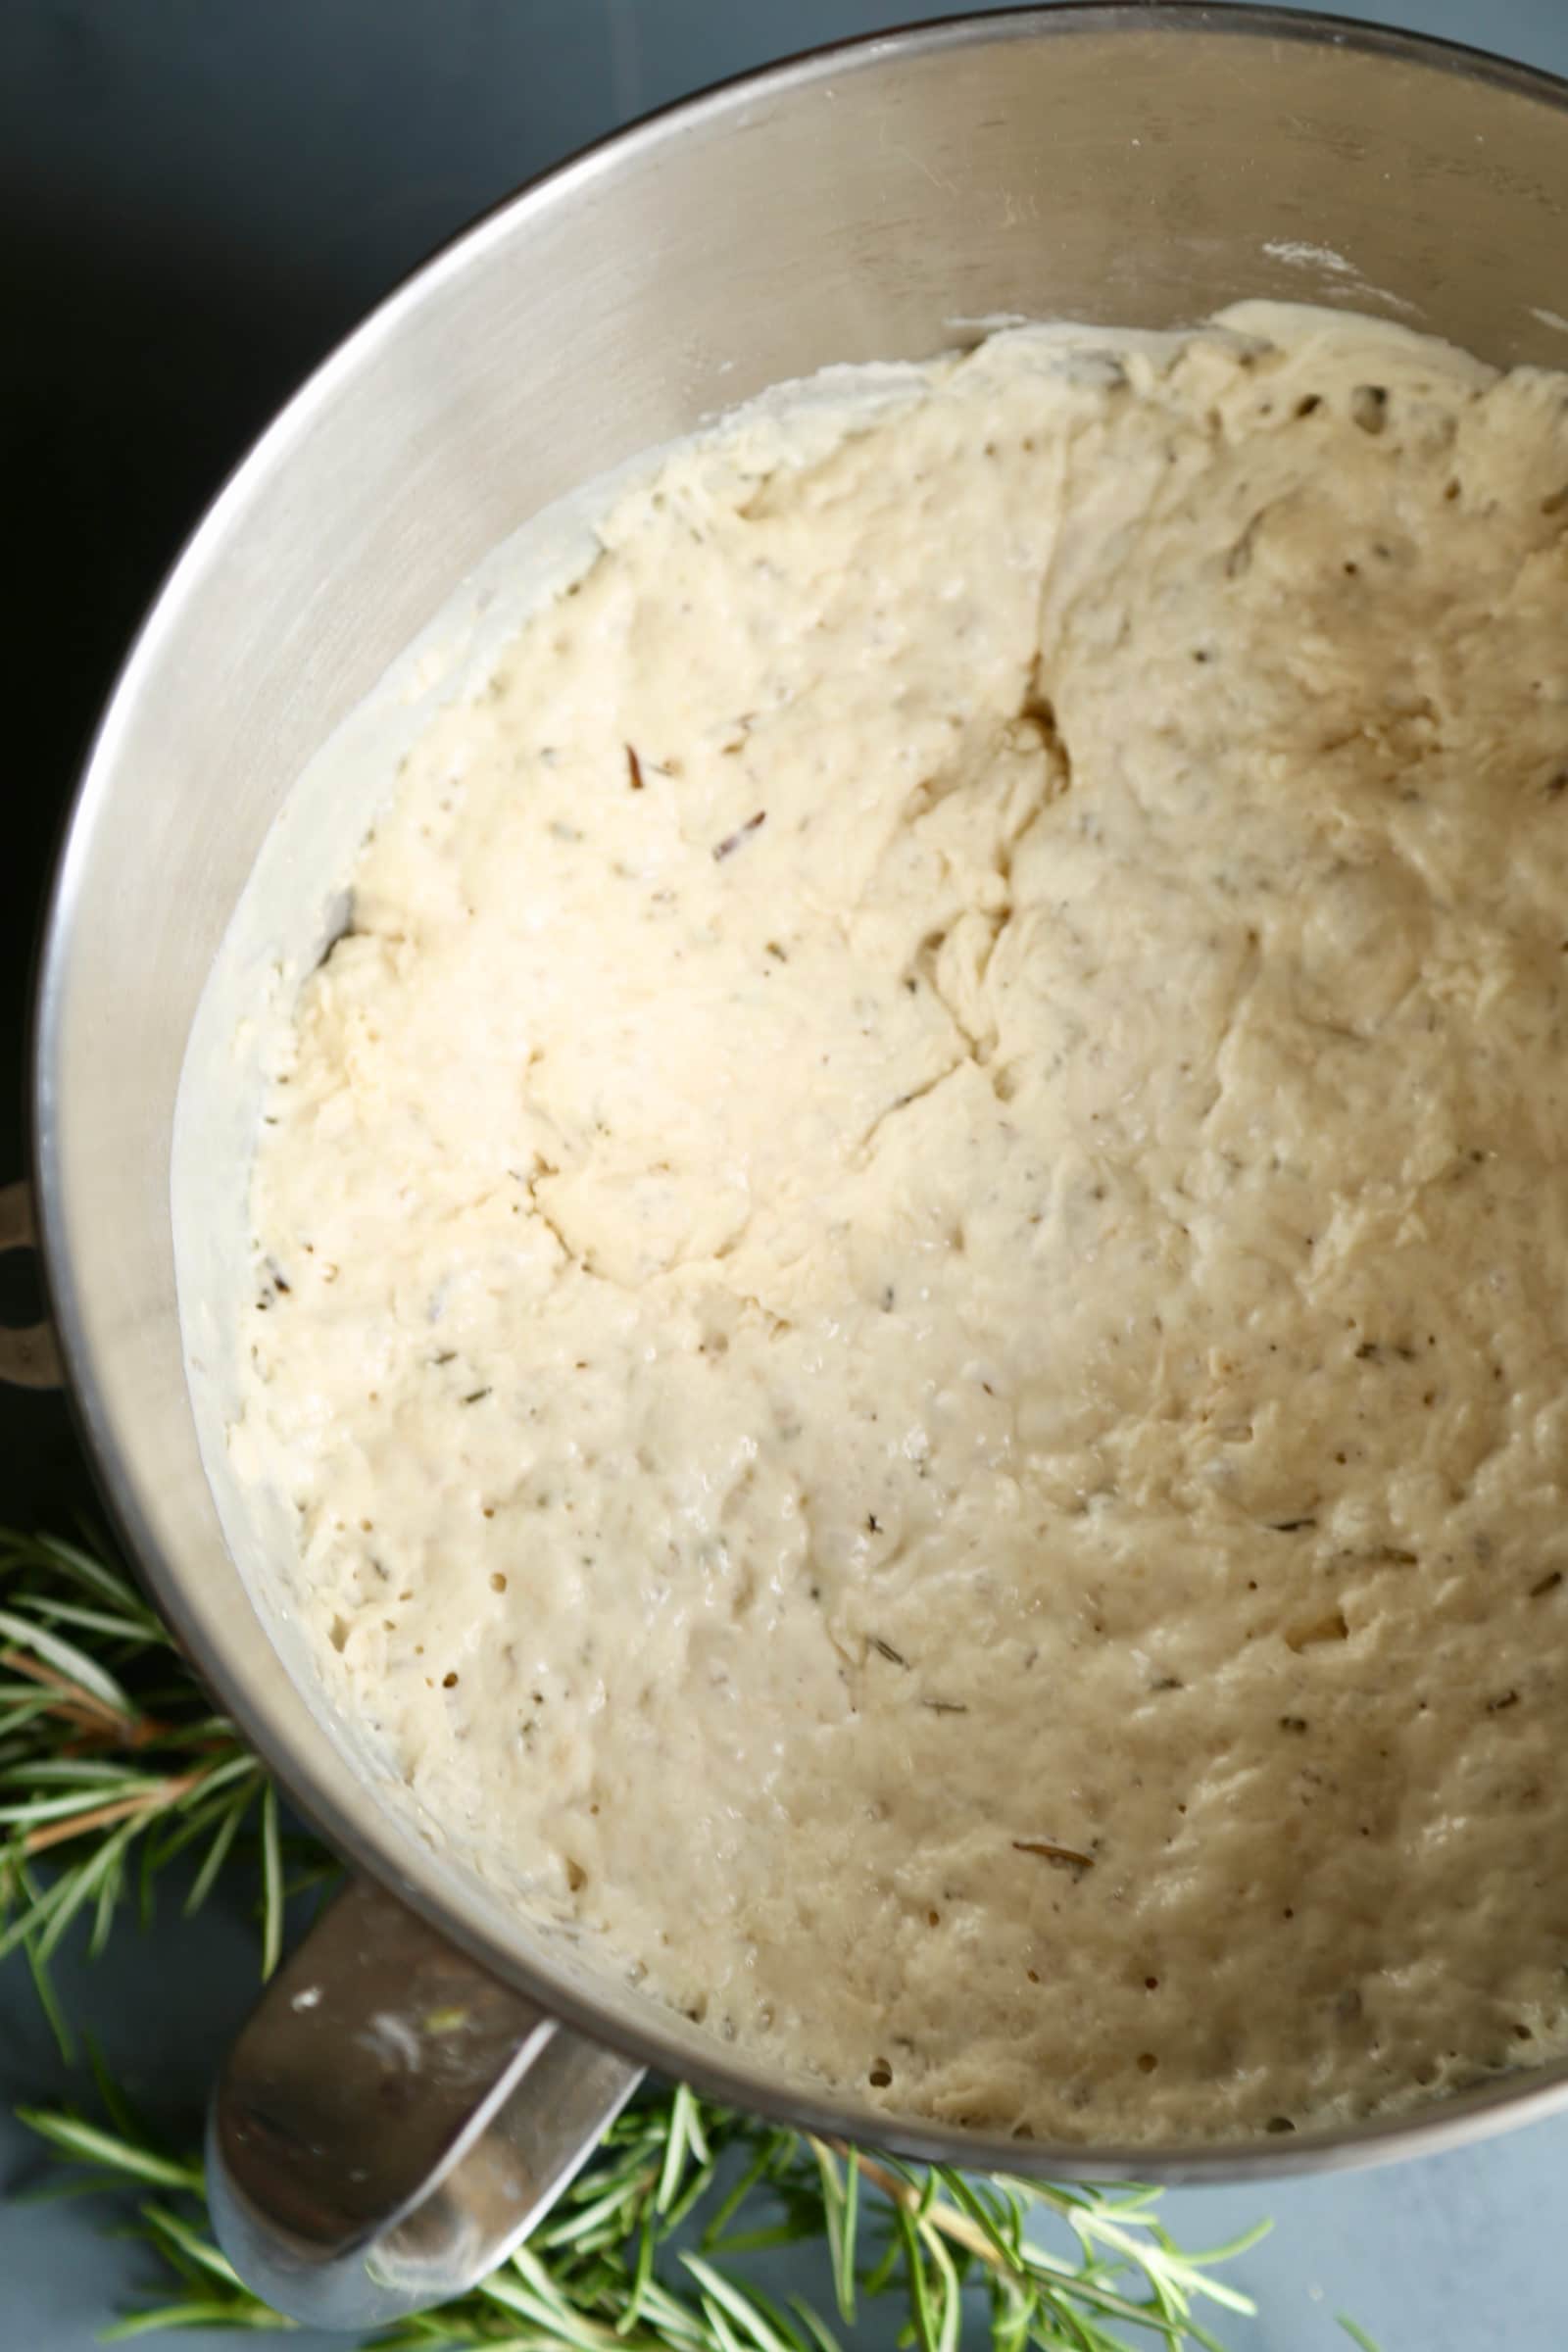
The night before you want to make the bread, you mix up your flour, salt, yeast and water with a big spoon.  I like to make this a Parmesan and rosemary bread, so I also stirred in some minced rosemary and a handful of shredded Parmesan cheese.

Homemade Artisan No-Knead Bread | Perfectly crusty on the outside, with a soft fluffy inside, this no knead bread is perfect with any dinner! | https://thechunkychef.com

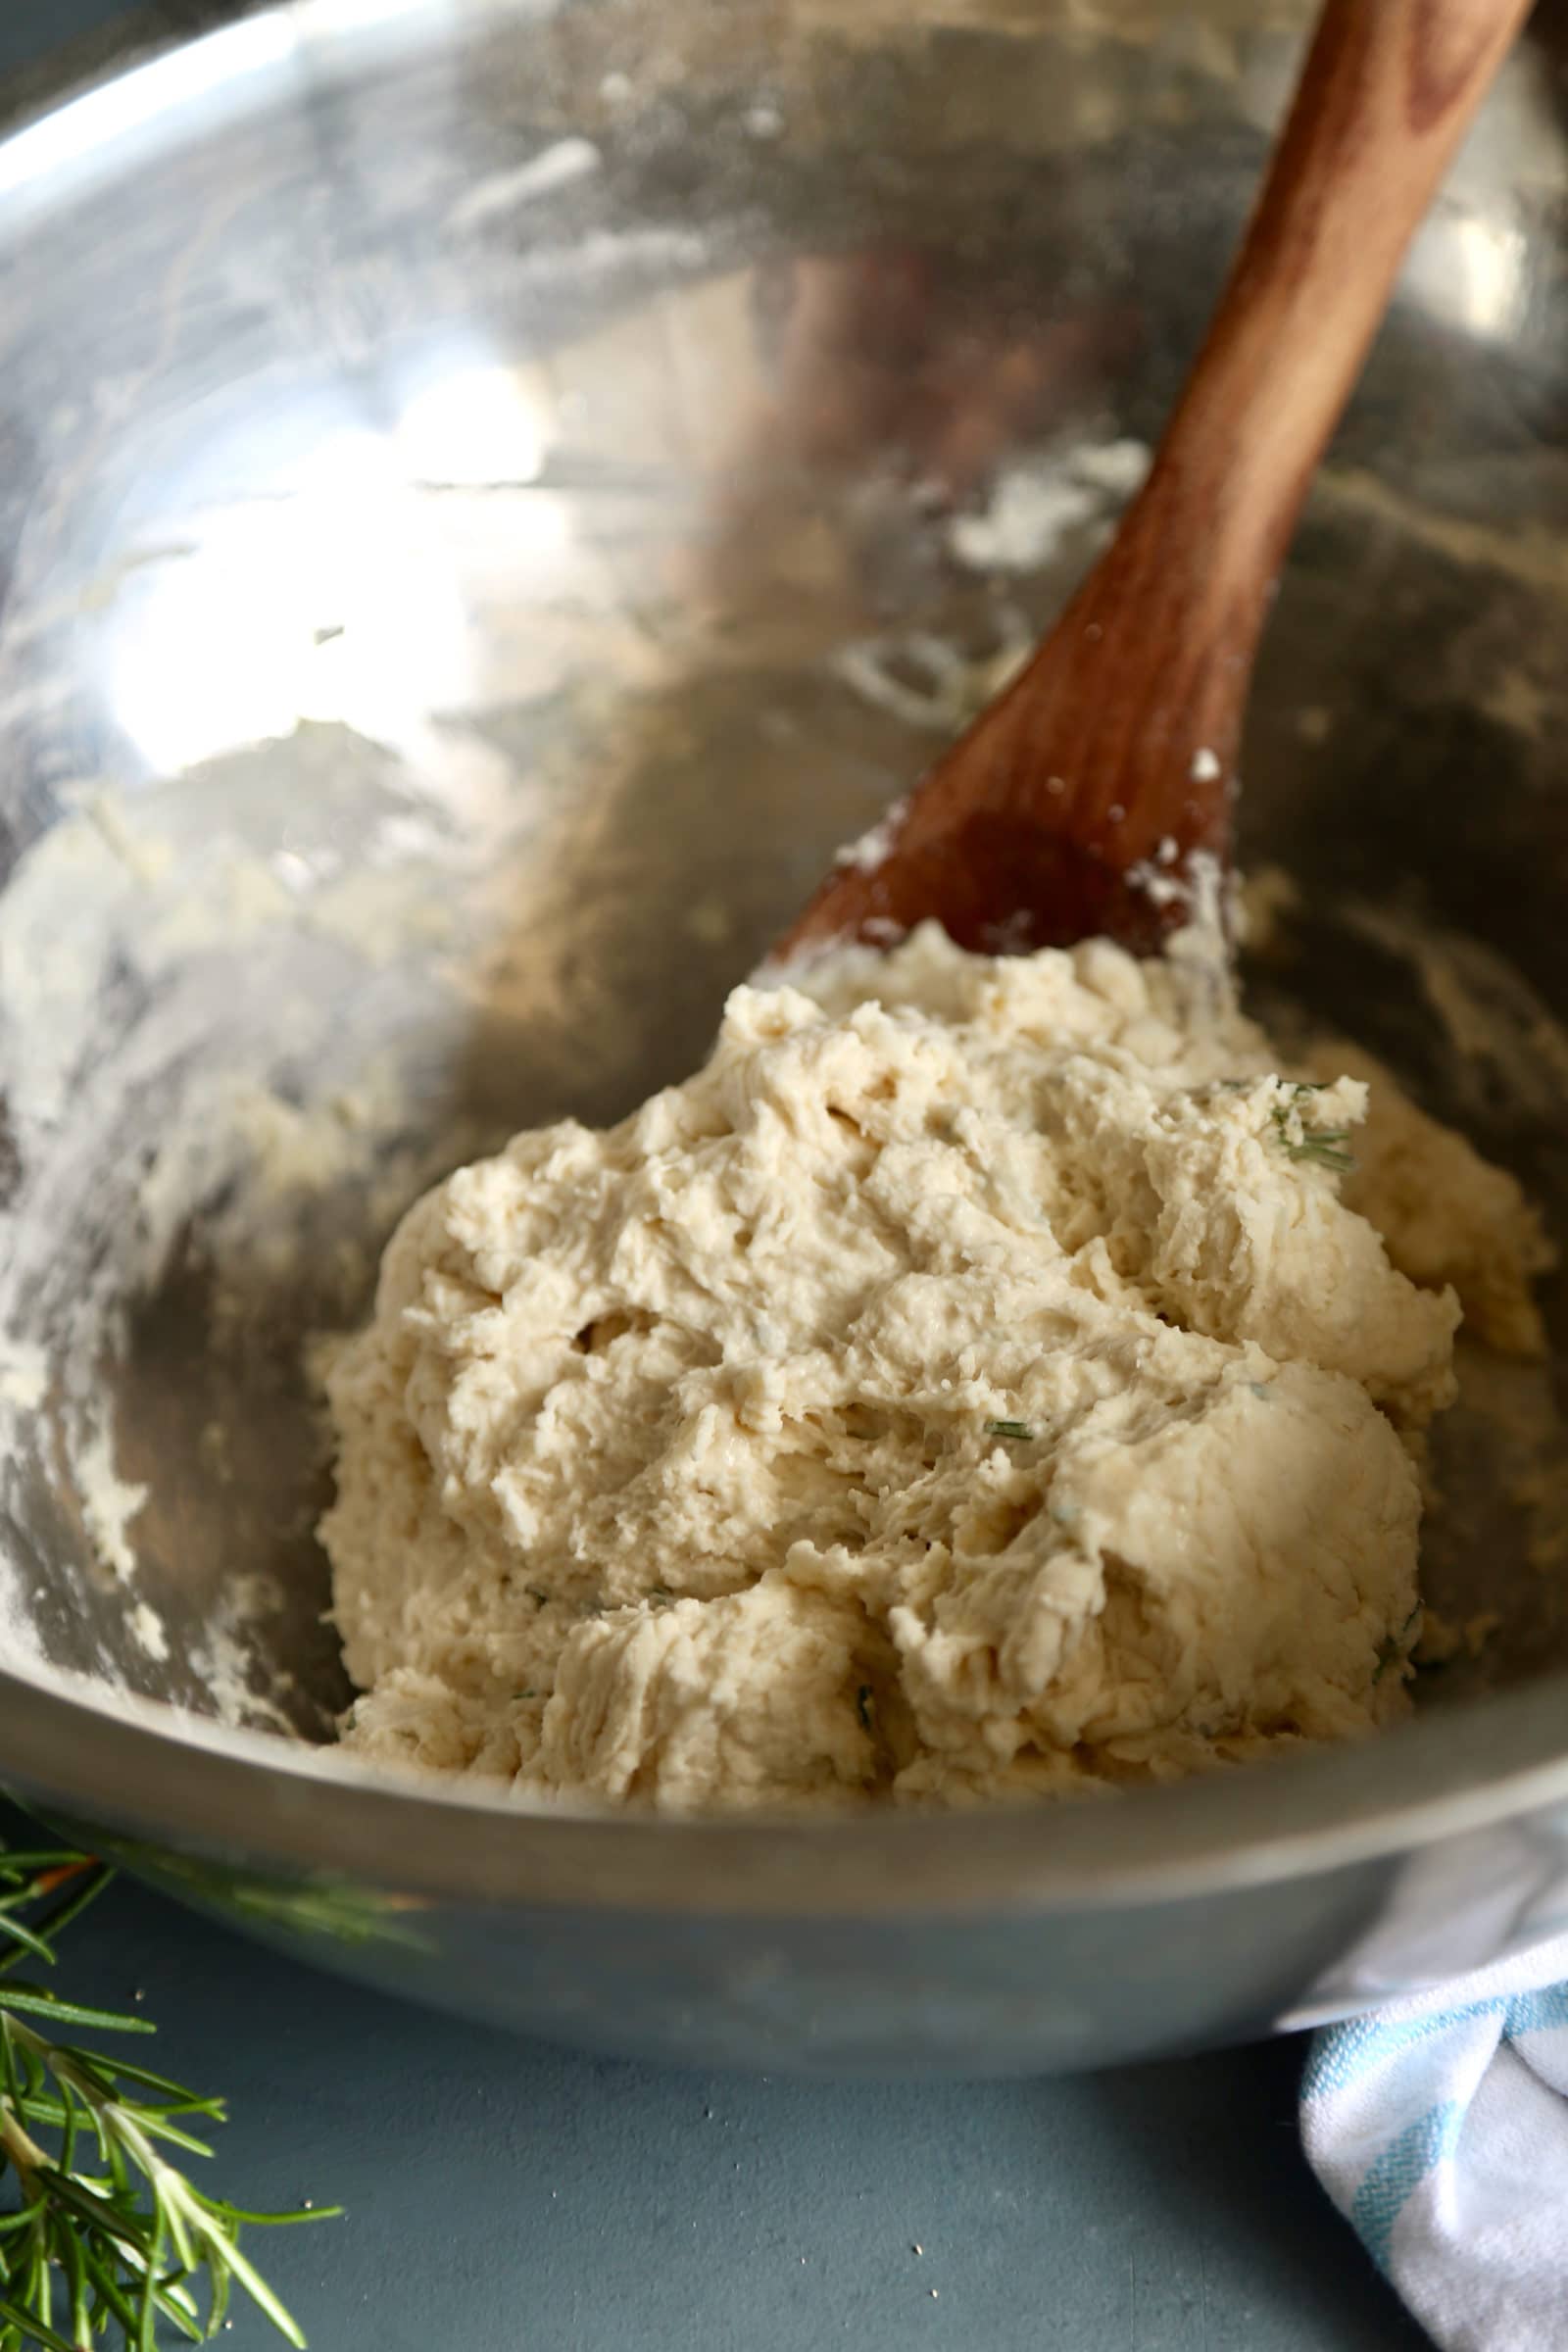
Now just cover the bowl with plastic wrap and let it sit out on your counter overnight and throughout the next day.  So there is a bit of prep with this bread, in that you have to plan ahead and make it the night before.  But that’s the only “work” there is with this bread.  Seriously.

Homemade Artisan No-Knead Bread | Perfectly crusty on the outside, with a soft fluffy inside, this no knead bread is perfect with any dinner! | https://thechunkychef.com

After it’s rested for a good 18 hours or so, flour your hands and cutting board really well.  Turn out your dough onto your cutting board and roughly shape it into a ball.  Drop the ball into a preheated dutch oven and bake.  That’s it!

WHAT OTHER FLAVORS CAN I MAKE?

The sky is really the limit here!  It’s great plain, and obviously with the parmesan and rosemary, but here are some additional flavor options!

  • Cheddar cheese and crumbled cooked bacon
  • Roasted garlic cloves
  • Sun-dried tomatoes (diced up) and basil
  • Diced olives
  • Cheddar cheese and jalapeños

Homemade Artisan No-Knead Bread | Perfectly crusty on the outside, with a soft fluffy inside, this no knead bread is perfect with any dinner! | https://thechunkychef.com

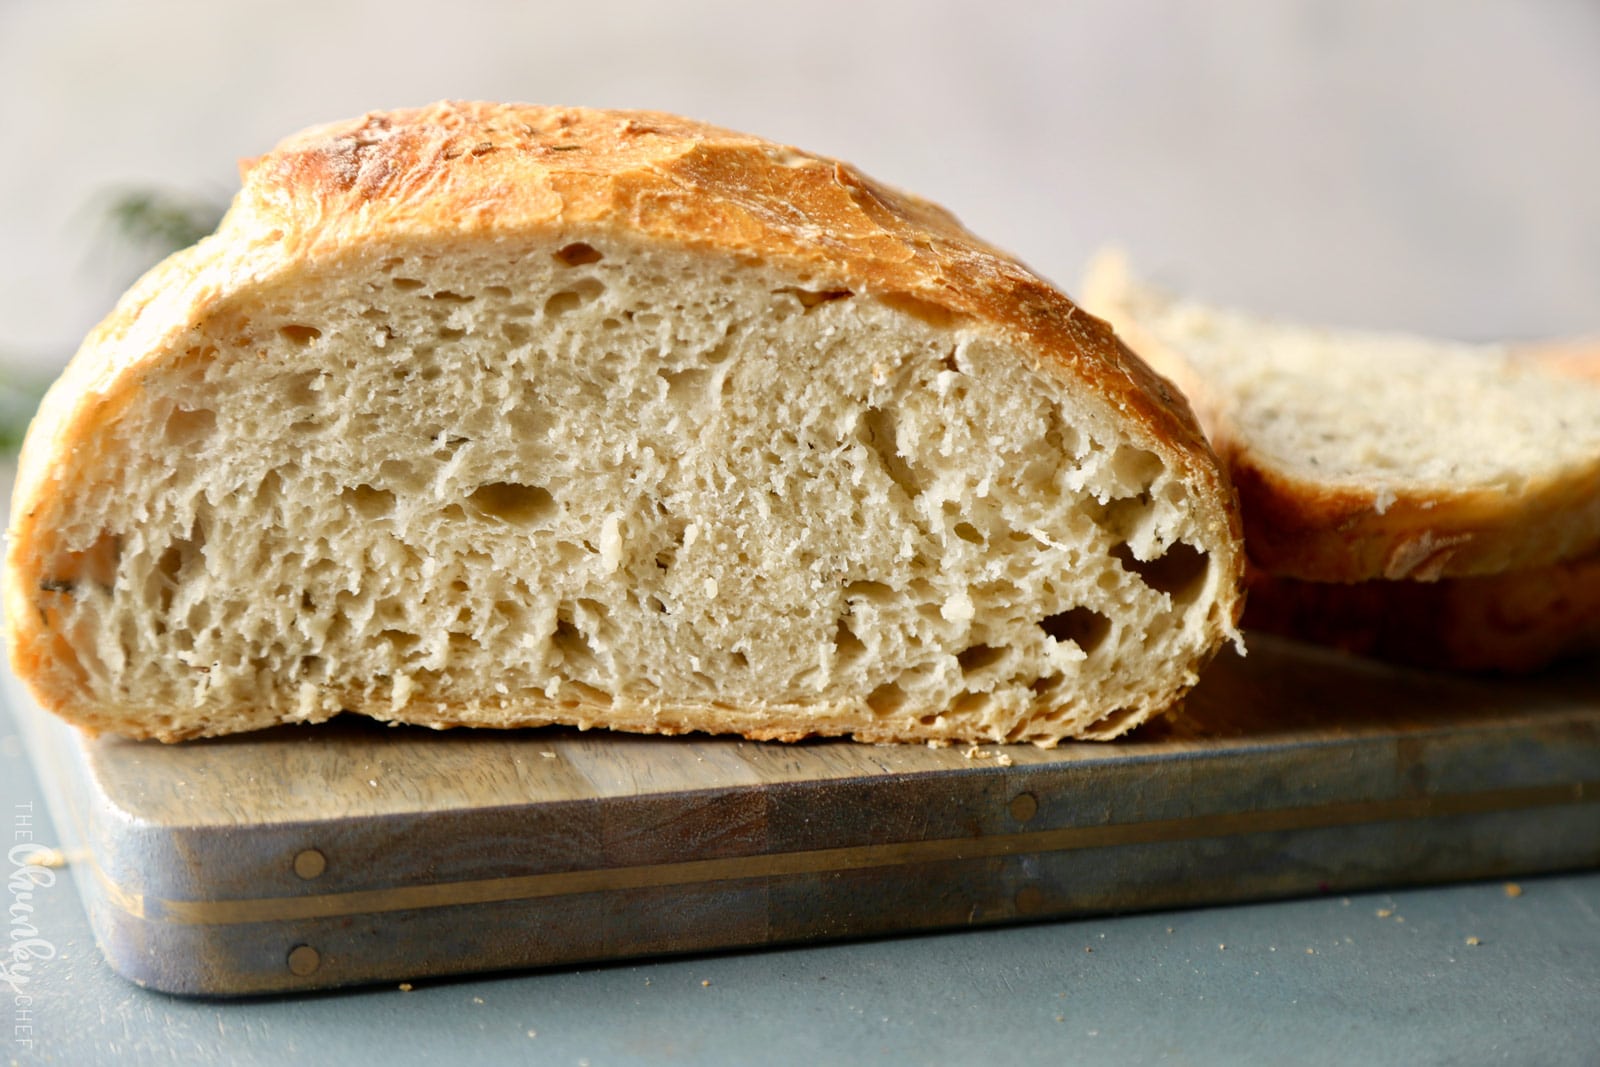
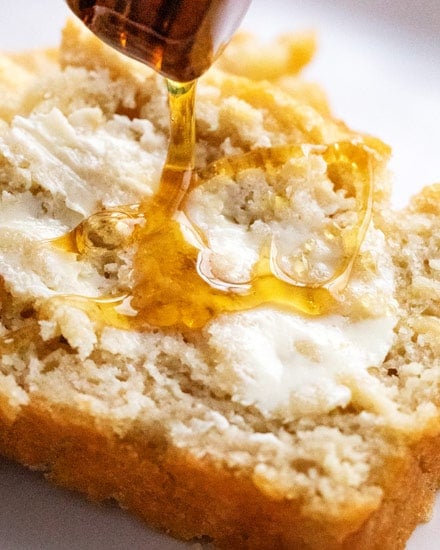
Look at that amazing texture!  All those little nooks and crannies are just begging for some creamy salted butter or to be dipped in a soup/stew!

Here are some great recipes to go with this no knead bread:

  • Slow Cooker Spaghetti Bolognese Sauce
  • Slow Cooker Creamy White Chicken Chili
  • 10 Minute Shrimp Scampi
  • Slow Cooker Creamy Tomato Basil Soup
  • Guinness and Coffee Irish Beef Stew

Homemade Artisan No-Knead Bread | Perfectly crusty on the outside, with a soft fluffy inside, this no knead bread is perfect with any dinner! | https://thechunkychef.com

The next time you’re craving a loaf of homemade crusty bread, give this no knead bread recipe a try… I really think you’ll love it!

Did you make this? Be sure to leave a review below and tag me @the_chunky_chef on Facebook and Instagram!

Homemade Artisan No-Knead Bread | Perfectly crusty on the outside, with a soft fluffy inside, this no-knead bread is perfect with any dinner! | https://thechunkychef.com

Homemade Artisan No Knead Bread

4.35 from 43 votes
Author: The Chunky Chef
Prep Time: 5 minutes minutes
Cook Time: 45 minutes minutes
Total Time: 50 minutes minutes
Calories: 304
Servings: 6 servings
(hover over # to adjust)
Print Rate Pin

Ingredients

  • 3 cups all purpose flour
  • 1 1/2 tsp kosher salt
  • 1/2 tsp active dry yeast
  • 1 1/2 cups room temperature water
  • 1/3 cups grated parmesan cheese
  • 1 Tbsp minced fresh rosemary

Instructions

  • In a large mixing bowl, add flour, salt, yeast, cheese and rosemary.  Pour in water, use a wooden spatula to combine.  Cover tightly with plastic wrap and let sit on your counter for 12-18 hours (I've even done up to 24 hours).
  • When ready to bake your bread, preheat oven to 450 F degrees. Add cast iron dutch oven (with the lid on) to the oven, so it preheats along with the oven itself.
  • Flour your hands, counter/cutting board, and sprinkle some flour over the top of the dough itself.  Remove dough from bowl and shape it into a rough ball shape.  Drop ball of dough into the preheated pot, cover with lid and return to the oven.
  • Bake, with the lid on, for 30 minutes, then remove lid and bake for another 15-20 minutes until golden brown and crusty.
  • Bread should remove easily from the pot, so take bread out and let cool completely before slicing.

Want to save this recipe for later? Click the heart in the bottom right corner to save to your own recipe box!

Chef Tips

  1. Dough will be sticky, and unlike any traditional kneaded bread dough.
  2. Preheating the dutch oven is important, as it makes sure the dough doesn't stick to the bottom.  If you want a little extra assurance, sprinkle a bit of flour or cornmeal on the bottom before adding the dough.
  3. I like to use a smaller dutch oven, about 3.5 qt, so the dough rises upwards and yields a higher loaf.  Using a larger dutch oven means the dough will spread out more and won't be as high, although still just as tasty.  It's all about how you want the bread to look.
  4. Make sure your yeast is not expired.  Even if you've never opened the yeast, it can lose it's effectiveness over time.  I like to buy smaller packets of yeast so I can use them before they go bad.
I have this dutch oven, but here is a cheaper alternative.

Nutrition Disclaimer

The Chunky Chef is not a dietician or nutritionist, and any nutritional information shared is an estimate. If calorie count and other nutritional values are important to you, we recommend running the ingredients through whichever online nutritional calculator you prefer. Calories can vary quite a bit depending on which brands were used.

Did You Make This?Tag @the_chunky_chef on Instagram and hashtag it #thechunkychef so I can see what you made!
Tag on Insta! Leave a Rating Save for Later Saved!

NEVER MISS A CHUNKY CHEF RECIPE:

FACEBOOK / INSTAGRAM /  PINTEREST / TWITTER  

Homemade Artisan No-Knead Bread | Perfectly crusty on the outside, with a soft fluffy inside, this no-knead bread is perfect with any dinner! | https://thechunkychef.com

You May Also Like...

  • Homemade garlic bread is so simple to make! Complete with crispy edges, buttery and soft middles and plenty of garlic and herb flavor. Frozen bread doesn’t stand a chance against this garlic bread! #garlicbread #garlic #bread #easyrecipe #homemade #cheesy #cheesybread #italian
    Classic Homemade Garlic Bread
  • It only takes 6 simple ingredients to make this Honey Beer Bread - and NO yeast!  No rising time, just mix and bake! #beerbread #bread #honey #beer #baking #breadmaking #quickbread #pantry
    Honey Beer Bread
  • Way better than the soup from that popular Italian restaurant chain, this minestrone soup is bursting with hearty flavors and is made easily in the slow cooker!  Vegetables, beans and pasta are simmered in a rich vegetable broth to make a soul-warming soup. | #minestrone #soup #slowcooker #crockpot #copycat #souprecipe
    Hearty Slow Cooker Minestrone Soup
  • Homemade garlic bread is so simple to make! Complete with crispy edges, buttery and soft middles and plenty of garlic and herb flavor. Frozen bread doesn’t stand a chance against this garlic bread! #garlicbread #garlic #bread #easyrecipe #homemade #cheesy #cheesybread #italian
    Classic Homemade Garlic Bread
Previous Post
Next Post

Meet The Chunky Chef

Hey there! I'm Amanda. Wife, mother, photography nerd, and bacon lover! I believe that delicious meals should be easy to make. Now that you’re here, stay a bit, browse a few recipes, and let’s get cookin’!

Learn More

Reader Interactions

4.35 from 43 votes (13 ratings without comment)

Leave a Comment Cancel reply

Have a question? Submit your question, comment, or review below.

Recipe Rating


  1. Stephanie says

    Posted on 8/1 at 6:56 pm

    This is one of my favorite recipes and I love your cutting board so much!! Where did you find it?

    Reply
    • Kim H. says

      Posted on 5/10 at 9:18 pm

      Great recipe! Tastes like the bread you’d get at an expensive bakery and so easy to make! I baked mine in the bread machine on light crust and it turned out great. No more making sourdough starters, this is my new go-to bread recipe for a tangy, chewy loaf. Can’t wait to try it in the Dutch oven on the campfire!

      Reply
  2. Paula says

    Posted on 11/26 at 5:57 pm

    I haven’t made this recipe yet , but I’ve read it a couple times, unless I missed it there you do not grease or oil the pan before baking?

    Reply
    • The Chunky Chef says

      Posted on 11/26 at 8:09 pm

      In the recipe notes section, I cover that there’s no need for grease, as you’re preheating the dutch oven, which is important for the dough to not stick. You could sprinkle some cornmeal in the pan before adding the dough if you’d like though.

      Reply
  3. Don says

    Posted on 11/1 at 6:37 pm

    This is the best recipe for the crusty bread!

    Reply
  4. Liz says

    Posted on 10/25 at 7:13 am

    Can this bread be made with sprouted whole wheat flour.

    Reply
    • The Chunky Chef says

      Posted on 10/26 at 8:20 pm

      I haven’t tested the recipe except as written, so I can’t say for certain if that would work or not.

      Reply
  5. Bobbie Stinson says

    Posted on 6/21 at 8:22 am

    MY FAMILY ABSOLUTELY LOVED THIS BREAD!!! I made it IN THE SAME WEEK!! The first was a Basil Parmesan, then it was an Italian, after that a cinnamon raisin

    Reply
    • diane honan says

      Posted on 9/6 at 11:22 pm

      to Bobbie Stinson…..can you please share the steps for the cinnamon raisin version….i.e. when did you add the cinnamon and the raisins….did you coat the raisins with flour or even moisten them at all

      Reply
  6. Lauren says

    Posted on 3/24 at 9:15 am

    I’d like to try this but don’t have a dutch oven .Are there any alternatives?

    Reply
    • The Chunky Chef says

      Posted on 3/24 at 8:13 pm

      If you don’t have a Dutch Oven, a covered metal pot would work as well, just make sure it can stand the high heat. If your pot doesn’t have a lid, you can cover the pot with heavy-duty aluminum foil, just make sure you seal the pot really well.

      Reply
  7. Madonna Hollingsworth says

    Posted on 2/11 at 1:40 am

    Took a loaf and some wonderful jelly down the street to welcome the new neighbors. Six months later we are having a BB~Q, I asked what I could bring, she said another loaf of bread. It is wonderful, thank you.

    Reply
  8. Vicki says

    Posted on 9/17 at 4:34 pm

    Have you tried this recipe with whole wheat flour?

    Reply
    • The Chunky Chef says

      Posted on 9/17 at 8:08 pm

      Hi Vicki 🙂 I haven’t, but if you try it, I’d love to hear how it turns out!

      Reply
  9. Gina says

    Posted on 9/3 at 12:14 pm

    If I do not have a 3.5 qt Dutch oven, can I double the recipe for a 6 at oven?

    Reply
    • The Chunky Chef says

      Posted on 9/3 at 2:36 pm

      Hi Gina 🙂 I’ve never doubled it, but I know other readers have had success with it!

      Reply
  10. Colleen Mayberry says

    Posted on 9/3 at 9:50 am

    Hi there!

    I just made this bread this morning, it smells amazing!! If I used a 5 qt Dutch oven could I double the recipe to achieve the higher loaf with the bigger pot?

    If so, how would you suggest I adapt the cooking time?

    Thanks! I can’t wait to try it!

    Colleen

    Reply
    • The Chunky Chef says

      Posted on 9/3 at 2:41 pm

      Hi Colleen 🙂 It’s amazing how great fresh bread smells isn’t it? I think doubling it in the 5 qt should work just fine (although I’ve never tried it so I can’t say for sure). I would still bake it covered for 30-35 minutes, and check to see if it’s risen and has a crust starting to form. If it has, go ahead and remove the lid and bake as directed (adding maybe 5-10 minutes). You’ll know it’s done baking when you tap on the top and sides and it makes a sort of hollow sound. I’d love to hear how it all works out!

      Reply
      • Colleen says

        Posted on 11/22 at 10:40 am

        Hi there!

        I just made this again doubling the recipe and it came out fantastic!

        I increased the time with the lid off to 25 minutes and it is absolutely perfect, nice and tall! I would have included a picture of it but this format doesn’t seem to let me do that 🙁

        Thanks for the advice, by far my favorite and easiest recipe!

        Colleen

        Reply
  11. Cathy @ Lemon Tree Dwelling says

    Posted on 8/30 at 3:53 pm

    Wow, my mouth is watering!!!

    Reply
  12. Janie Landis says

    Posted on 8/28 at 10:25 am

    Amanda, I notice that you don’t say how long to let the yeast bread mixture sit on the counter before baking. You just say, “when you are ready to bake, ” Similar recipes suggest letting the yeast mixture sit for numerous hours – 8-24 – so I just wondered if your recipe required this amount of time as well? I’ve tried making one recipe for this Crusty Bread and it DID NOT turn out so I’m going to try it again, perhaps using your recipe. So I just wanted to clarify your recipe a little – thank you.

    Reply
    • The Chunky Chef says

      Posted on 8/28 at 12:02 pm

      Hi Janie 🙂 At the end of step 1 of the written recipe I state to let it sit for 12-18 hours. Best of luck to you!

      Reply
  13. Amanda says

    Posted on 8/27 at 2:58 am

    Hi, This bread looks and sounds delicious! I can’t wait to try it this week. I just wanted to clarify that I don’t need to add the yeast to water and let it set before mixing everything together?

    Reply
    • The Chunky Chef says

      Posted on 8/27 at 1:29 pm

      Hi Amanda 🙂 Nope, there’s no need to for this recipe!

      Reply
  14. Noel Lizotte says

    Posted on 8/26 at 12:58 pm

    I love these type of breads… one of these days I’m going to make a loaf or two!
    I’m pretty sure they’ll be eaten up quickly!

    Reply
  15. Gina says

    Posted on 8/25 at 12:58 pm

    This looks so delicious! I recently discovered your blog through Pinterest and have already happily made several recipes with great success! One question though-I don’t have a cast iron dutch oven, but I do have an All-Clad dutch oven-6 qt. that can go in the oven-do you think that would work? Or is the cast iron the secret?

    Reply
    • The Chunky Chef says

      Posted on 8/25 at 1:09 pm

      Hi Gina 🙂 I’m so glad you loved the recipes you’ve tried!! I’ve never made this in anything other than my cast iron, but I think as long as it’s oven safe and has a lid, it should be okay 🙂

      Reply
  16. Kimberly @ The Daring Gourmet says

    Posted on 8/24 at 11:37 pm

    Nothing beats homemade bread and that looks perfect!

    Reply
  17. Delaney | Melanie Makes says

    Posted on 8/24 at 8:24 pm

    I love that this bread is no-knead!

    Reply
  18. Dee says

    Posted on 8/24 at 7:43 pm

    Freshly baked bread is my weakness, and I can’t wait to make this!

    Reply
  19. Jen says

    Posted on 8/24 at 6:40 pm

    I seriously never knew it could be this easy to make! Definitely trying it!

    Reply
  20. Mark says

    Posted on 8/24 at 12:19 am

    I’ll have to try this one!

    Reply
    • The Chunky Chef says

      Posted on 8/24 at 8:02 am

      Hi Mark 🙂 Hope you love it!

      Reply
Newer Comments

Primary Sidebar

welcome!

Hey there! I'm Amanda. Wife, mother, photography nerd, and bacon lover! I believe that delicious meals should be easy to make. Now that you’re here, stay a bit, browse a few recipes, and let’s get cookin’!

New! Save Recipes To Your Own Account!

Free eBook!

Subscribe & receive my most popular recipes compiled into an easy ebook format!

download now!

Subscribe & Receive My Free Recipe Ebook!

Game Day Recipes!

These crowd-pleasing tender meatballs are smothered in a super flavorful honey garlic bbq sauce.  Perfect for parties, this crockpot meatball recipe couldn't be more simple to make! #meatballs #crockpot #slowcooker #honeygarlic #bbq #appetizer #party #honey #garlic #easyrecipe

Honey Garlic Crockpot Meatballs

2 hours hours 5 minutes minutes

Smooth and silky queso dip, made using NO velveeta!  Packed with flavor, yet so easy to make, and party ready in just 20 minutes! #queso #dip #cheese #mexican #appetizer #party #cincodemayo #easyrecipe

Queso Dip Recipe

20 minutes minutes

Creamy, cheesy, and oh so addicting, this bacon cheeseburger dip is just like your favorite gooey cheeseburger... but in a party-ready dip form! #bacon #gameday #cheesy #cheeseburger #party #appetizer #dip #easyrecipe

Creamy Bacon Cheeseburger Dip

32 minutes minutes

Insanely tasty chicken wing recipe, dry rubbed, then hickory smoked to perfection.  And don't forget the homemade bourbon bbq sauce! #chickenwings #wingrecipe #smoked #smoker #smokedchickenwings #bourbon #bbq #crispy

Bourbon BBQ Smoked Chicken Wings

3 hours hours

This easy game day appetizer combines classic buffalo wing flavors with cool creaminess in an easy dip made in the crockpot. Perfect for any party, serve it up with chips or celery sticks and watch everyone go back for seconds!

Buffalo Chicken Dip (Crockpot Recipe)

2 hours hours 10 minutes minutes

Chicken Taco Mexican Pinwheels | These pinwheels are filled with a creamy chicken taco filling, which is easily customizable, and rolled up to make a perfect appetizer or party food! | http://thechunkychef.com

Chicken Taco Mexican Pinwheels

15 minutes minutes

More Holiday Recipes >

Who doesn’t love free stuff?

Who doesn't love free stuff? Get an ad-free ebook of my most popular recipes, plus be the FIRST to know about new things coming to the site!

Looking for something?

As Seen On…

Stay Connected

subscribe to get new posts via email:

Quick & Easy

Dinner Favorites

Hearty and positively soul-warming, this beef barley soup simmers all day in the slow cooker, which makes for an incredibly rich soup recipe! #beefbarley #soup #slowcooker #crockpot #comfortfood #barley #beefsoup #easyrecipe #dinner
M

Crockpot Beef Barley Soup

white bowl of chicken and dumplings
T

Instant Pot Chicken & Dumplings

HONEY GARLIC SALMON - Succulent and tender salmon filets cooked in a mouthwatering simple honey garlic sauce, then broiled until sticky and caramelized.  Made with simple ingredients, in one pan, and in just 20 minutes! #salmon #honeygarlic #onepan #easyrecipe #dinner #seafood #fish
W

Honey Garlic Glazed Salmon

Light and filling, this Italian Wedding Soup is perfectly delicious comfort food, all year round.  Made in one pan, and ready in 30 minutes, this recipe is great for a weeknight meal! #soup #souprecipe #Italianweddingsoup #onepot #30minutemeal #weeknight #dinner #easyrecipe #homemaderecipe
R

Italian Wedding Soup

This Honey Garlic Chicken is one incredible weeknight dinner idea. Juicy chicken coated and cooked with a glorious sauce made with soy, hoisin, garlic, honey and more! Toss it all in the slow cooker and let it do the work for you! #dinner #chicken #asian #honey #garlic #honeygarlic #easyrecipe #weeknight #slowcooker #crockpot
F

Honey Garlic Chicken

S

Swedish Meatballs

free e-book!

Download MY Free Recipe eBook!

Subscribe & receive my most popular recipes compiled into an easy ebook format!

get my copy!

Subscribe & Receive My Free Recipe Ebook!

As Featured On:

Back to Top

Recipes

Dinners

Appetizers

Desserts

Slow Cooker

Learn to Cook

Start Here

Tips & Tricks

e-Cookbook

Easy Recipes

  • About
  • Work With Me
  • Privacy
  • Contact
© 2025 The Chunky Chef
Site Credits Designed by Melissa Rose Design Developed by Once Coupled
Back to Top

Recipe Ratings without Comment

Something went wrong. Please try again.